Saturday, 30 May 2009

New Imperial Guard Hellhound & Demolisher

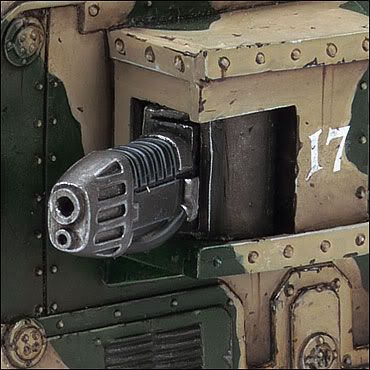
Stonedrose has posted a thread on HERE on Warseer with pictures of the new all plastic Imperial Guard Helhound. This kit has been rumoured for some time with an early CAD shot of what we now know to be the Devildog having appeared around a year ago.

The new kit will retail at £30.00/$49.50 according to a Price list which takes effect from the 1st of June posted HERE on Warseer by forthegloryofkazadekrund.

Hellhound:
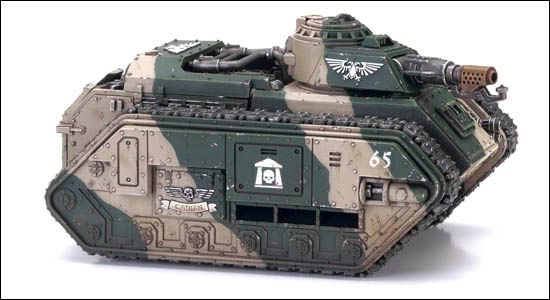

Banewolf:
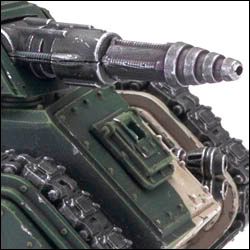

Devildog:
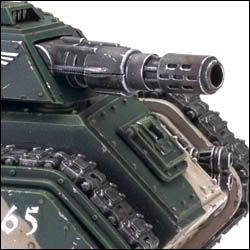

What do you think of the look of the new model? Personally I'm liking the hull alot, and also the Devildog turret but am finding myself less fond of the Hellhound and Banewolf turrets.

EDIT: The New Demolisher kit has now also been previewed by Games Workshop and brought to the attention of the community on Warseer HERE by Scryer in the Darkness. Further Games Workshop's preview text which can be found HERE confirms that the kit can be assembled as the Punisher and Executioner variants in addition to the standard Demolisher - it also mentions further new 'Bitz Packs'.
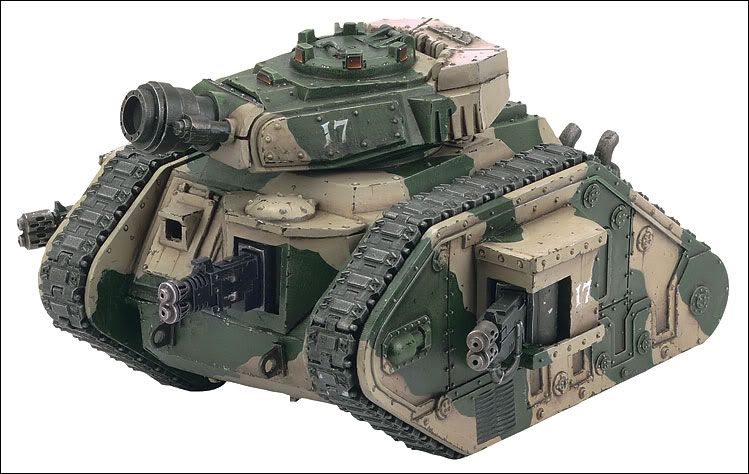


The kit also includes updated sponson weapons.
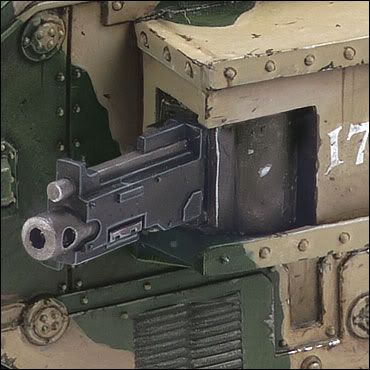


The kit is believed to cost £30/$49.50 according to the previously mentioned price list. It looks like there has been some slight reworking of the hull, the hull mount assembly appears as if it may have been slightly altered in the way it is assembled, extra rivets have appeared on the back around the engine hatch and the rivets on the sponsons have been resized - of course the most noteable changes are the new turret (even if like the Helhound it seems to have horrible join lines) and the updates sponson and hull weapons. One last thing to note on the subject of the sponsons, as with the Hellhound the different weapons have been showcased on the same tank chasis, which means the models are either innately swapable as part of the design or at the very least would be with the addition of magnets.

Friday, 29 May 2009

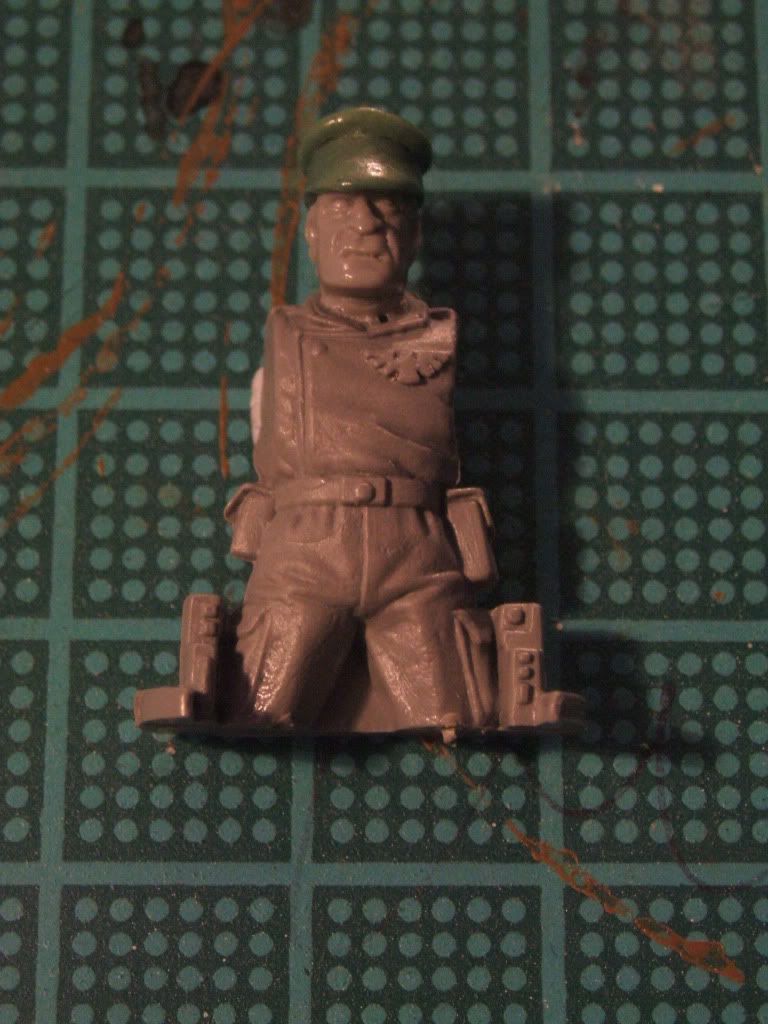
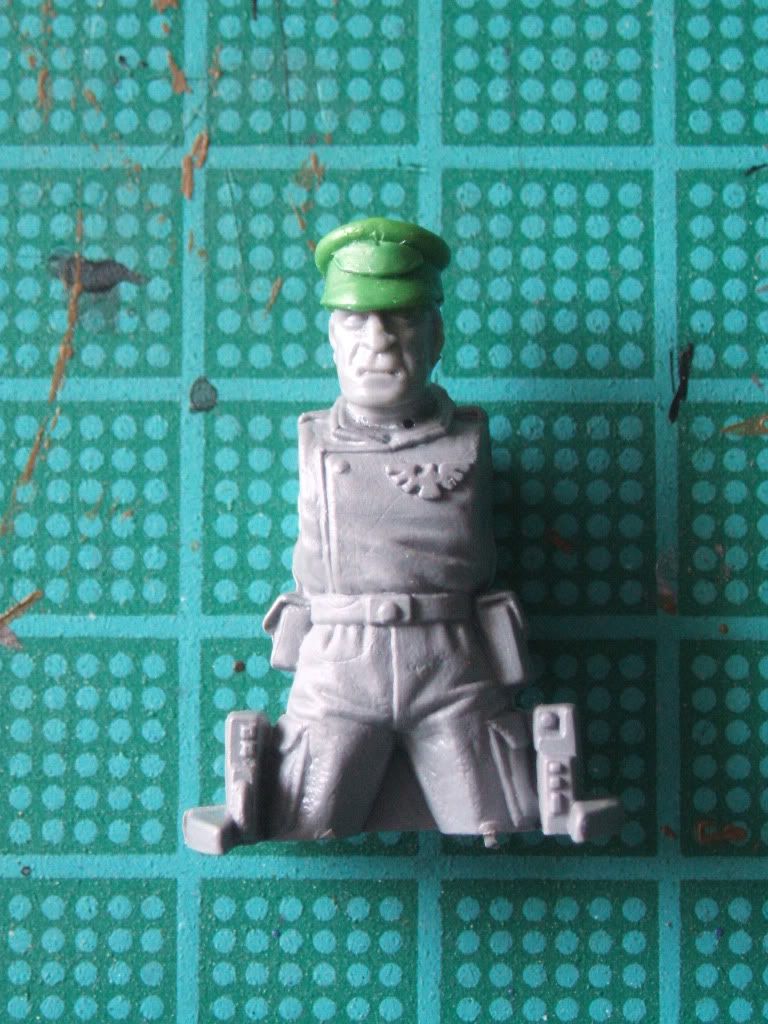
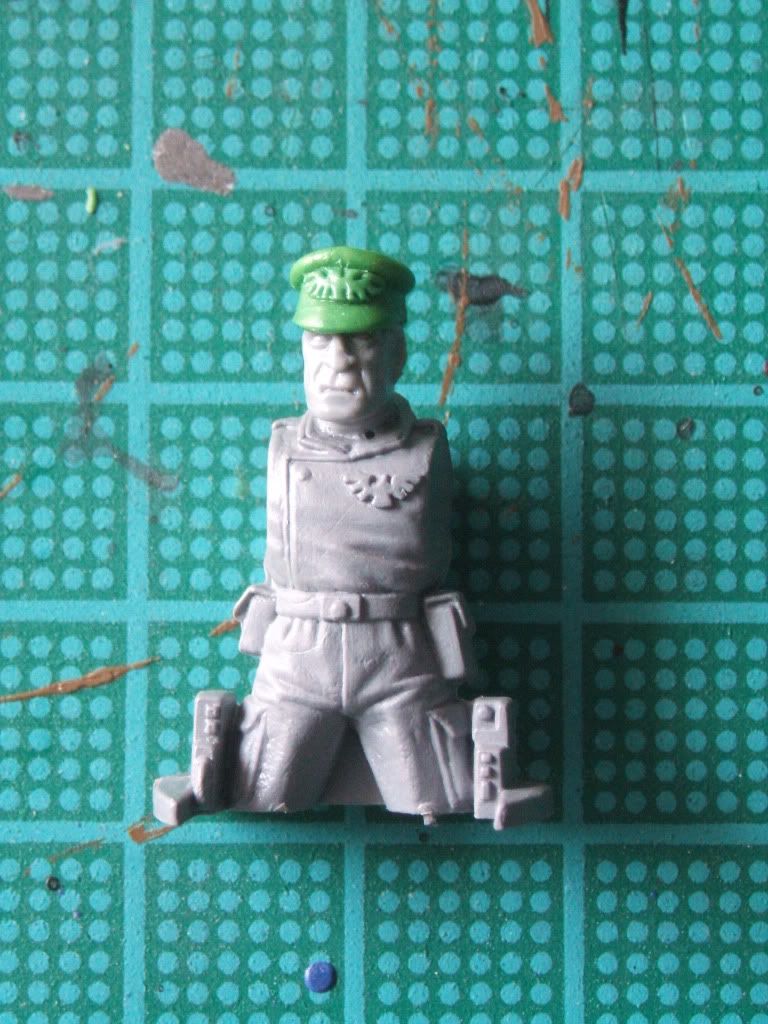
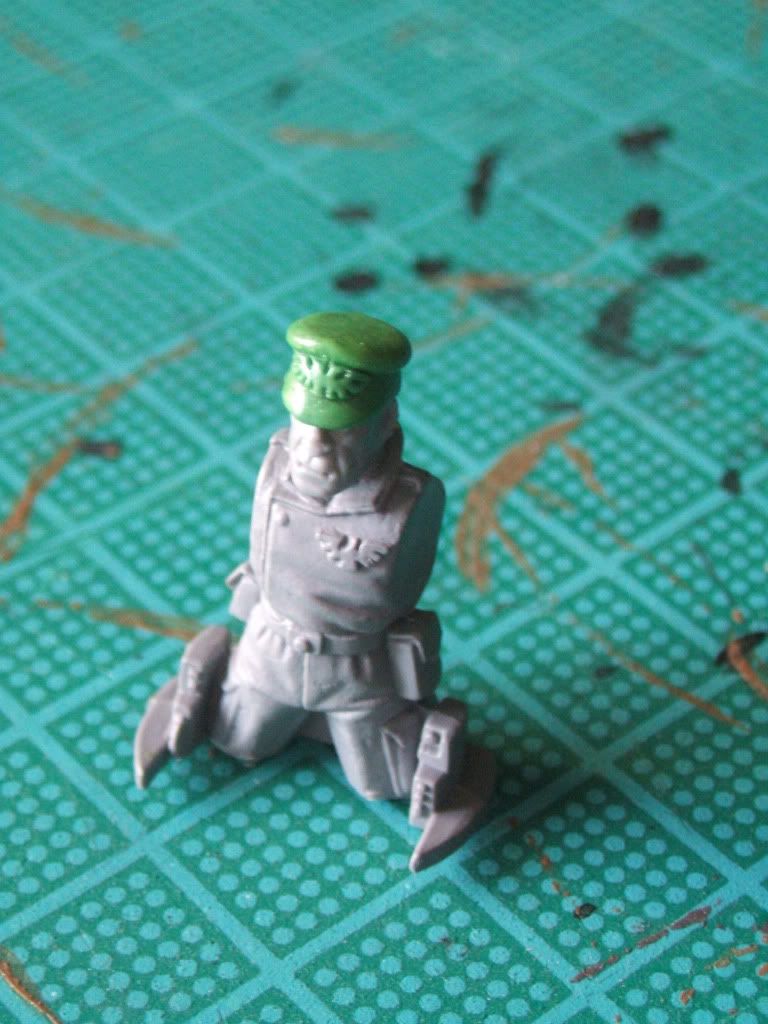
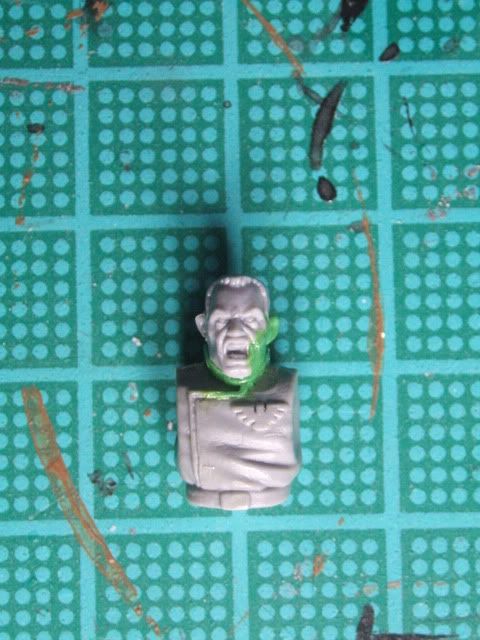
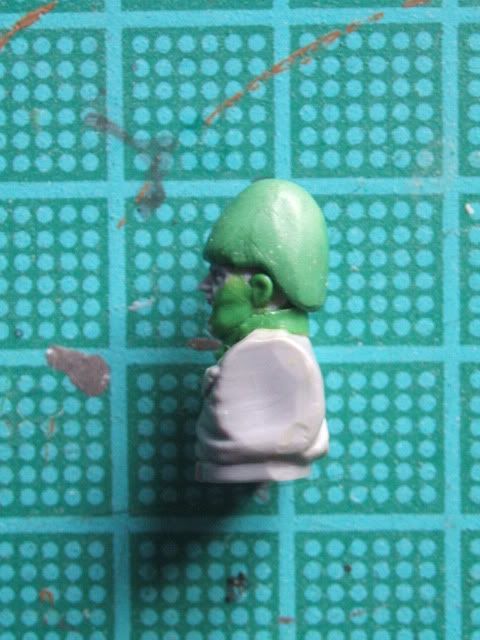
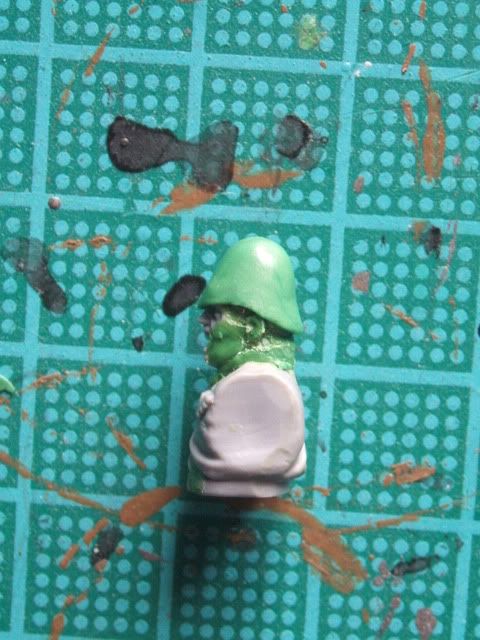
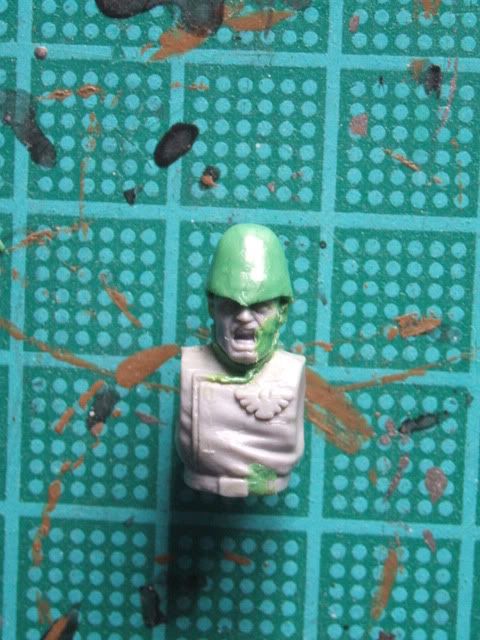
Tutorial - Sculpting Mordian Style Caps

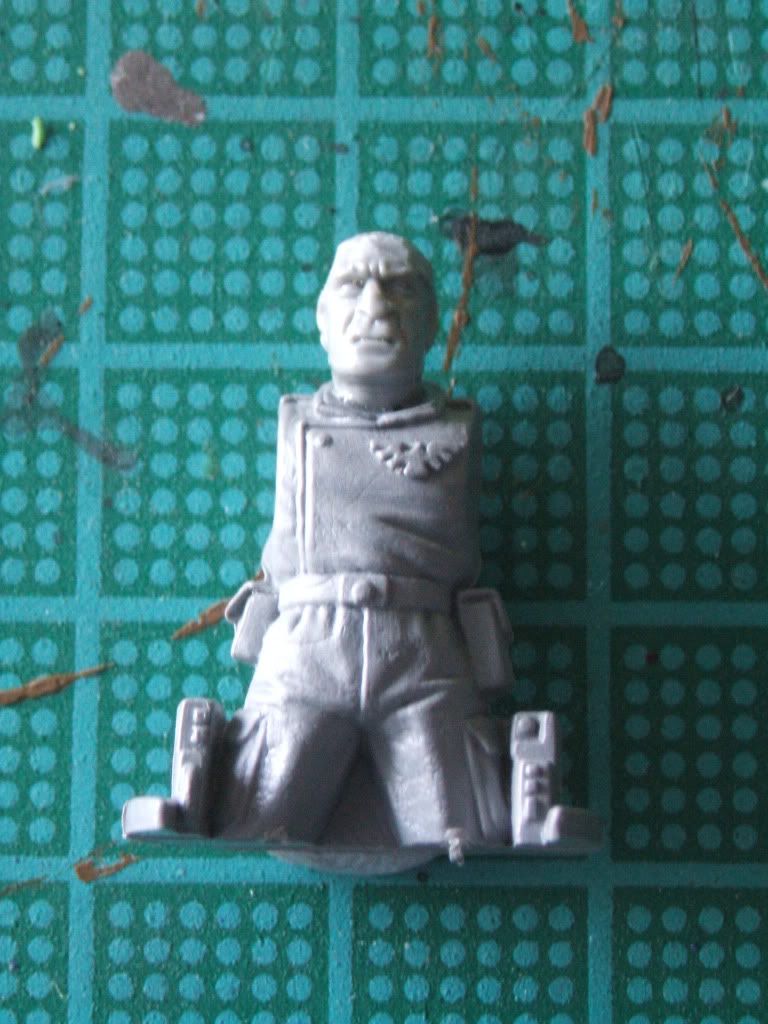
Since I posted the Pith Helmet Tutorial (and I must admit before then as well), I've been asked on a number of occasions about how best to sculpt a Mordian style cap, now I've always oblieged, but in a confessional mood I've never actually tried the method I've suggested - since I've simply never had the need to sculpt one. Hence this new tutorial, firstly to better show what in theory I think is a good way to do the cap's, and secondly to have a go at it myself.

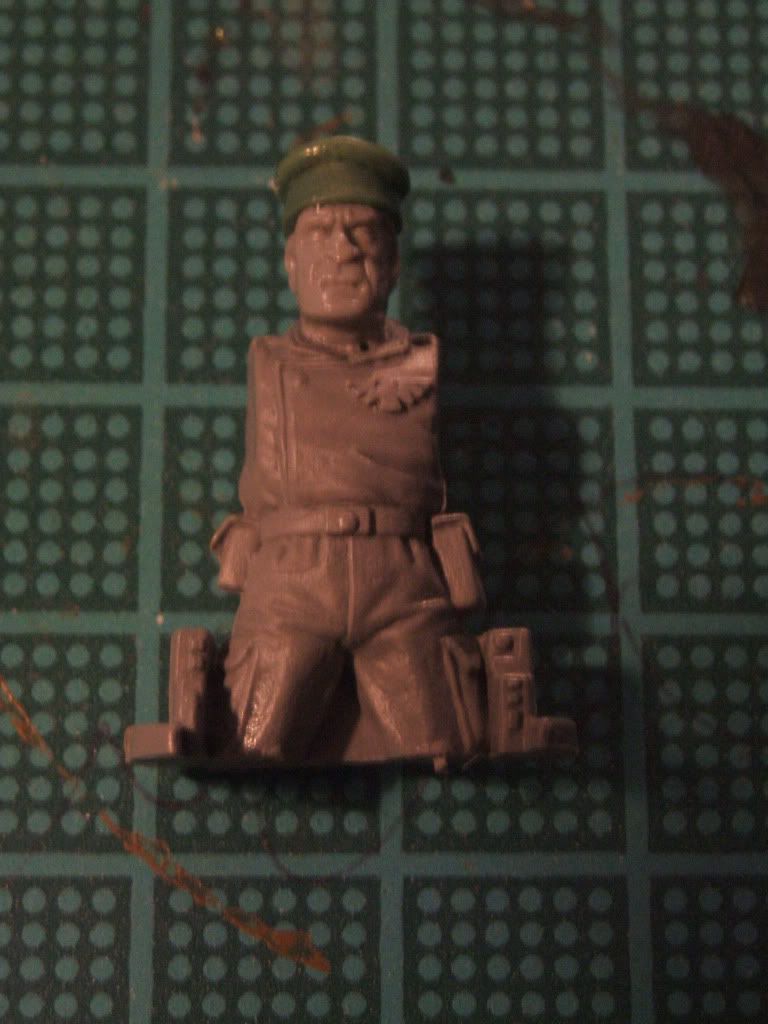
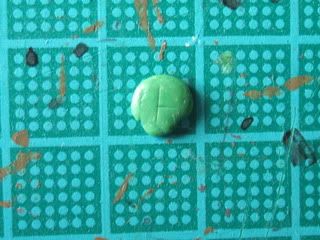
My approach to doing a Mordian Cap is too break it down into it's constituent parts, this is in my mind a good way to tackle most simple forms, using the picture below you can roughly break the cap down into four components which will make it far easier for sculpting. The first is the main part of the cap itself, next is the upper rim, then the brim and finally the aquilla. Each of these is a simple form which can be sculpted in four different stages so as not to risk undoing work done on another part of the cap, though thats certainly not to say it's not possible to do it in fewer stages, once the main 'cylinder' is done I believe it would be possible to do the rest in one go with a little care.


As ever we start with our subject, today it'll be a Catachan. He's not ideal and I've not spent any time as such preparing him, simply trimming away his bandana, hence the head itself is a little rough. At least we should be able to prove that being a 'baby ogryn' is no excuse for being a scruff!


Firstly a cylinder is placed on the head, in this case I rolled a small sausage wrapping it around the top of the head and then shaping it as desired, if more preperation was done and the top of the head for example trimmed or removed a small ball of putty squashed downwards would also work. This cylinder is then left to cure, something I think is fairly essential to do the cap this way. Once cured I cut it down to a more appropriate height.


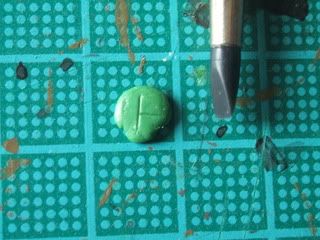
The next step was to add the upper rim. I started with a small ball of putty which was flattened evenly over the top of the cylinder, the edges were then pushed over and rounded off. It's worth noting that the front of the rim on the Mordian range has a slight rise, this is easily achieveable either by not pushing the rim down so much when rounding the edge off or pushing it upwards gently with a clay shaper once the whole rim is rounded.


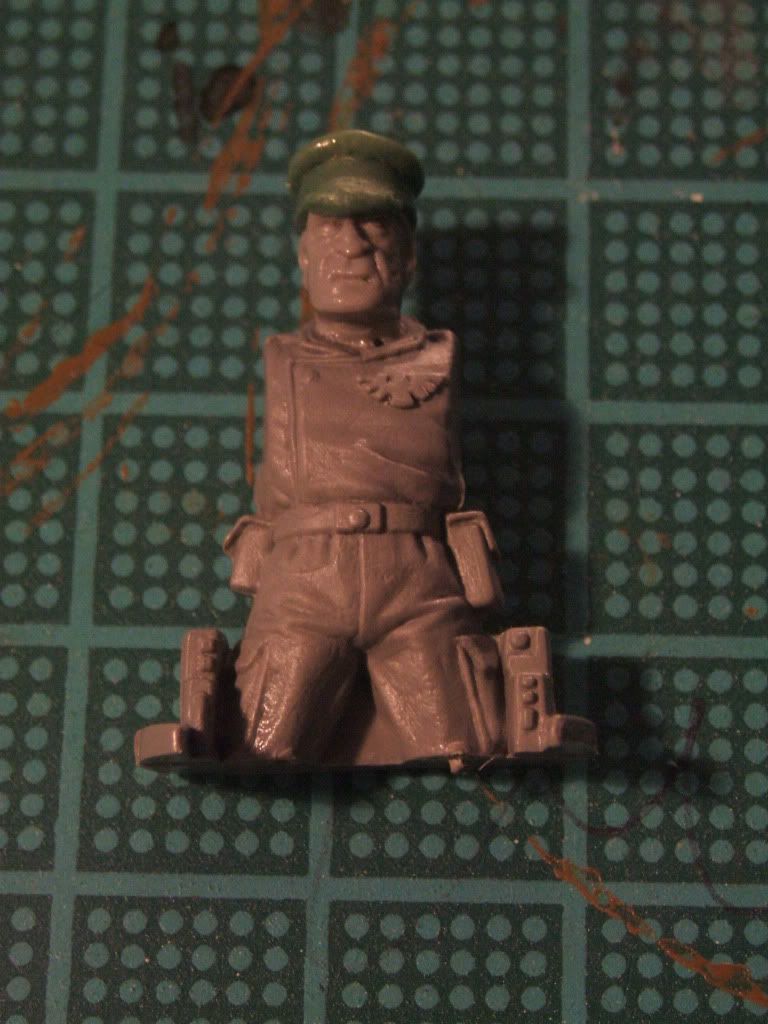
Once the rim had also cured I added the brim, this was formed from a small sausage of putty wrapped around the front and then shaped and pressed to fit, excess puty was removed scraping and the cutting downwards, with any left overs in the recesses removed with a pin. The brim was then also left to cure.


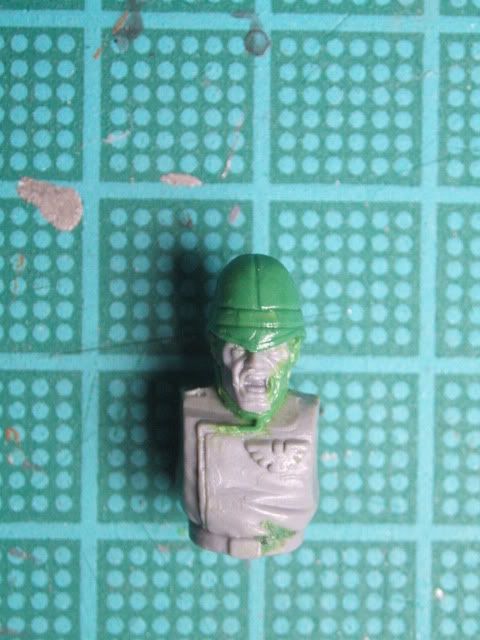
Finally the Aquilla was added, a simple trianglular shape was pressed flat against the cylinder and then the detail pressed in with the tip of a scapel blade.


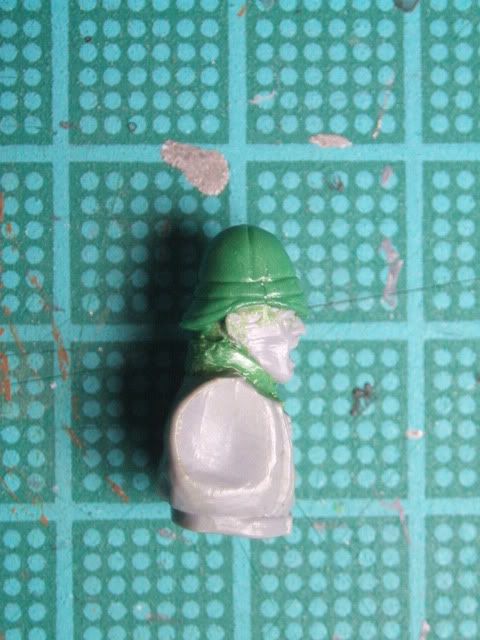
And so you have it, one finished Mordian style Cap.

Thursday, 28 May 2009

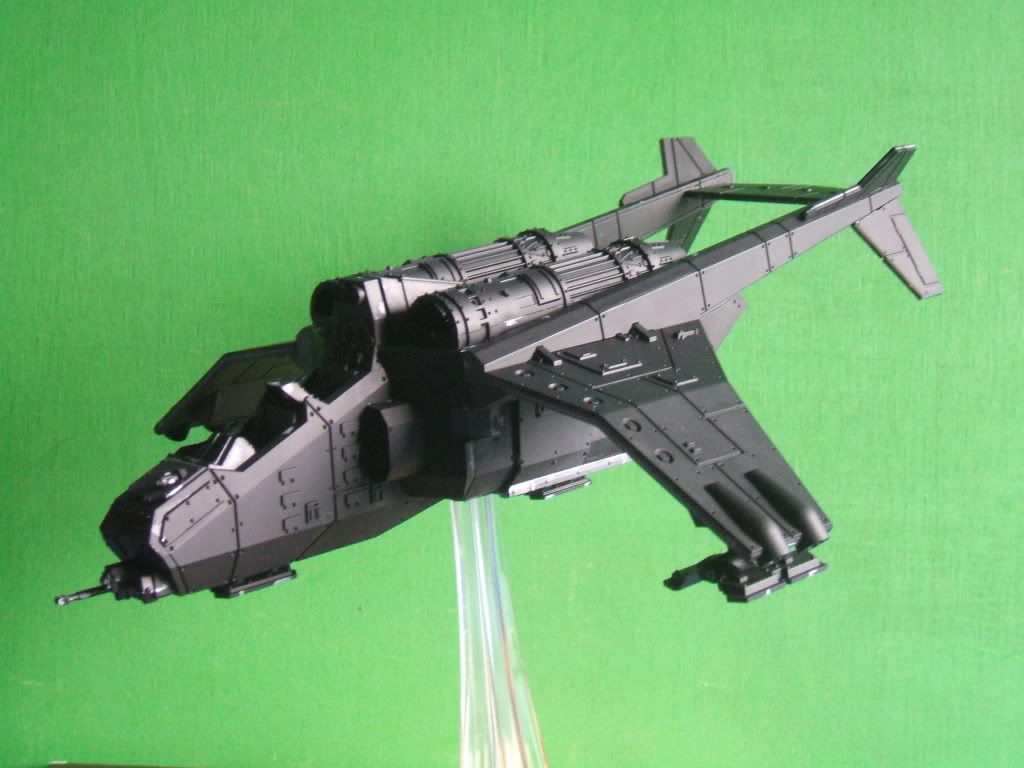
Imperial Navy Valkyrie (Part 1)

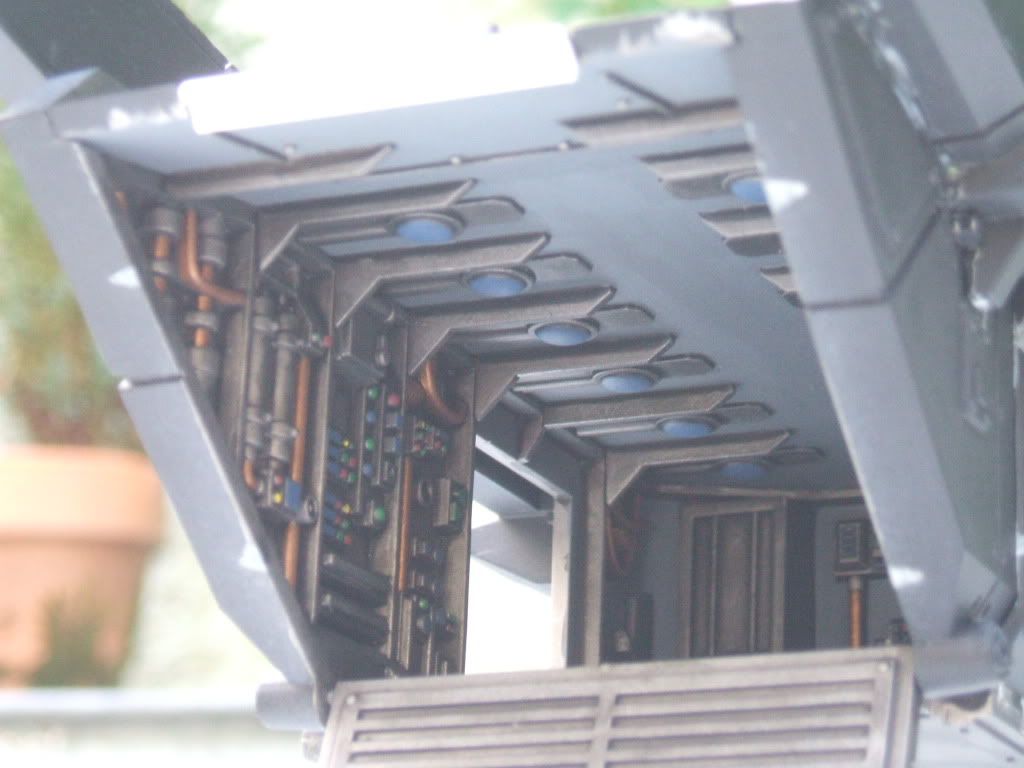
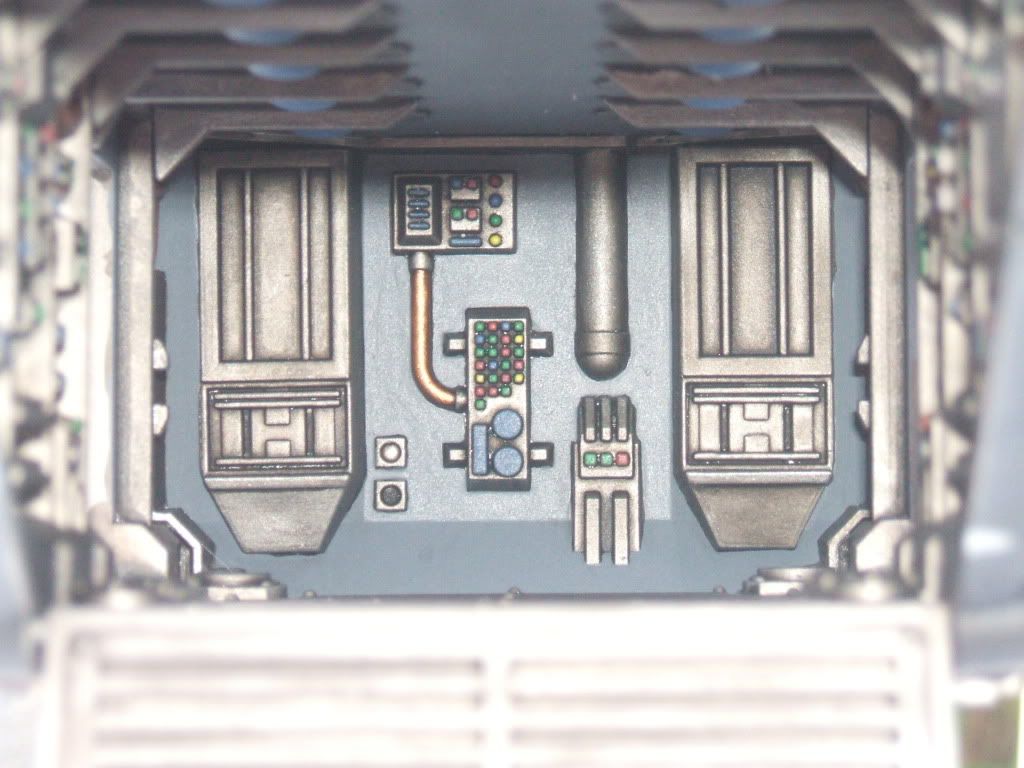
I've been painting the inside of my first Valkyrie on an off for a little while, things have now started to come together now though having spent a few hours assembling it at last.


The inside is'nt a mega paint job, no highlights, just flat colours and a wash on the metal, I dont envisenge I'll spend much time looking at the insides(!) but since it has some nice detail in there and as I wanted to have the hatches opening it would of been silly not to paint it. Both side doors work, as does the rear hatch, not wanting to play around with magnets for this I took an easier approach, attaching a strip of plasti-card to the rear above the hatch with just enough of a lip that the door remains shut but so it can be easily opened and closed. I'll add the Heavy Bolters shortly, then I can simply fold them out an open the doors if I want to use the upgrade or keep the doors closed when I dont.


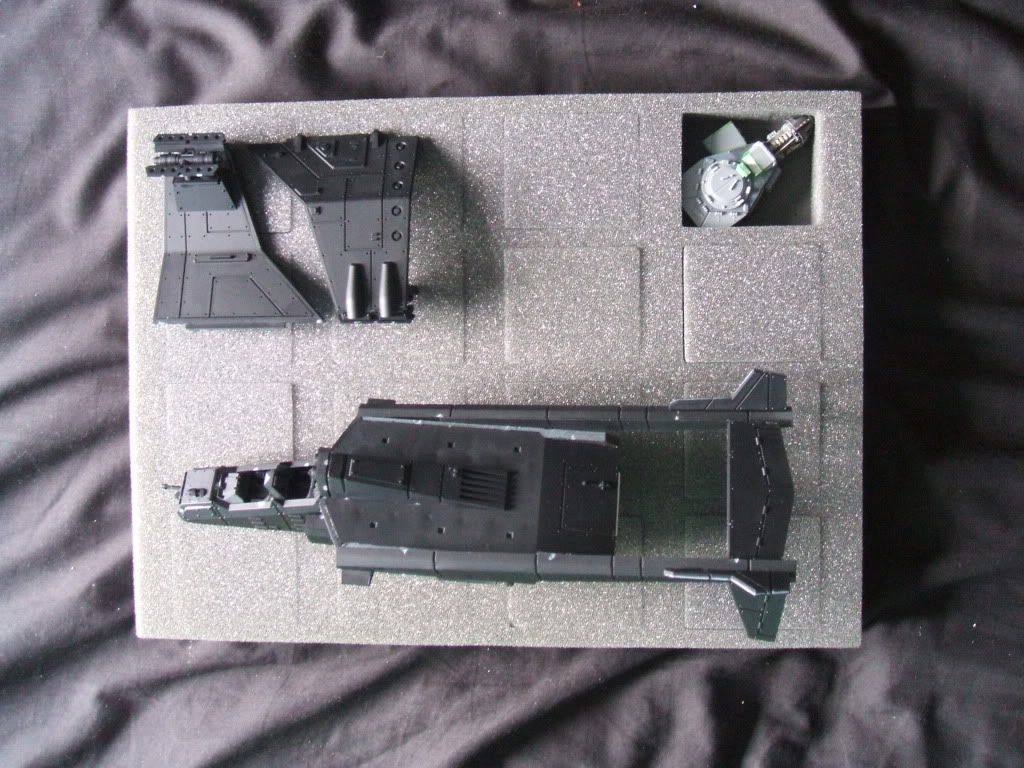
I've also settled on not glueing the wings, this way I'll be able to fit three Valkyries into two double depth trays, a much better deal then one for each, the wing fittings are surprisingly stable and a good snug fit so I dont believe I'll have any trouble doing it this way.


I hav'nt yet decided what colour scheme I'll paint it, I definately want to do it up as Imperial Navy rather then as a Guard version, that would'nt really fit the theme of the Praetorians, but my first choice of grey is how my tanks are painted so I need to do some thinking. Also I need to decide how I'm going to fit the weapons, I know I want them swapable so as too allow me to field Valk's and Vendetta's I'm not quite sure on the best way of achieving this yet though, I may have to try an get some different shaped magnets to my usual disc ones.

Tuesday, 26 May 2009

D Company Sergeants (Part 1)

I'm a bit slow off the mark with this one, but better late then never.

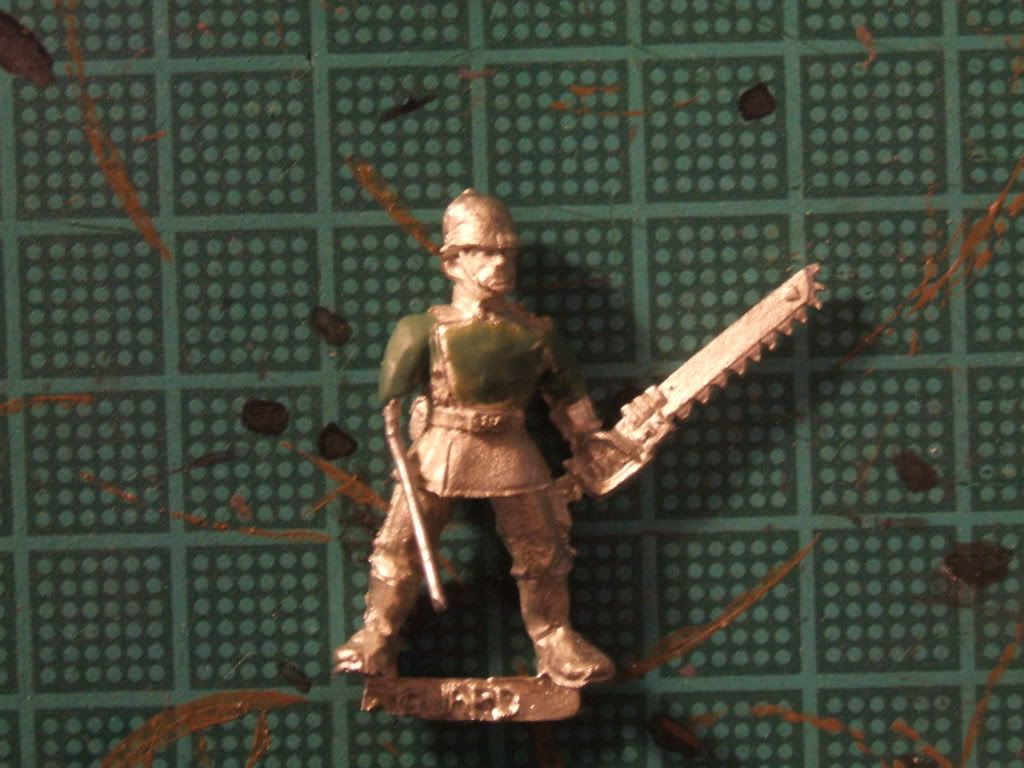
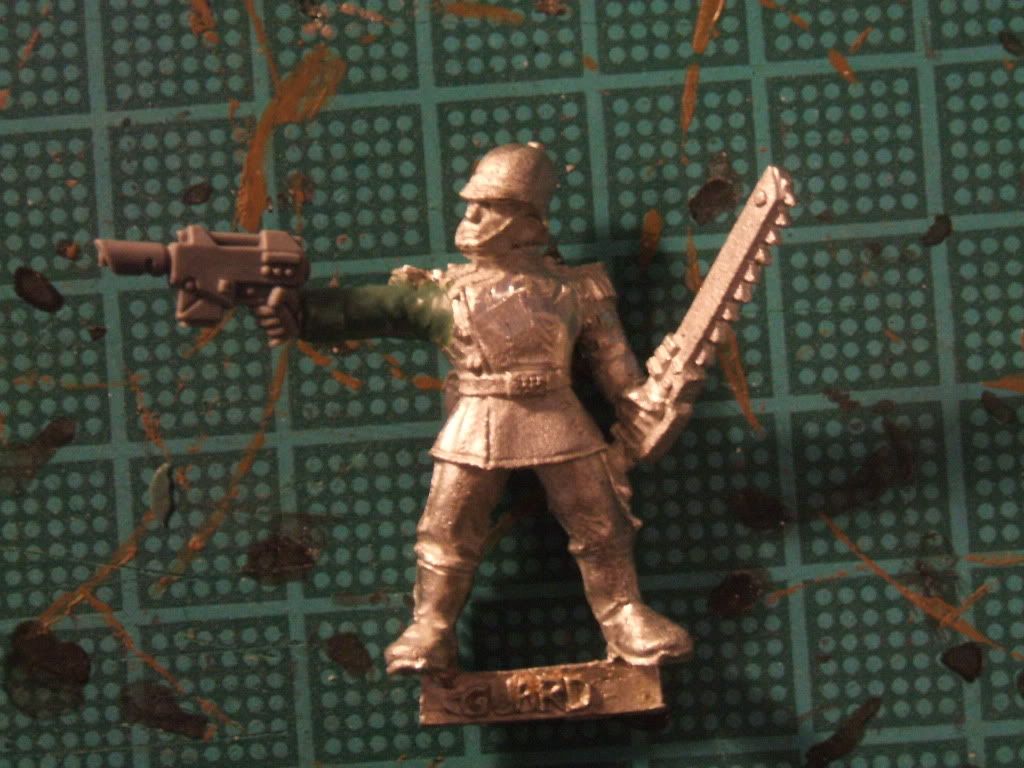
The new codex presented a new problem for squad leaders, Sergeants no longer have the option to take Lasguns. Of all the changes in the new codex this has been the one which has bugged me the most, it was in my mind a silly and unnessercery little change to make. The only reason I can see for it is to distinguish which model is the Sergeant, which should'nt be an issue anyway in my mind. Still to make the best of it I've put aside some models to be converted as new Sergeants with Laspistol & Chainswords. Now it's true the Praetorian range includes two such models, but largely unconverted these have been used as my Platoon Commanders so are out of the running without some work - which some of them will be. The first six will be for the two existing finished platoons.

The first conversion is based on a misscast Standard Bearer I had lurking in my bits box. I was a little unsure what to do with him at first, an I'm still not sure I'm right with the pose with his chainsword as is and a pistol held at his side, we'll see once he gets a bit nearer being finished.


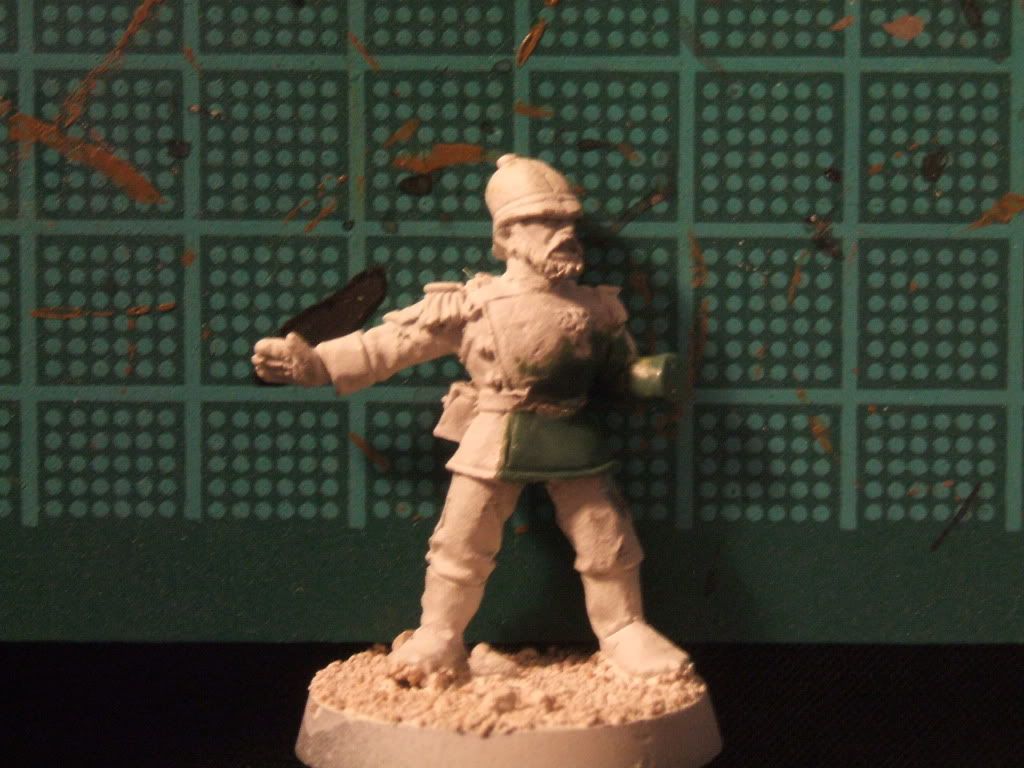
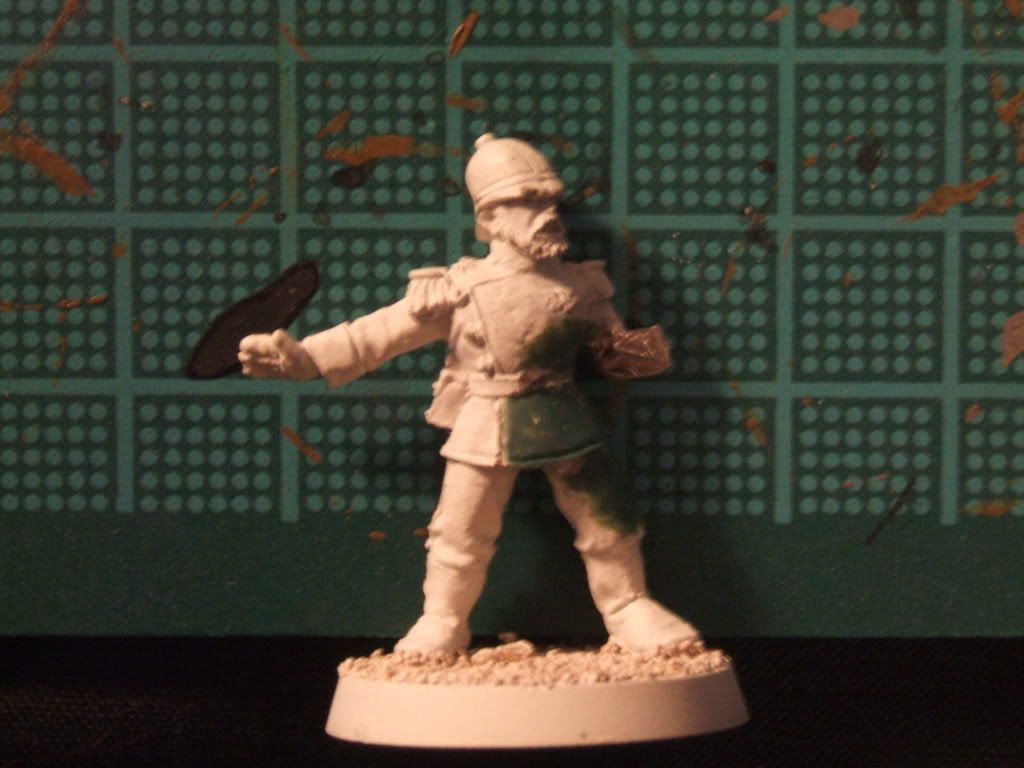
The second and third models are based on the Lasgun 1 model, they'll both be identical with one hand waving to the troops while the other will hold a Laspistol. This conversion has involved removing both Lasgun and some pouches, as well as resculpting much of the front torso so it's actually quite a big job, but I really like the pose and am looking forward to turning it into a nice looking Sergeant. The models will have a empty holster like all the others, but the scabbard for his sword will be full.


The forth conversion is based on actual Praetorian Sergeant model with Power Sword, except his power sword is replaced with a Chainsword and the braid has been removed, his pistol is also switched with one of the plastic Cadian ones which all the Sergeants will have for consistancy.


The next model meanwhile is based on the other Sergeant, this is probably the easiest of the lot again a pistol swap and the braid has been removed, otherwise he'll just be getting a holster and scabbard.


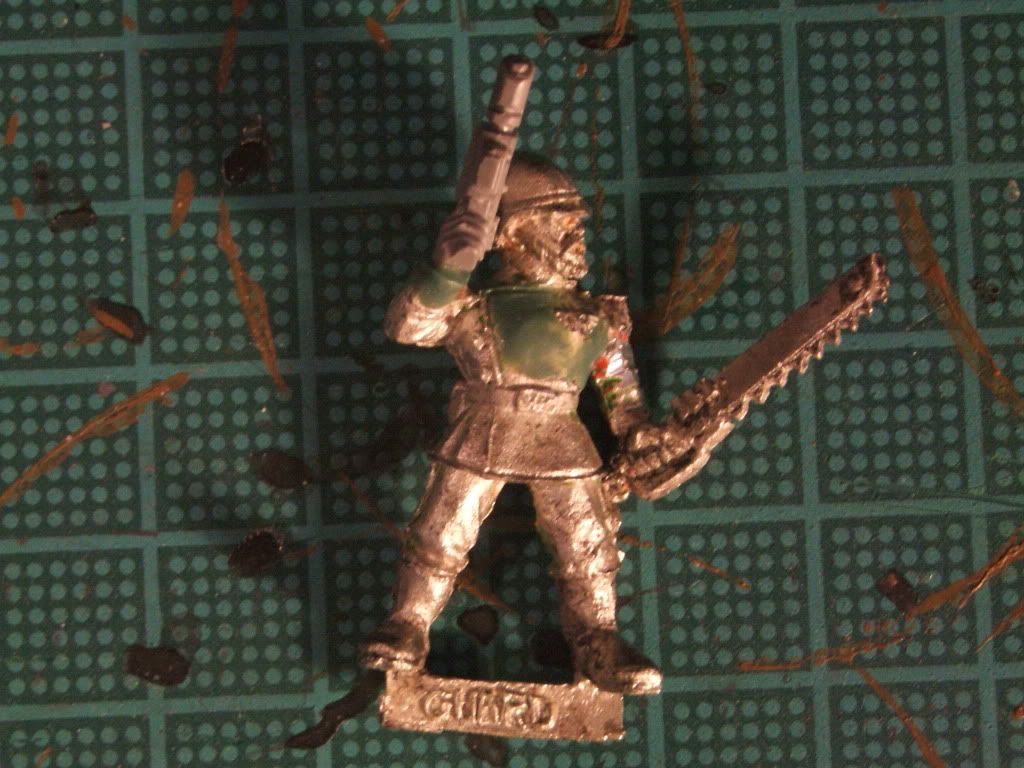
The final model for the first batch of new Sergeants is based on a Bugler model, as well as removing the braiding I've altered the angle of his chainsword arm, to complete the conversion I'm replacing the bugle arm with a newly sculpted one which will hold a pistol in a similar pose to the stock Power Sword Sergeant. Actually I think this one is shaping up to be my favourite.


As with my old Sergeant's they'll each get their chevron stripes on the sleeves of their arms - and as for the older Sergeants, well they're taking demotions back to Guardsmen, giving me the first few painted models for the third Platoon of D Company, I'm quite tempted to get on with painting the Platoon as a whole soon, maybe once the Leman Russ I'm working on is finished.

Sunday, 24 May 2009

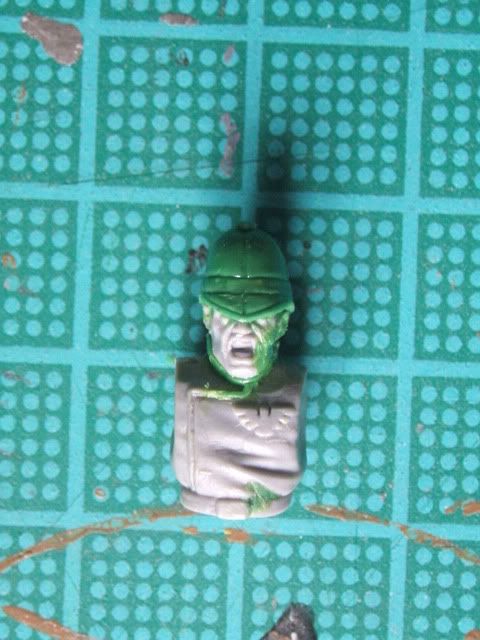
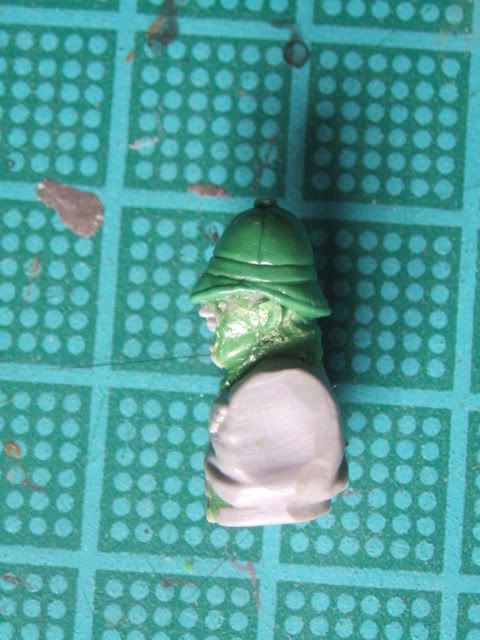
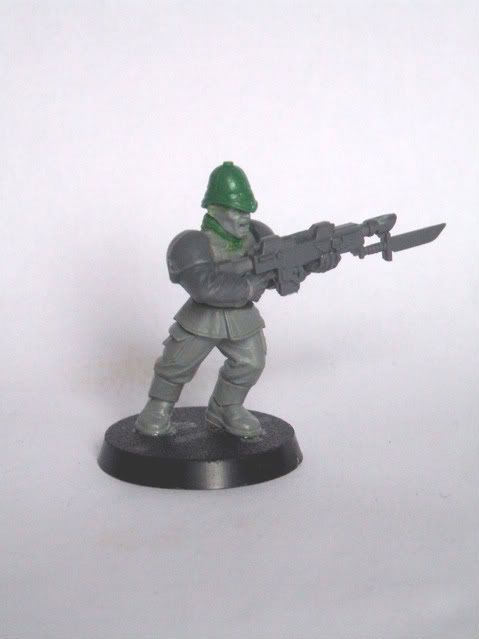
Sculpting Pith Helmetted Heads (Part 1)

At the end of 2007 I sculpted my first face while working on Captain Caine, I've played around with faces on an of a little since then with little success but now I at it again with a plan.

My intention at the moment is too sculpt and release my own set of Pith Helmetted Heads in 28mm Heroic Scale, which of course amongst other things would be suitable for Praetorian conversions. The helmet is done and I'll be sending this away to get multiple copies made up so all the headgear will be consistant - that leaves the hardest part, the faces themselves.

While I was very pleased with the overal model I was never entirely happy with Captain Caine's face, it was'nt particularly fantastic though not bad for a first attempt, the thing was as you can see below it's quite jowly, far too chubby and not brillaintly defined.


In the past few days I've been working on more faces, it's very slowly going and quite fustrating at times as any change made on something with fine detail will change something else as well, but I think I am making progress especially with the aid of a couple of tutorials I'd like to point out to anyone who might be interested in having a go themself.

One Ring : Sculpting Masterclass - Pulling Faces

Scribor Miniatures : Sculpting a Face in 10 Minutes

Sculpting Faces really does highlight to me that you need to find your own way however, what works for one person does'nt always work for another, so it's a really good idea to read around, ask questions of others and then find what works best for you, I will aim to do my own tutorial eventually, but thats a way down the line yet.

At the moment I'm turning out a face a day spending something like an hour at it each time, I hav'nt yet got it too a point that the first result is one I'm happy with so I'm often going back and starting again.

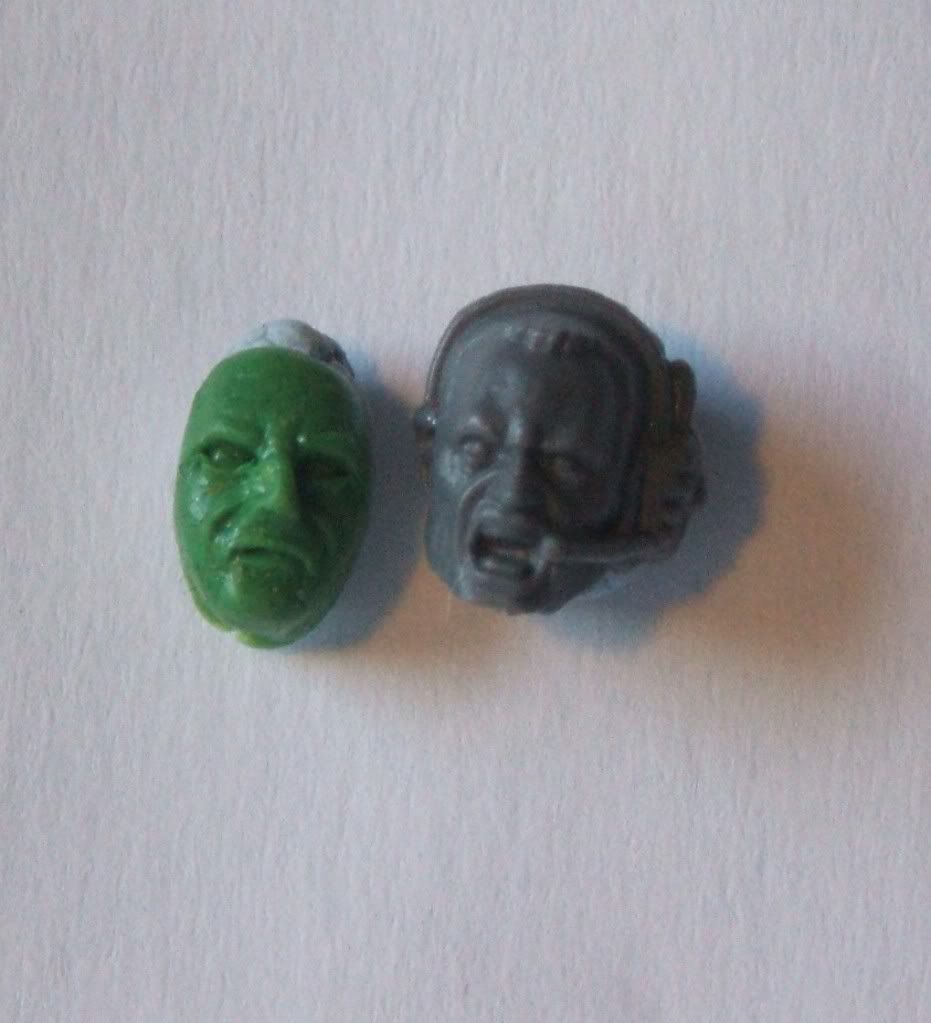
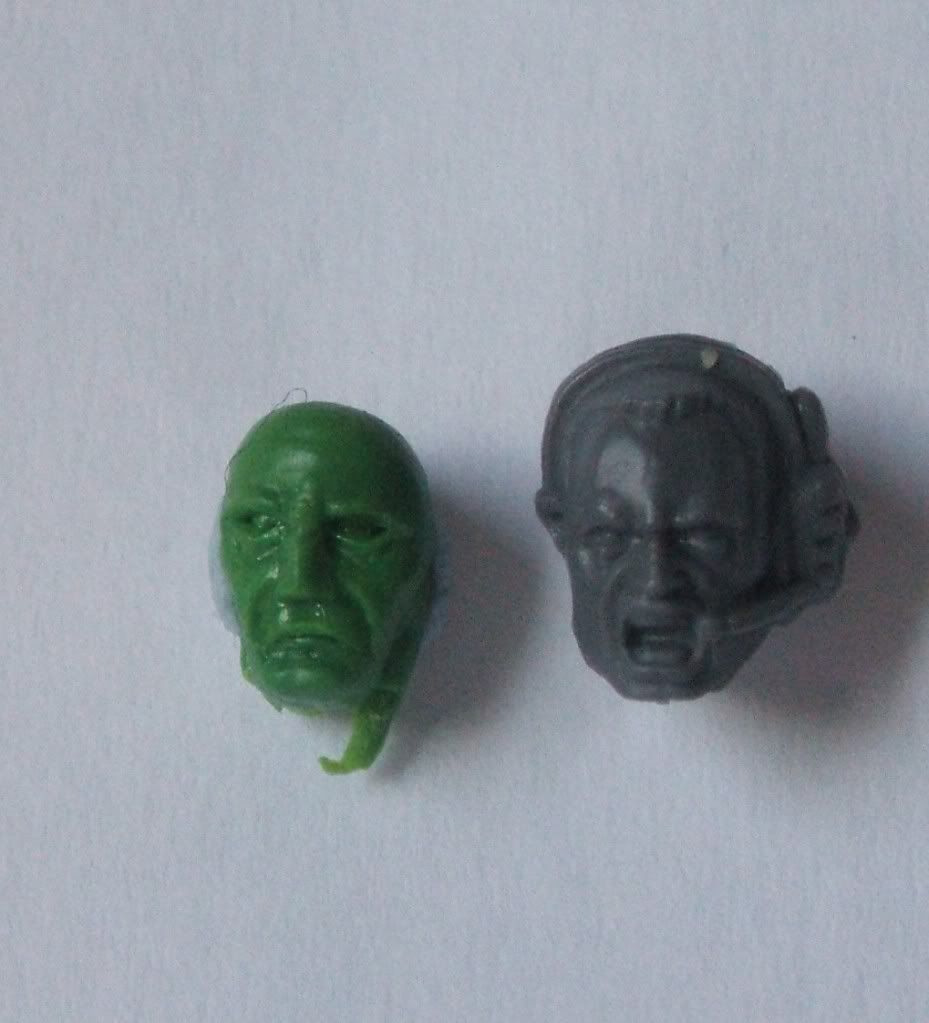
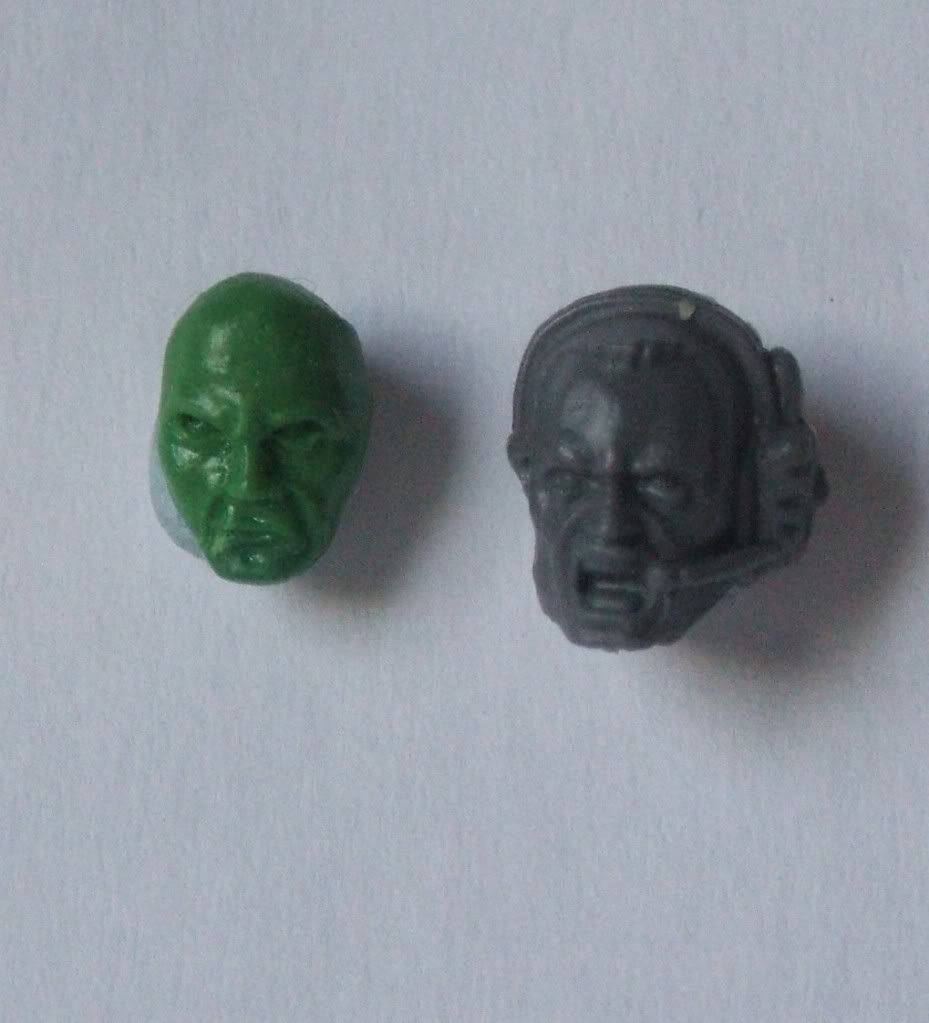
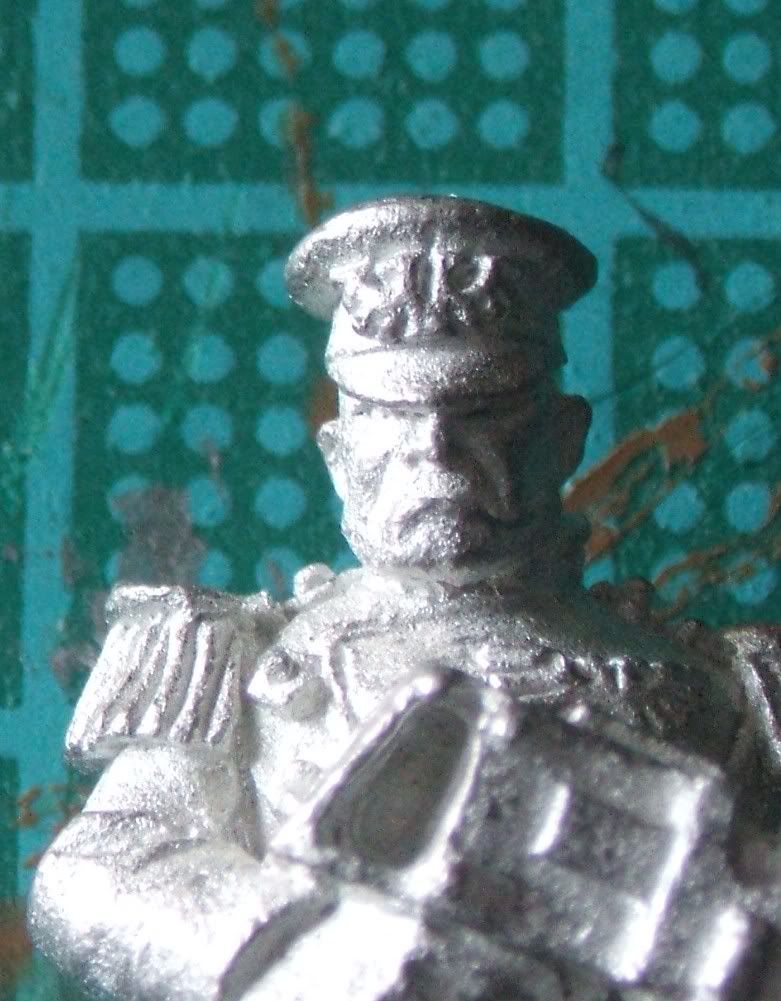
The first result was quite chubby still and slightly too long, the nose has also been giving me trouble always being a little larger then suited the face, though I was far more happy with the eyes then my earlier attempts.


The next one corrected the chubbyness a little, but was longer still, the lower eye lids also ended up bigger then I'd of liked. I think the longness in the face resulted from over doing the shape while not reducing the amount of putty I was using, with the nose also way extended.


Today's worked out a bit better, the eyes I'm happy with as I am with the nose, the shape and length of the face are roughly there, though it's not quite symmetrical, and the lower jaw is'nt quite right. I'm pretty pleased with it overal though, so hopefully in the next few days I'll have something close to a final face to show.


My plan is too have perhaps three shaven faces for the initial head sprue, one mouth shut, one mouth open, one well I've not really decided about that yet, a second sprue with bearded heads and variant heads could perhaps then follow.

Praetorian Imperial Guard Alternatives

As most visiting this page wil be aware Games Workshops line of Praetorian Imperial Guardsmen ceased production in early 2008 with no signs of this being reiniated. One of the consequences of this has been the already high prices of picking up second hand Guardsmen (because there are VERY few stores which still have any sort of stock left) inflated even more then they already were. While the likes of eBay and Bartertown are still good sources you will, short of finding a real bargain, be paying considerably for your Guardsmen. However there are alternatives even if you dont feel like doing extensive sculpting yourself as a number of suppliers provide bits, or even complete models, suitable for use in conversions. Those I've come across are linked below with a few important points.
If you have any suggestions for other suppliers with suitable ranges that could be included below or have used one of the below ranges and would be interested in doing an objective review of them please contact me at;


Important Notes -
28mm Heroic & True Scale - Games Workshop Miniatures are of a scale often referred too as Heroic, this means that the heads, weapons etc are noticeably larger then they would be on a true scale 28mm model, Heroic and True Scale models often do not blend together well.

Heads

Empress Miniatures - Pith Helmets & Glengarry Caps
Key Points; True Scale 28mm, Metal
AVAILABLE HERE

MaxMini - Pith Helmets
Key Points; 28mmm Heroic, Resin
AVAILABLE HERE - REVIEW HERE

Ramshakle Games - Pith Helmets with Gas Masks
Key Points; 28mmm (Heroic?), Resin
AVAILABLE HERE - REVIEW HERE

Secret Weapon Miniatures - Pith Helmetted Heads
Key Points; 28mm Heroic Scale, Metal
AVAILABLE HERE

Victoria Miniatures - Pith Helmetted Heads
Key Points; Heroic 28mm, White Metal
AVAILABLE HERE

Complete Models

Black Tree Design - British Zulu Wars Troops
Key Points; True Scale 28mm, Metal
AVAILABLE HERE

Empress Miniatures - British Colonial Troops
Key Points; True Scale 28mm, Metal
AVAILABLE HERE

Perry Minatures - Sudan British
Key Points; True Scale 28mm, Metal
AVAILABLE HERE

Wargames Factory - British Firing Line
Key Points; True Scale 28mm, Plastic, Multipart
AVAILABLE HERE

Warlord Games - British Anglo/Zulu Wars Infantry
Key Points; True Scale 28mm, Plastic, Multipart
AVAILABLE HERE

Other Bits & Components

Curious Constructs / Col.Gravis - Cavalry Conversion Kits
Key Points; Heroic 28mm, Metal
AVAILABLE HERE

Curious Constructs / Col.Gravis - Various Components inc. Torsos
Key Points; Heroic 28mm, Metal
AVAILABLE HERE

MaxMini - Greatcoat Legs
Key Points; 28mmm Heroic, Resin
AVAILABLE HERE - REVIEW HERE

Victoria Miniatures - Roughriders
Key Points; Heroic 28mm, Metal
AVAILABLE HERE

Victoria Miniatures - Various Components inc. Arms, Torsos & Legs
Key Points; Heroic 28mm, Metal
AVAILABLE HERE

Saturday, 23 May 2009

Tutorial - Sculpting Pith Helmets

Disclaimer - There are plenty of better sculptors out there, and I'm sure many of them would advocate different and quite possibly better ways of tackling projects then I currently do. I'd encourage anyone considering doing any sculpting to browse around and do your homework before tackling a project.

Also if anyone wants to add any suggestions to the tutorial please do comment with any tips, suggestions, criticisms etc, all would be most welcome.


There has been a lot of interest following the new Guard Codex in how you could create your own Praetorian styled Guardsmen, part of this I've covered previously with adding Epaulettes to a model, in this tutorial I'll cover how I sculpt the most distinctive feature of Praetorian Guardsmen, the Pith Helmet.

To start with you'll need your subject, in this case I'm using the Cadian Sergeant head, slightly modified in advance removing the Mic on one side and giving him an ear instead.


You'll then need a blob of greenstuff, the closer you can get to the amount of putty you'll need the easier the work will be in this case, you don't want to be removing too much, but you don't want to be adding any during the sculpt either ideally, for a Cadian sized head such as this I've found a ball slightly smaller then 4mm in diameter to be about right. Taking this and applying it to the head you can form a rough shape.


This you can gradually work on getting the desired shape (it helps to have a model with a Pith Helmet - or if your like me a real Pith Helmet to use as a reference!), I find it easier to work front to back, moving any excess putty to the neck from where it can be removed.


It will take some practice, but eventually you'll get the basic shape finished, though I would add at this stage I don't try to finish the front brim leaving this until later. Using something like a flat headed clayshaper to get a smooth finish if you've not been using such a tool already. It's also worth noting that its very easy to end up with the putty starting to cure before you've finished this stage early on so dont be dishearted if your first few attempts don't work out, put it down to experience and try again later.


Your next stage is too put in the seams I find the easiest way to do this is by taking it in three stages. Firstly I use the length of a scalpel blade to lightly mark where the seams will go, then using the thin edge of a sculpting tool I gently press these seams in deeper correcting any mistakes in the scalpel line. Finally I use the flat headed clay shaper again to smooth the edges and push them inward to ensure the lines are straight and where they cross that there is a smooth transition.

Using this method I do the seam around the edge of the base first, then the lower horizontal band which merge with the base seam at their highest point, this acts as a guide to the upper horizontal band which I put in 1-2mm higher, the vertical bands follow last of all.


Hopefully you'll then have a piece looking something like this.


Once this has cured in the final stage I add the button to the top and work on the front brim, as this is at a slight angle I personally find it easier to add it now rather then too try an do the whole sculpt in one go and risk undoing work done on the rest of the helmet, though it certainly is possible to do it all in one go.

And so we have one finished Pith Helmet.


Sunday, 17 May 2009

Venatio Accipiter (Part 3)

Yes, some hobby stuff once more!

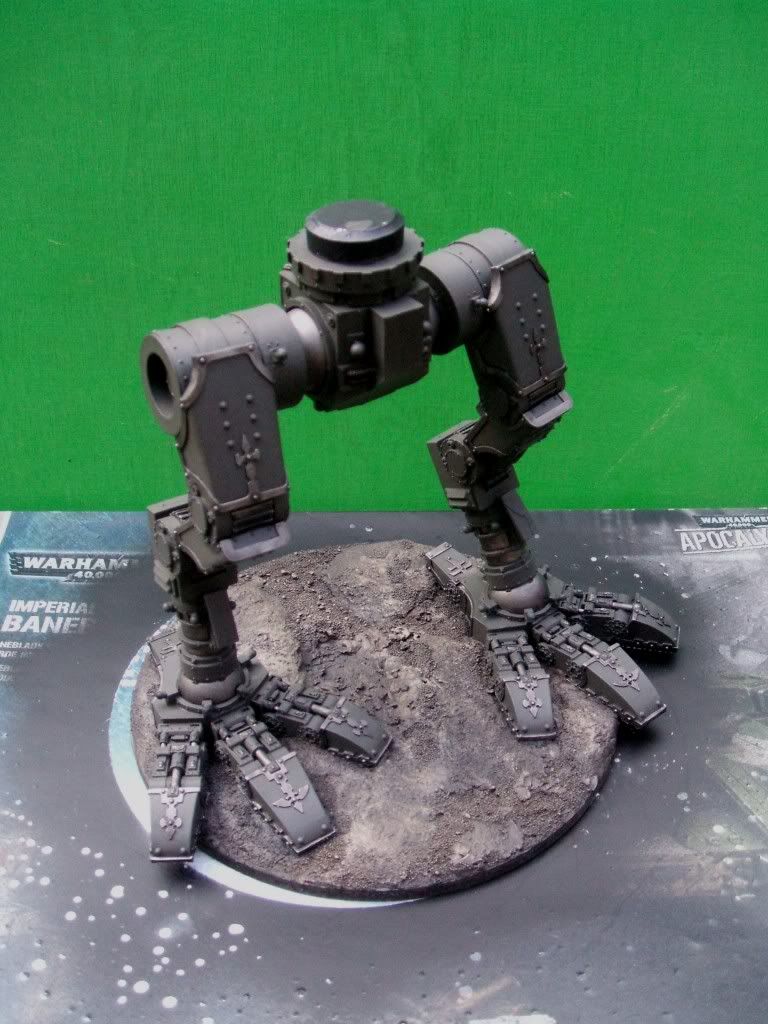
I've been fairly busy with work as of late amongst other things, but just about whenever I've had the chance I've been beavering away on the Venatio Accipiter again. The result of this is a model with the legs now completely basecoated with Charadon Granite. Why you ask? Well because I liked the colour so I started applying that, I'm thinking a mix with Catachan Green to bring it up a bit next, plus plenty more work on the metal. This has been the reason for quite a dry month as far as hobby is concerned, it's taken rather a long time!


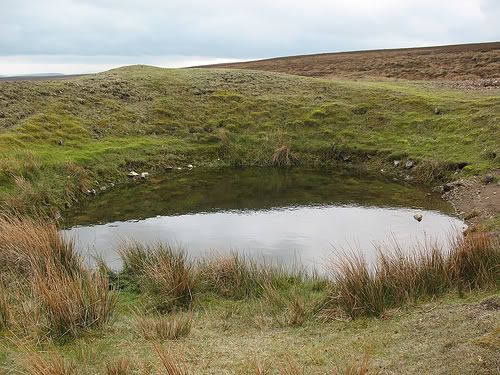
The base meanwhile I'm intending to do with a moorlandish feel, something like in the picture below, there will be a pool in the center of the base with scrub and the like around it. My hope is this will be suitable more impressive then how I do my bases normally (quickly!) while it'll still blend in with them when the army is used as a whole.


I've also been working on the forward portion of the main hull's interior which I hope to update with pictures next time, indeed with a bit of luck I'll be able to get the main portion of the hull pinned together and ready to start work on it's exterior. I've also just recieved a Lucius Pattern Turbo Laser to replace the Vulcan Mega Bolter, I'd planned to convert this to fit in with the Mars pattern, however it seems that Forgeworld may release the actual Mars Pattern arm far sooner then anticipated as it was on show at GD Baltimore - we'll see how get's to the arm first, me or Forgeworld.

My money's on Forgeworld.

Thursday, 7 May 2009

2009 Season Tourny List - 1500pts

Okay, first off I apolgiese for the lack of hobby content at the moment, suffice to say I am working away, and they'll be something to show for it in the next post or two, it's kinda fustrating as theres lots I want to work on, but as ever being slow as I am not enough hours in the day.

I've been mulling over the Guard list as you do with a shiny new codex, with my mind turned to this years Grand Tournament (almost certainly it'll be Heat 3 this year for the Exeter Inquisition team). I'm of course planning on using Guard this year after taking a break and playing Sisters in 2008, and I'm going competative with them - well I hope so anyway! As it stands this is what I've got in mind.

Company Commander @75pts
inc. Standard Bearer, Autocannon Team

A basic Commander, he'll sit with the firebase to keep them in place with the Standard, while the Autocannon team provides some mid-range AT.

Pysker Battle Squad @90pts
inc. Overseer, 7 Pyskers
Chimera @55pts

The Pysker Battle Squad, with Chimera for protection these guys will either lay down a nice template each turn which the numbers give plenty of strength, or see a squad running thanks to Weaken Resolve, this could be especially useful against small elite units, specificly the ones which are hard to put down with firepower (yes Ork Nob Bikers I'm looking at you).

Infantry Platoon
Platoon Commander @40pts
inc. Autocannon
Infantry Squad @85pts
inc. Plasma Gun, Lascannon Team
Infantry Squad @85pts
inc. Plasma Gun, Lascannon Team
Infantry Squad @85pts
inc. Plasma Gun, Lascannon Team

The firebase, Guard may have lots of new toys, and be far more mobile now, but it's still the Infantry doing what they do best which are fairly key to any list, this force will be the core of the firebase, and hold ground.

Infantry Squad @55pts
inc. Flamer
Infantry Squad @55pts
inc. Flamer

These two squads will provide um... cover for the firebase, or act as objective takers, their Flamers give me a little help against hordes.

Veteran Squad @100pts
inc. 3 Meltaguns

Veteran Squad @100pts
inc. 3 Meltaguns

Vendetta @130pts

Valkyrie @130pts
inc. Multiple Rocket Pods

The armour killers and mobile element of the force, it's a standard trick really, each Veteran Squad is mounted up in a Valk or Vendetta, using the Scout move to get into a first turn strike position, or Outflank where thats not possible. The Vendetta's lascannon reinforce this, while the Valk's Multiple Rocket Pods are a useful addition to dealing with Hordes.

Roughrider Squadron @55pts
inc. 5 Roughriders

I still wont leave home without these guys, a little counter-assault can go a long way.

Leman Russ @170pts
inc. Hull Heavy Bolter, Heavy Bolter Sponsons

Leman Russ Demolisher @185pts
inc. Hull Heavy Bolter, Heavy Bolter Sponsons

Russ, Russ, Glorious Russ. The final piece of the firebase, a pair of Russ, one standard pattern, one Demolisher as it would be rude not too, backed up with sponsons when stationary these two can lay down a scary amount of firepower now (as if they did'nt already with the previous codex).

Total = 1495pts

Friday, 1 May 2009

Hobby Fund (1st May)

Well there's not alot to say about the Hobby Fund this month to be honest, but I'll stick to keeping my record of how it's going. With my American adventure I did'nt do much in the way of selling an absolutely no buying, which suits me just fine as it happens! Tommorrow Exeter Legionary comes around, so I'll be hoping to sell off a few more bits an pieces at the Bring & Buy stand while I take part in the Total Carnage Tournament with my Sisters of Battle, of course tommorrow is also Guard release day, I'll be picking up a Codex and Valk from my local Games Workshop store, one of those rare occasions I buy anything other then hobby supplies from them - supporting my local so to speak!

  • Starting Balance 1st April (Previous Sales) = £104.38

  • Sales in April = £27.50

  • Sales Fee's in April = -£0.64

  • Purchases in April = £0.00

  • Misc Income/Outgoings = £0.00

  • Balance 1st May = £131.24