
My intention at the moment is too sculpt and release my own set of Pith Helmetted Heads in 28mm Heroic Scale, which of course amongst other things would be suitable for Praetorian conversions. The helmet is done and I'll be sending this away to get multiple copies made up so all the headgear will be consistant - that leaves the hardest part, the faces themselves.
While I was very pleased with the overal model I was never entirely happy with Captain Caine's face, it was'nt particularly fantastic though not bad for a first attempt, the thing was as you can see below it's quite jowly, far too chubby and not brillaintly defined.

In the past few days I've been working on more faces, it's very slowly going and quite fustrating at times as any change made on something with fine detail will change something else as well, but I think I am making progress especially with the aid of a couple of tutorials I'd like to point out to anyone who might be interested in having a go themself.
One Ring : Sculpting Masterclass - Pulling Faces
Scribor Miniatures : Sculpting a Face in 10 Minutes
Sculpting Faces really does highlight to me that you need to find your own way however, what works for one person does'nt always work for another, so it's a really good idea to read around, ask questions of others and then find what works best for you, I will aim to do my own tutorial eventually, but thats a way down the line yet.
At the moment I'm turning out a face a day spending something like an hour at it each time, I hav'nt yet got it too a point that the first result is one I'm happy with so I'm often going back and starting again.
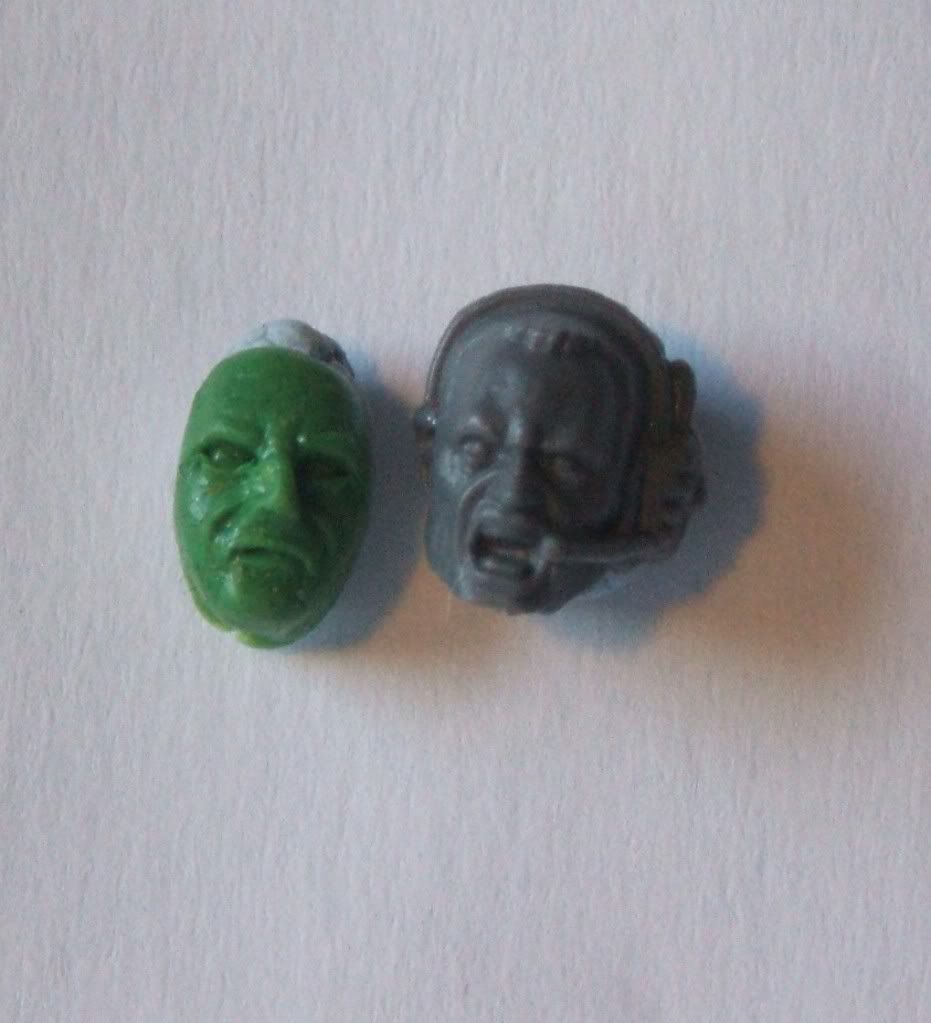
The first result was quite chubby still and slightly too long, the nose has also been giving me trouble always being a little larger then suited the face, though I was far more happy with the eyes then my earlier attempts.
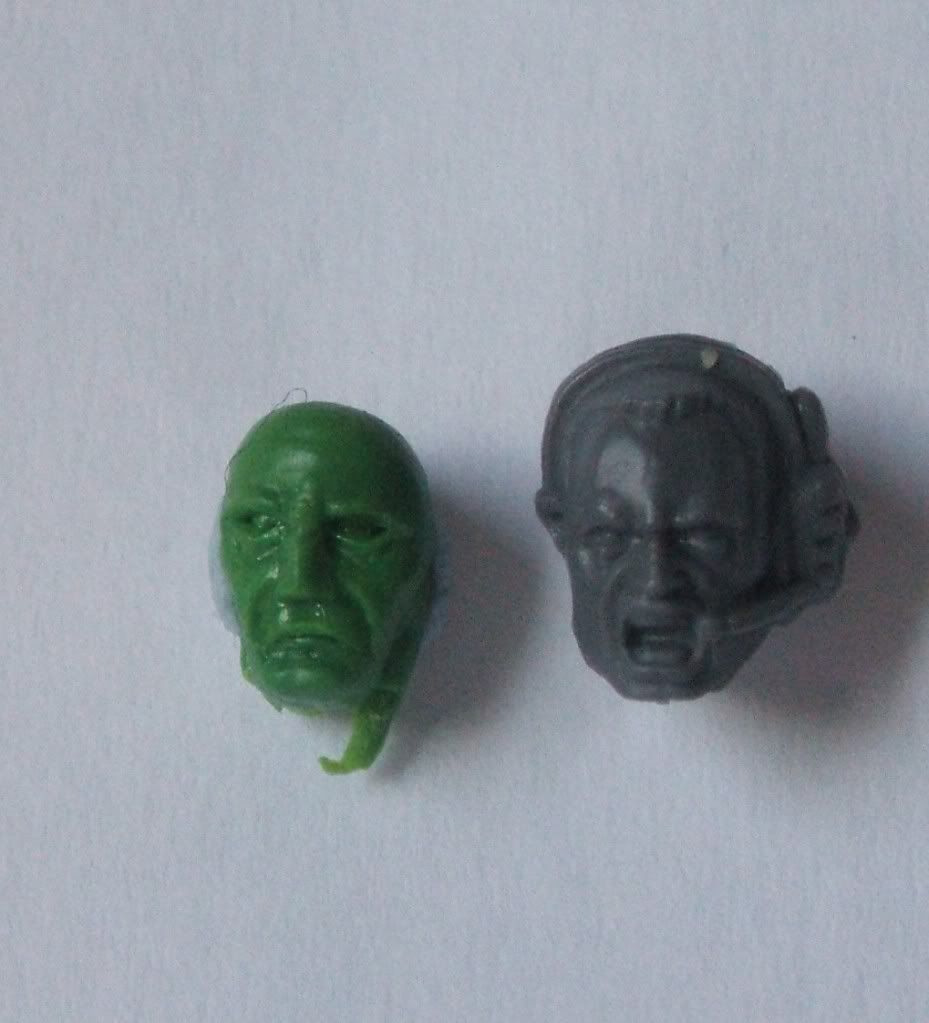
The next one corrected the chubbyness a little, but was longer still, the lower eye lids also ended up bigger then I'd of liked. I think the longness in the face resulted from over doing the shape while not reducing the amount of putty I was using, with the nose also way extended.
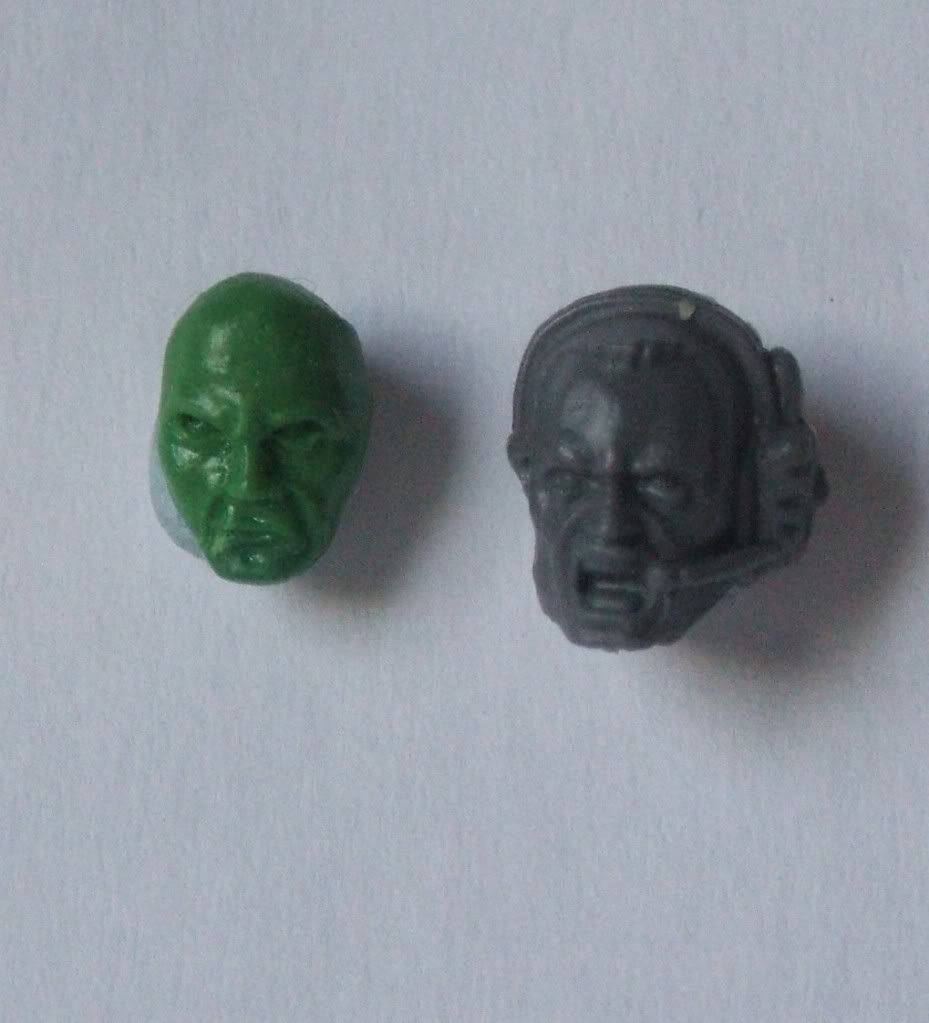
Today's worked out a bit better, the eyes I'm happy with as I am with the nose, the shape and length of the face are roughly there, though it's not quite symmetrical, and the lower jaw is'nt quite right. I'm pretty pleased with it overal though, so hopefully in the next few days I'll have something close to a final face to show.
My plan is too have perhaps three shaven faces for the initial head sprue, one mouth shut, one mouth open, one well I've not really decided about that yet, a second sprue with bearded heads and variant heads could perhaps then follow.
5 comments:
Good lesson with the green stuff :)
I invite you to visit my blog about WH40K: http://universo40k.blogspot.com/
Greetings from Spain!
great little tutorial. so you've decided to go all entrpreneurial ay?
Good luck with it all, Im sure you'll have it down in no time, practice makes perfect!
Great to see your blog back in action Col. You always do great GS work. How did your Praetorian Rough Riders project end up by the way? Keep up it up chap, what ho!
Thankyou :) it was'nt really intended as a tutorial, but hopefully it'll be useful all the same! :)
Luis, I'll take a look!
Scryer, the early finished components are now available from TrooperPX (theres a link in the Praetorian Alternative Model post), watch this space for more in the future though!
wow.
Post a Comment