Sculpting -
How to Sculpt Mordian Style Caps
How to Sculpt Pith Helmets
How to Sculpt Epualettes
How to Sculpt Valhallan Style Caps
Conversions -
Converting Praetorian Plasma Guns from Meltaguns
Converting a Swapable Basilisk and Medusa Artillery Piece
Terrain -
Quick and Easy Minefields

Showing posts with label Tutorial. Show all posts
Showing posts with label Tutorial. Show all posts
Sunday, 5 September 2010


Saturday, 14 August 2010
Tutorial - Swapable Basilisk/Medusa Artillery Tank
I decided I needed a Medusa, well two actually, for a tournament thats coming up, the catch being I don't have a Medusa, or the money to splurge on a Forgeworld kit. What I do have is three Basilisk partially assembled so I decided I needed to come up with a way to field them as either a Basilisk or Medusa, given they're essentially largely the same this is fairly easy.
To do this you need:
1 Basilisk kit
1 Baneblade Demolisher Cannon Barrel
Length of 10mm Plastic Tubing (Thin)
Length of 8mm Plastic Tubing (Fat)
I'm sure you can already see where I'm going with this.
Stage one is to take your assembled Earthshaker Gun, this could even be done on a tank thats already been fully assembled allowing you to retro fit the ability to switch between these two vehicles.

Stage two is too saw through the barrel as close as possible to the breach assembly, this needs to be done very neatly and carefully otherwise you'll end up with a bad fit and gaps later on, use a hobby saw.

Now in stage three you need to fit the larger 10mm tube inside the breach assembly, push it in as far as possible, this should be about 50mm, then remove the excess, cutting neatly as with removing the barrel.

Stage four is means cutting two sections of the small 8mm tubing (or whatever else you have, this needs to slot inside the 10mm tubing neatly), this will want to be about 55mm long.

Now you can fix this 8mm tubing inside your Earthshaker barrel (ensuring that it is central and straight, check it, test fit it, because a wonky barrel will look silly! If you've done it right you won't be able to spot the difference between this finished piece and the original before you started your conversion.


You'll need to then do the same for the Demolisher Cannon barrel, once dried your good to go, Basilisk or Medusa on demand!


To do this you need:
1 Basilisk kit
1 Baneblade Demolisher Cannon Barrel
Length of 10mm Plastic Tubing (Thin)
Length of 8mm Plastic Tubing (Fat)
I'm sure you can already see where I'm going with this.
Stage one is to take your assembled Earthshaker Gun, this could even be done on a tank thats already been fully assembled allowing you to retro fit the ability to switch between these two vehicles.
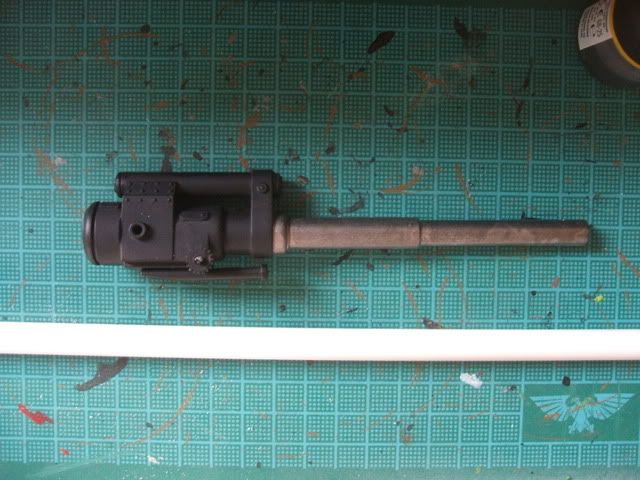
Stage two is too saw through the barrel as close as possible to the breach assembly, this needs to be done very neatly and carefully otherwise you'll end up with a bad fit and gaps later on, use a hobby saw.
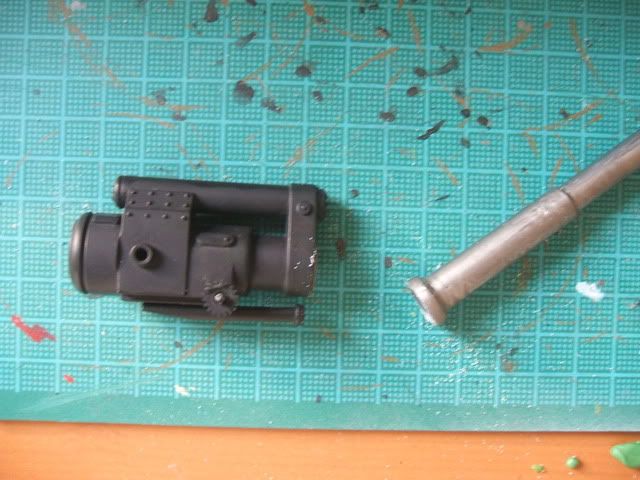
Now in stage three you need to fit the larger 10mm tube inside the breach assembly, push it in as far as possible, this should be about 50mm, then remove the excess, cutting neatly as with removing the barrel.
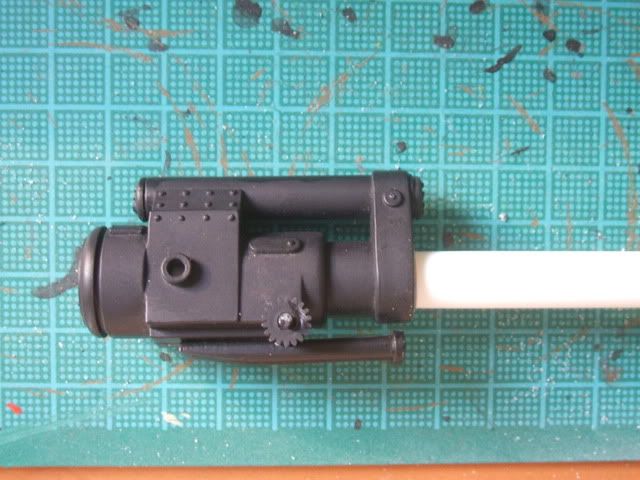
Stage four is means cutting two sections of the small 8mm tubing (or whatever else you have, this needs to slot inside the 10mm tubing neatly), this will want to be about 55mm long.
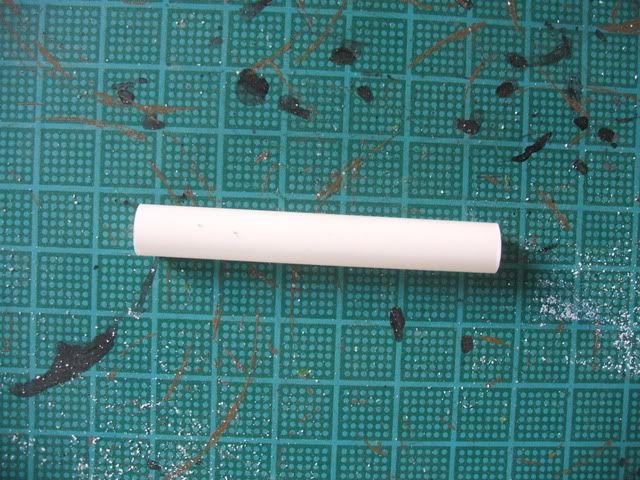
Now you can fix this 8mm tubing inside your Earthshaker barrel (ensuring that it is central and straight, check it, test fit it, because a wonky barrel will look silly! If you've done it right you won't be able to spot the difference between this finished piece and the original before you started your conversion.
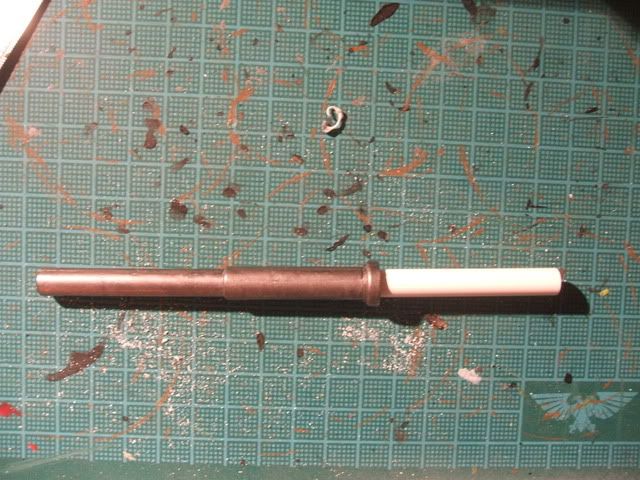
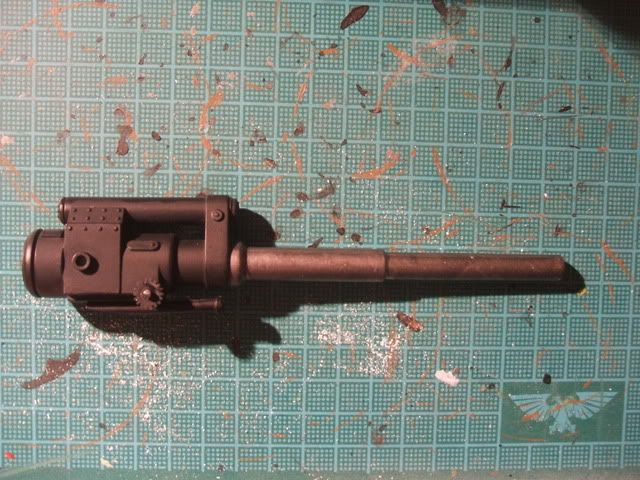
You'll need to then do the same for the Demolisher Cannon barrel, once dried your good to go, Basilisk or Medusa on demand!
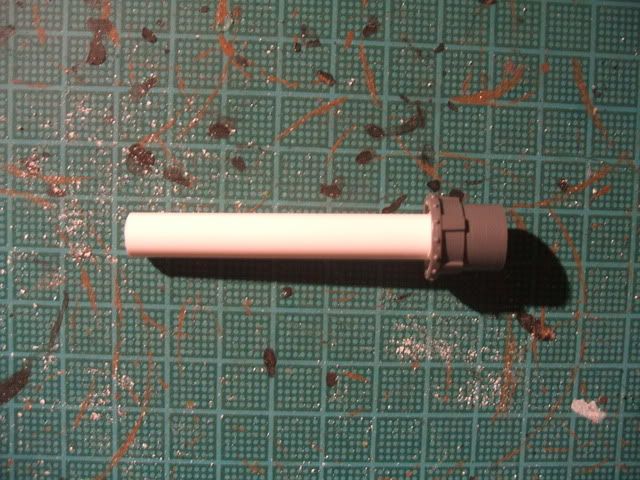
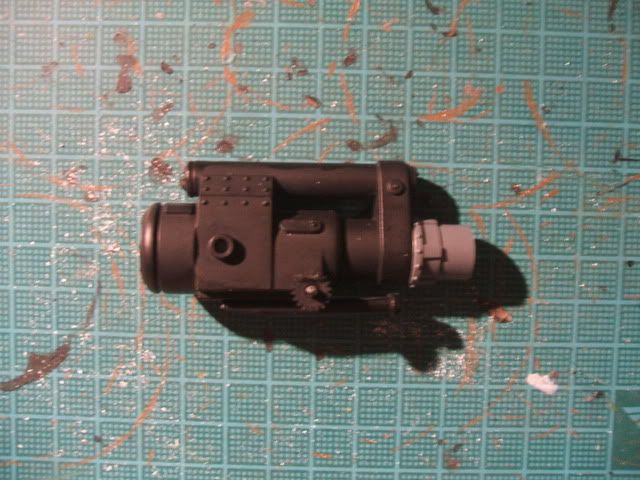
Sunday, 14 June 2009
Tutorial - Valhallan Style Winter Caps
I've decided to follow up on Mordian and Praetorian headgear tutorials with another, with probably more to follow, this time covering the Winter Headgear of the Valhallans.
I've started with a Catachan head, this was cleaned up roughly in the usual manner removing the bandana, the main component of the headgear is then added, this is formed from a small ball of putty, about 4mm in diameter, it is created in a cylinder pushing the putty downwards much as with the previously covered Mordian cap, however in this case the top edges of the cylinder are then made smooth curves with a clay shaper as this is actually the top of the dome.

Once cured the front flap is added from another small ball of putty which is pressed against the dome to an appropriate shape and size.

This is then textured using the very tip of a sculpting tool to simulate fur, remembering to not make it too regular a pattern, this has to be done very gently however, too much pressure will ruin it and you'll need to reshape the flap and start again.

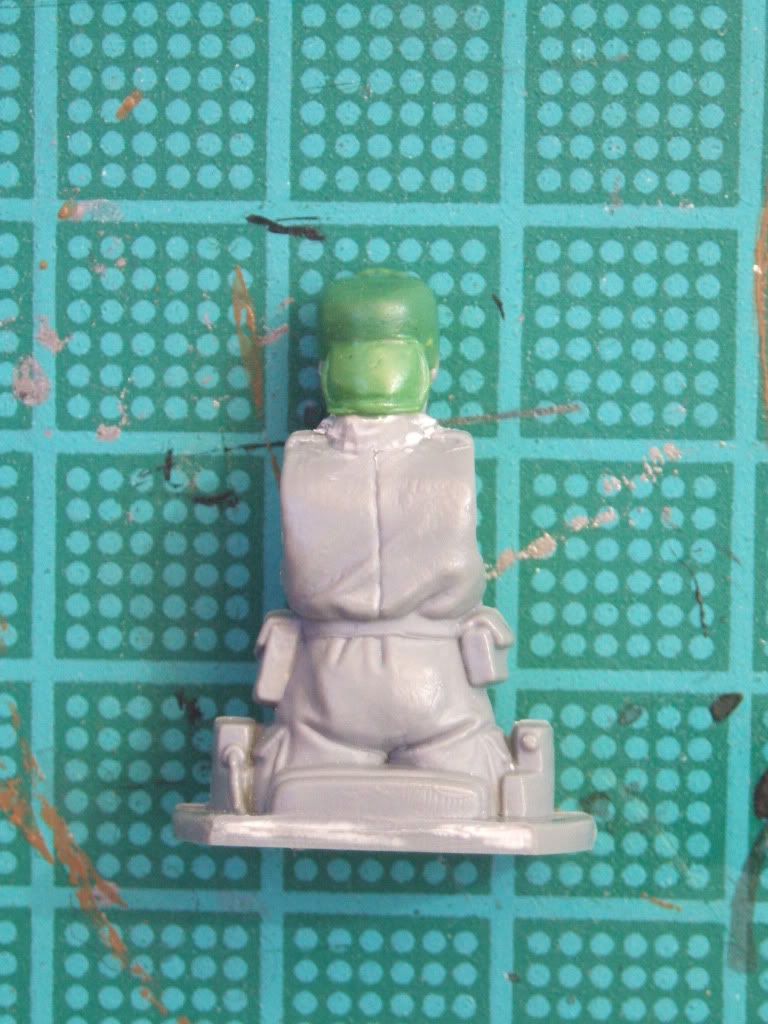
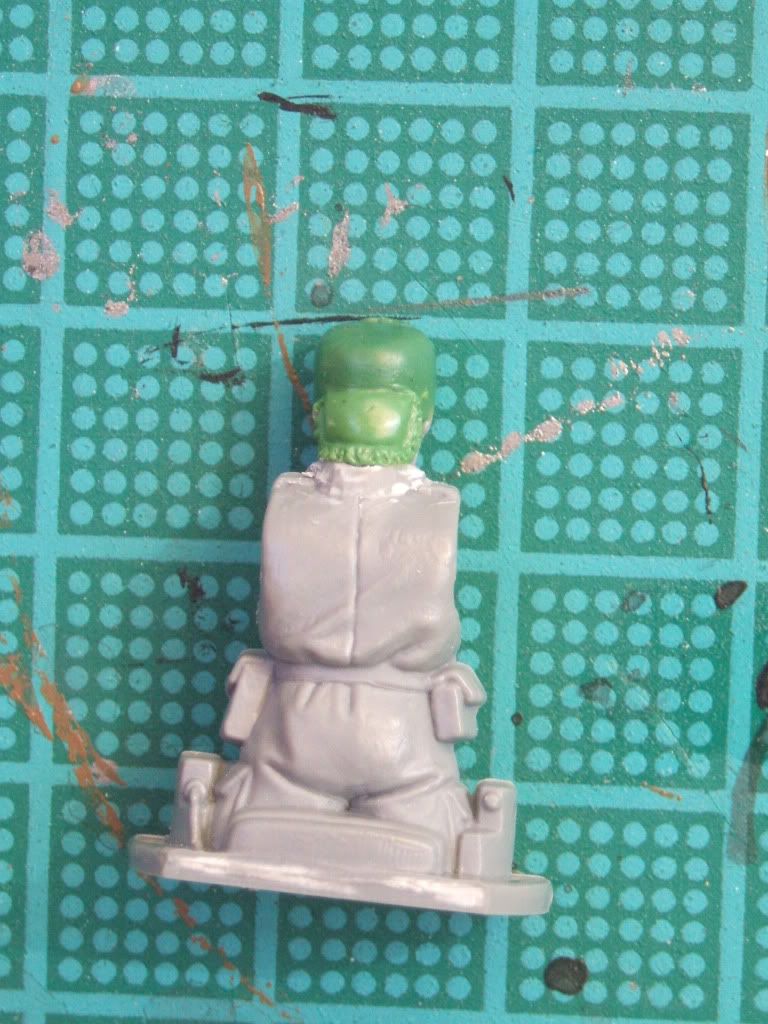
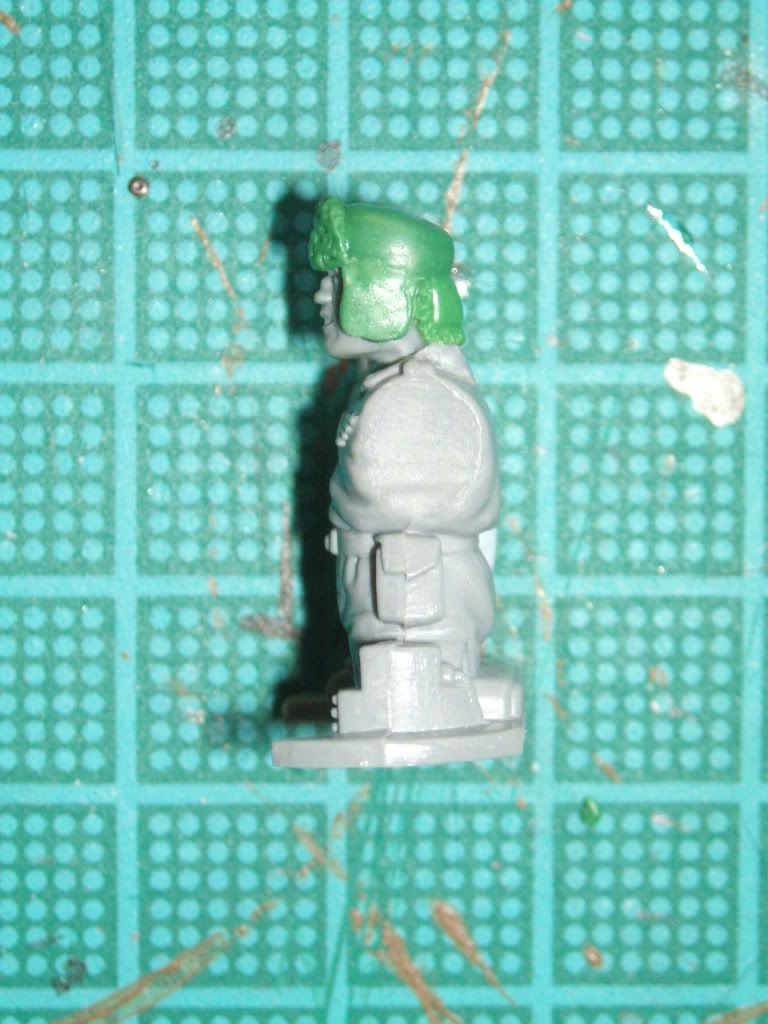
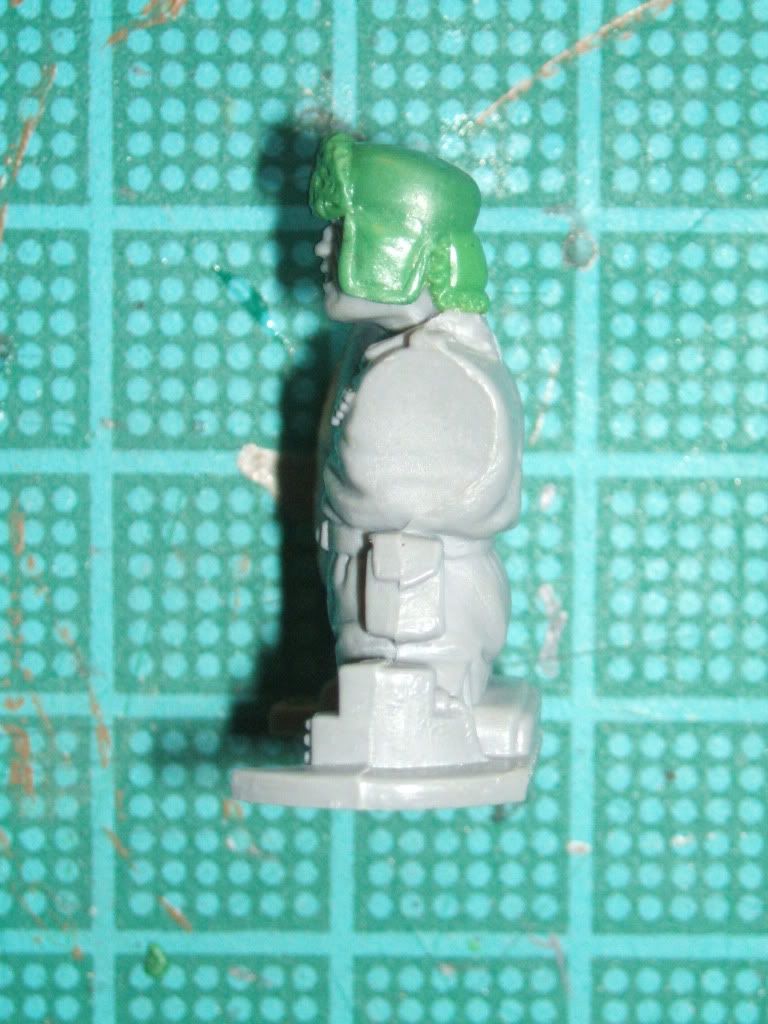
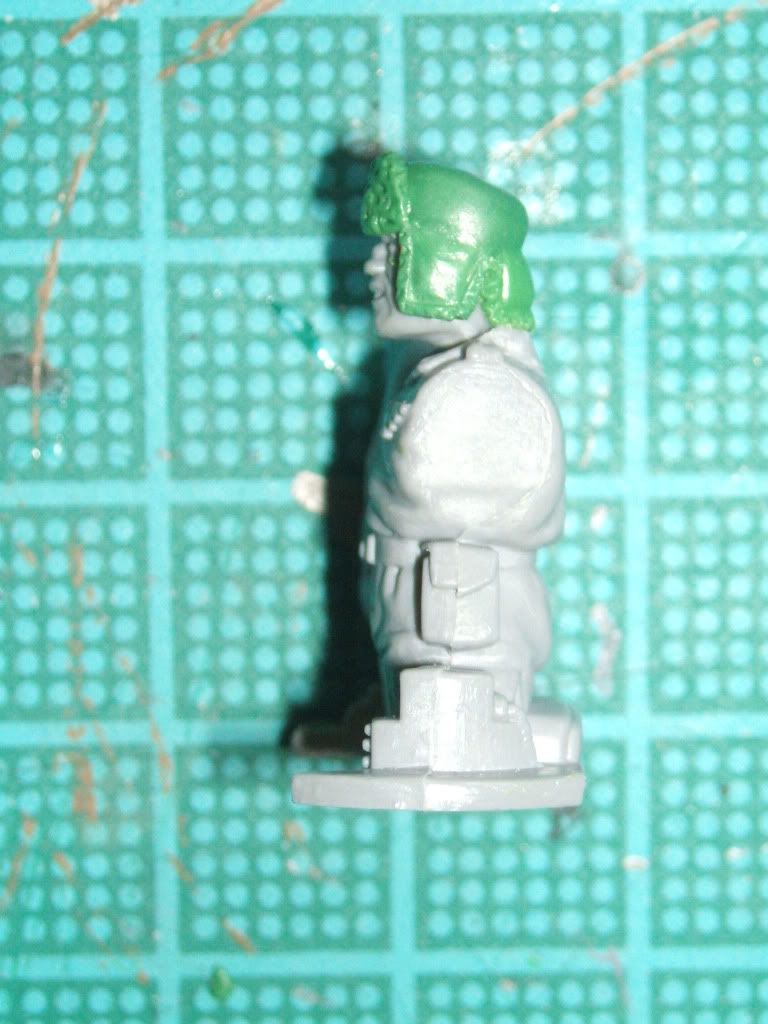
Next up came the flaps, obviously if your having a high collared greatcoat this will need to be done before the headgear as, as with the Valhallan models the side and rear 'flaps' should partly cover the collar. These are formed from small balls of putty which can be added all at the same time or seperately, I pushed the putty flat, forming the rough shape of the 'flap', this was then trimmed to size using the edge of the tool or a scapel. I then defined the edges of the cloth where the fur trim begins. The fur effect itself was as with the front portion then formed using the tip of a sculpting tool.
Finally once all the flaps were cured a skull emblem was added to the front of the headgear, this could equally be something such as an Aquilla though. A very small piece of putty was added, this was then shaped into a rough skull outline.

The eye, nose and teeth were then defined with the tip of the sculpting tool and a scapel blade, again applying these with great care so as not too caused too much pressure.

Job done, it looks a little odd without the greatcoat but I think it's a fairly simple way to achieve a reasonable effect which could be improved upon with a little more time spent on it.
I've started with a Catachan head, this was cleaned up roughly in the usual manner removing the bandana, the main component of the headgear is then added, this is formed from a small ball of putty, about 4mm in diameter, it is created in a cylinder pushing the putty downwards much as with the previously covered Mordian cap, however in this case the top edges of the cylinder are then made smooth curves with a clay shaper as this is actually the top of the dome.
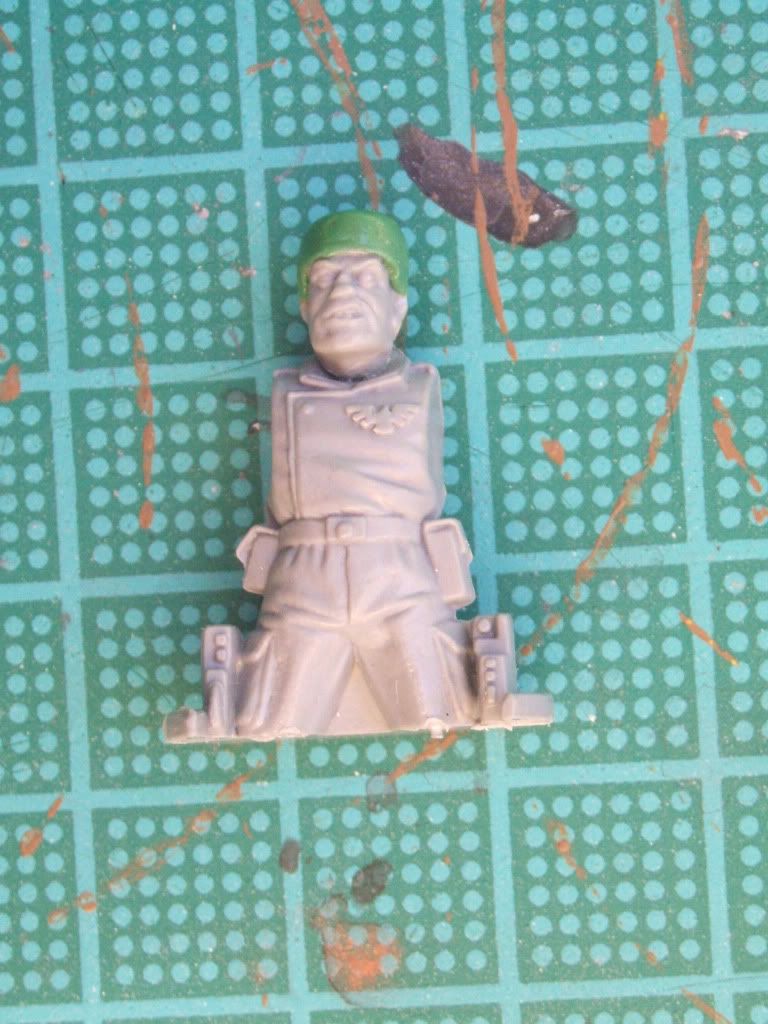
Once cured the front flap is added from another small ball of putty which is pressed against the dome to an appropriate shape and size.
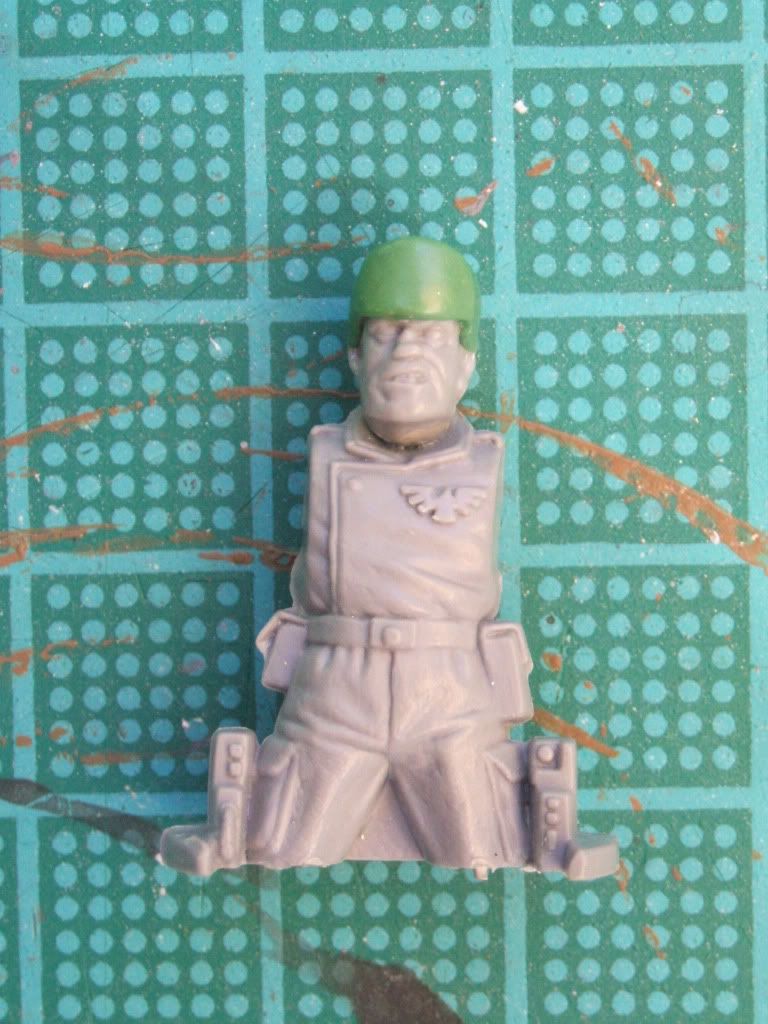
This is then textured using the very tip of a sculpting tool to simulate fur, remembering to not make it too regular a pattern, this has to be done very gently however, too much pressure will ruin it and you'll need to reshape the flap and start again.
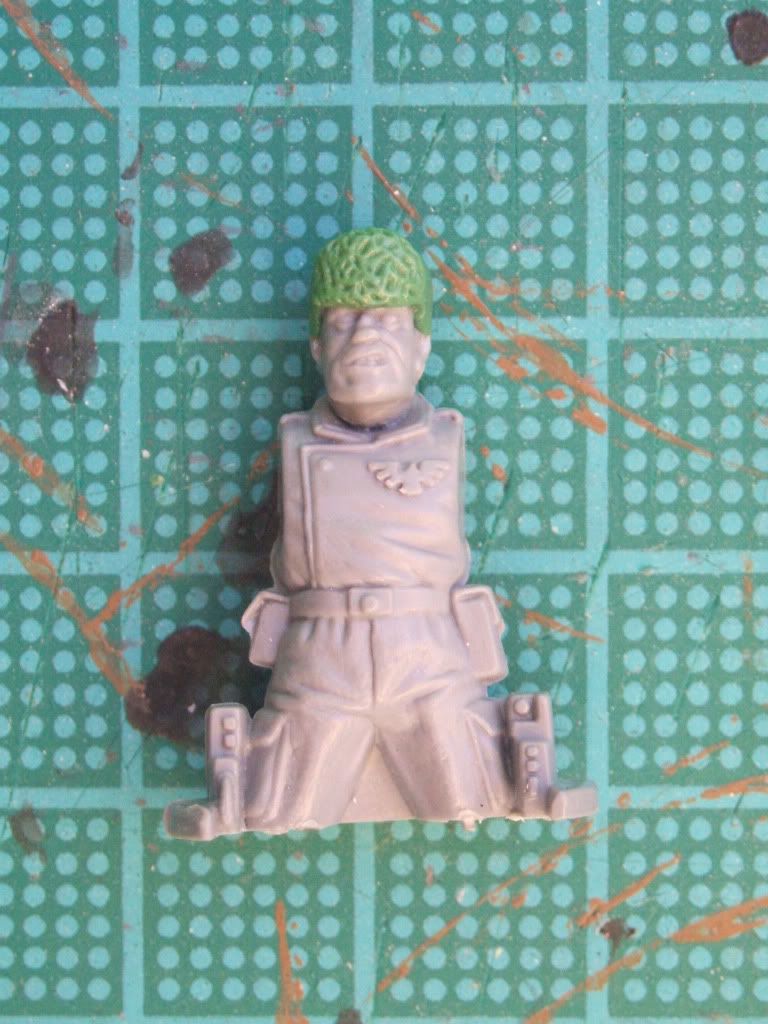
Next up came the flaps, obviously if your having a high collared greatcoat this will need to be done before the headgear as, as with the Valhallan models the side and rear 'flaps' should partly cover the collar. These are formed from small balls of putty which can be added all at the same time or seperately, I pushed the putty flat, forming the rough shape of the 'flap', this was then trimmed to size using the edge of the tool or a scapel. I then defined the edges of the cloth where the fur trim begins. The fur effect itself was as with the front portion then formed using the tip of a sculpting tool.
  |
  |
  |
Finally once all the flaps were cured a skull emblem was added to the front of the headgear, this could equally be something such as an Aquilla though. A very small piece of putty was added, this was then shaped into a rough skull outline.
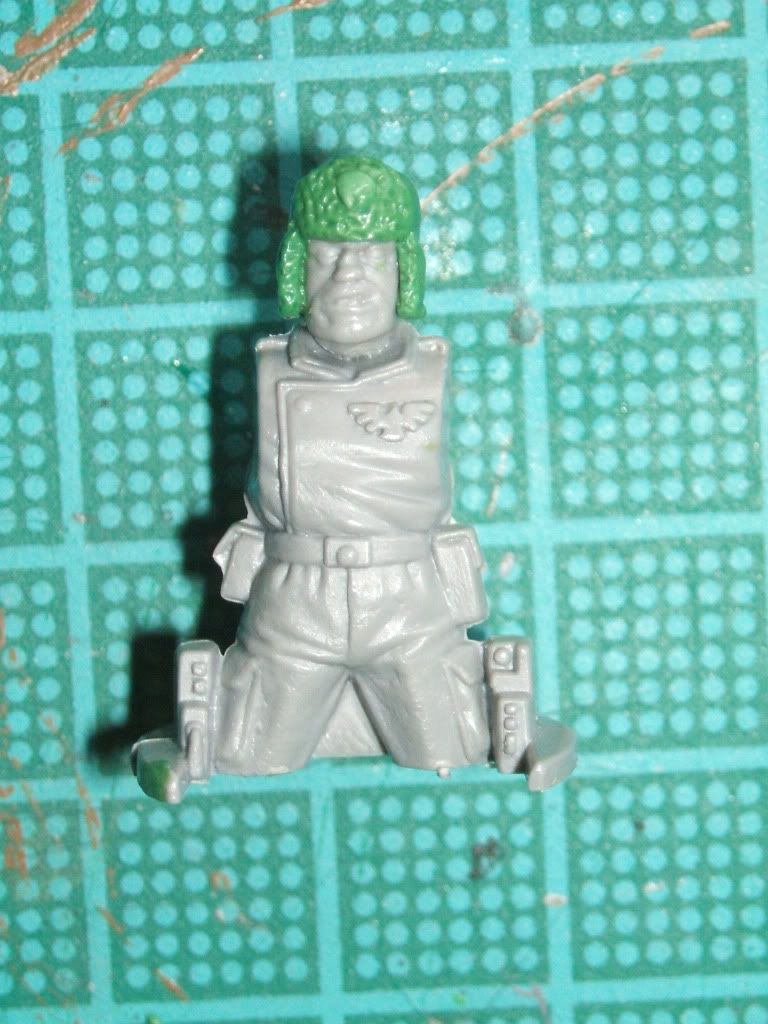
The eye, nose and teeth were then defined with the tip of the sculpting tool and a scapel blade, again applying these with great care so as not too caused too much pressure.
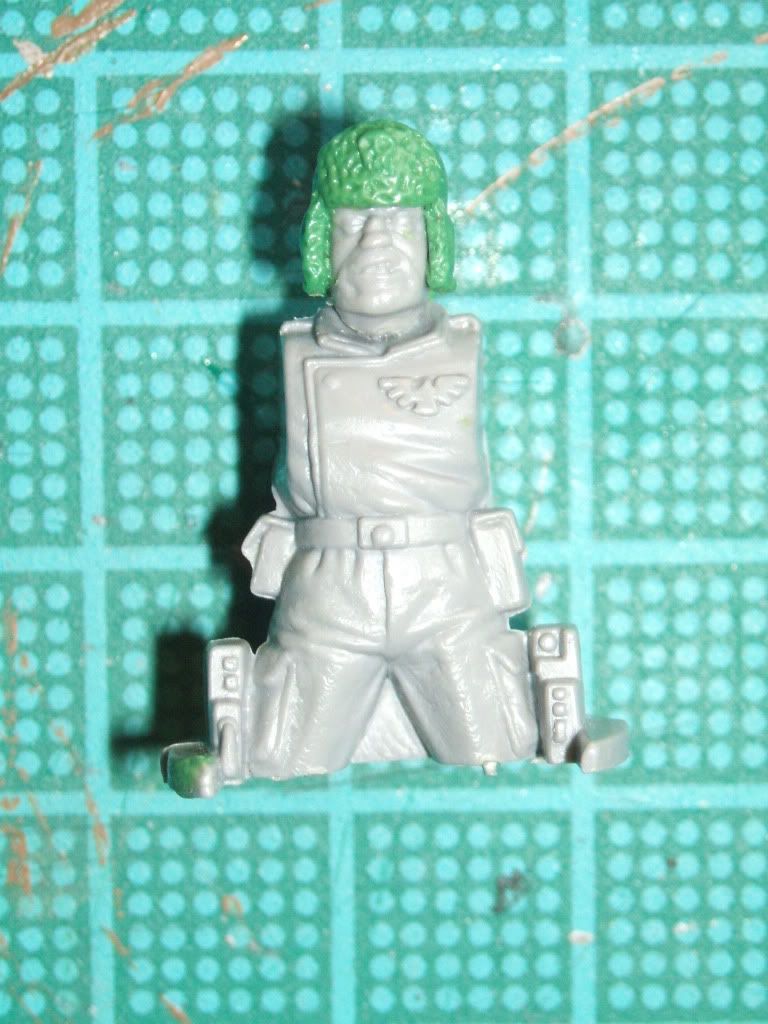
Job done, it looks a little odd without the greatcoat but I think it's a fairly simple way to achieve a reasonable effect which could be improved upon with a little more time spent on it.
Friday, 29 May 2009
Tutorial - Sculpting Mordian Style Caps
Since I posted the Pith Helmet Tutorial (and I must admit before then as well), I've been asked on a number of occasions about how best to sculpt a Mordian style cap, now I've always oblieged, but in a confessional mood I've never actually tried the method I've suggested - since I've simply never had the need to sculpt one. Hence this new tutorial, firstly to better show what in theory I think is a good way to do the cap's, and secondly to have a go at it myself.
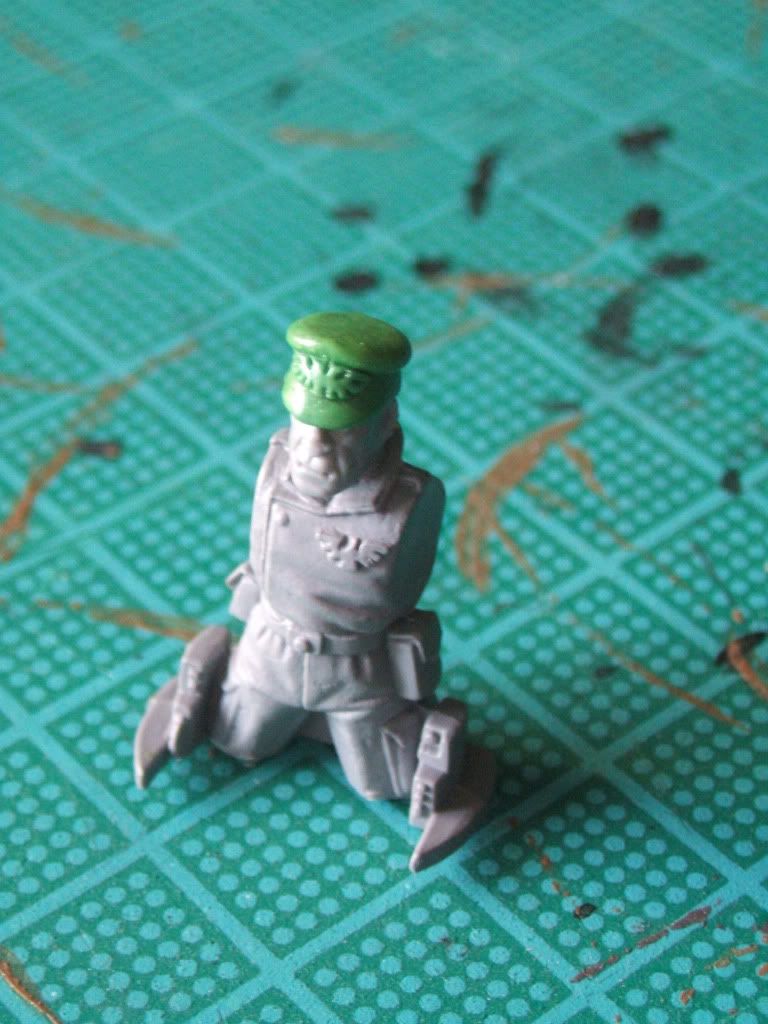
My approach to doing a Mordian Cap is too break it down into it's constituent parts, this is in my mind a good way to tackle most simple forms, using the picture below you can roughly break the cap down into four components which will make it far easier for sculpting. The first is the main part of the cap itself, next is the upper rim, then the brim and finally the aquilla. Each of these is a simple form which can be sculpted in four different stages so as not to risk undoing work done on another part of the cap, though thats certainly not to say it's not possible to do it in fewer stages, once the main 'cylinder' is done I believe it would be possible to do the rest in one go with a little care.

As ever we start with our subject, today it'll be a Catachan. He's not ideal and I've not spent any time as such preparing him, simply trimming away his bandana, hence the head itself is a little rough. At least we should be able to prove that being a 'baby ogryn' is no excuse for being a scruff!

Firstly a cylinder is placed on the head, in this case I rolled a small sausage wrapping it around the top of the head and then shaping it as desired, if more preperation was done and the top of the head for example trimmed or removed a small ball of putty squashed downwards would also work. This cylinder is then left to cure, something I think is fairly essential to do the cap this way. Once cured I cut it down to a more appropriate height.

The next step was to add the upper rim. I started with a small ball of putty which was flattened evenly over the top of the cylinder, the edges were then pushed over and rounded off. It's worth noting that the front of the rim on the Mordian range has a slight rise, this is easily achieveable either by not pushing the rim down so much when rounding the edge off or pushing it upwards gently with a clay shaper once the whole rim is rounded.

Once the rim had also cured I added the brim, this was formed from a small sausage of putty wrapped around the front and then shaped and pressed to fit, excess puty was removed scraping and the cutting downwards, with any left overs in the recesses removed with a pin. The brim was then also left to cure.
Finally the Aquilla was added, a simple trianglular shape was pressed flat against the cylinder and then the detail pressed in with the tip of a scapel blade.
And so you have it, one finished Mordian style Cap.

My approach to doing a Mordian Cap is too break it down into it's constituent parts, this is in my mind a good way to tackle most simple forms, using the picture below you can roughly break the cap down into four components which will make it far easier for sculpting. The first is the main part of the cap itself, next is the upper rim, then the brim and finally the aquilla. Each of these is a simple form which can be sculpted in four different stages so as not to risk undoing work done on another part of the cap, though thats certainly not to say it's not possible to do it in fewer stages, once the main 'cylinder' is done I believe it would be possible to do the rest in one go with a little care.
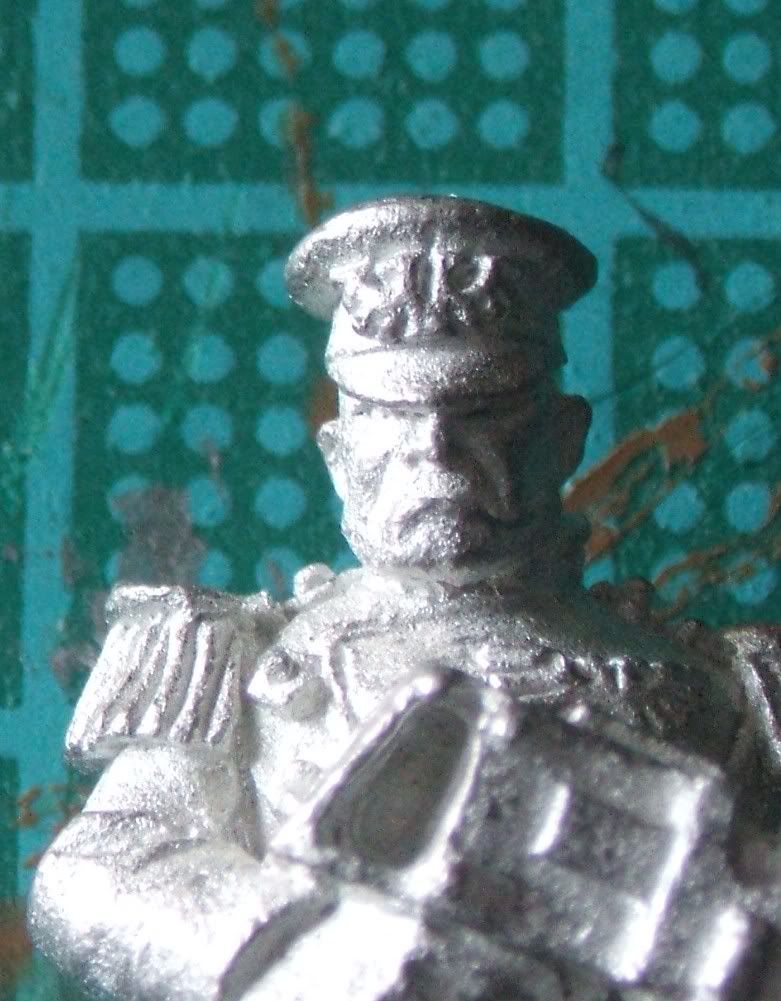
As ever we start with our subject, today it'll be a Catachan. He's not ideal and I've not spent any time as such preparing him, simply trimming away his bandana, hence the head itself is a little rough. At least we should be able to prove that being a 'baby ogryn' is no excuse for being a scruff!
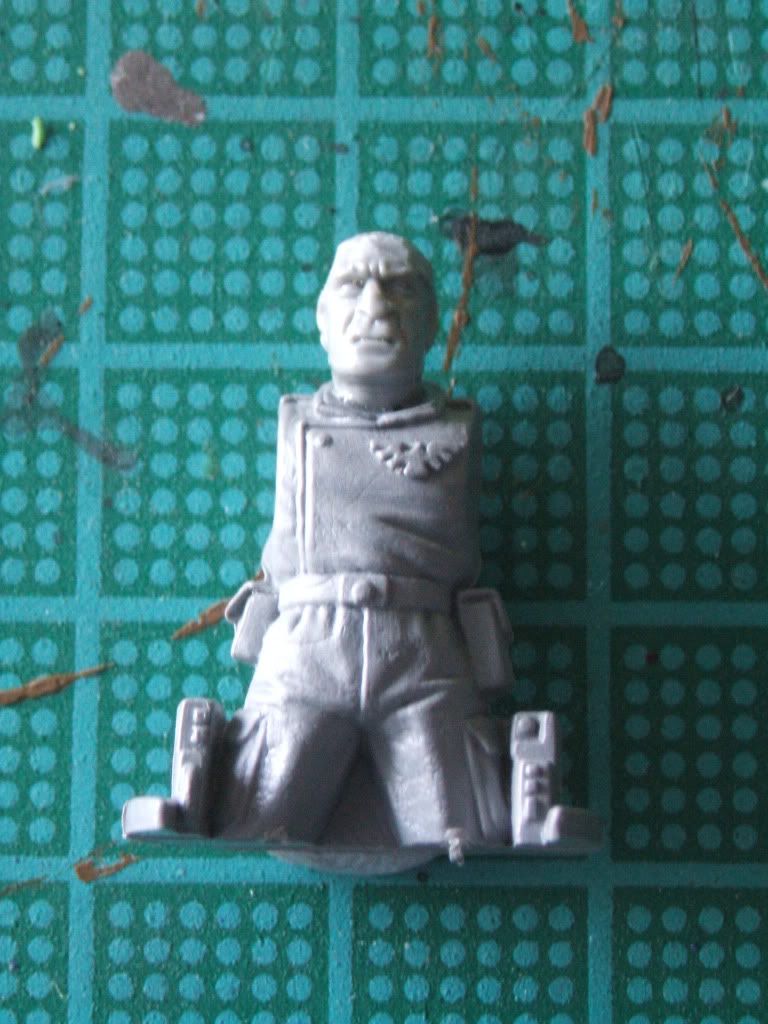
Firstly a cylinder is placed on the head, in this case I rolled a small sausage wrapping it around the top of the head and then shaping it as desired, if more preperation was done and the top of the head for example trimmed or removed a small ball of putty squashed downwards would also work. This cylinder is then left to cure, something I think is fairly essential to do the cap this way. Once cured I cut it down to a more appropriate height.

The next step was to add the upper rim. I started with a small ball of putty which was flattened evenly over the top of the cylinder, the edges were then pushed over and rounded off. It's worth noting that the front of the rim on the Mordian range has a slight rise, this is easily achieveable either by not pushing the rim down so much when rounding the edge off or pushing it upwards gently with a clay shaper once the whole rim is rounded.
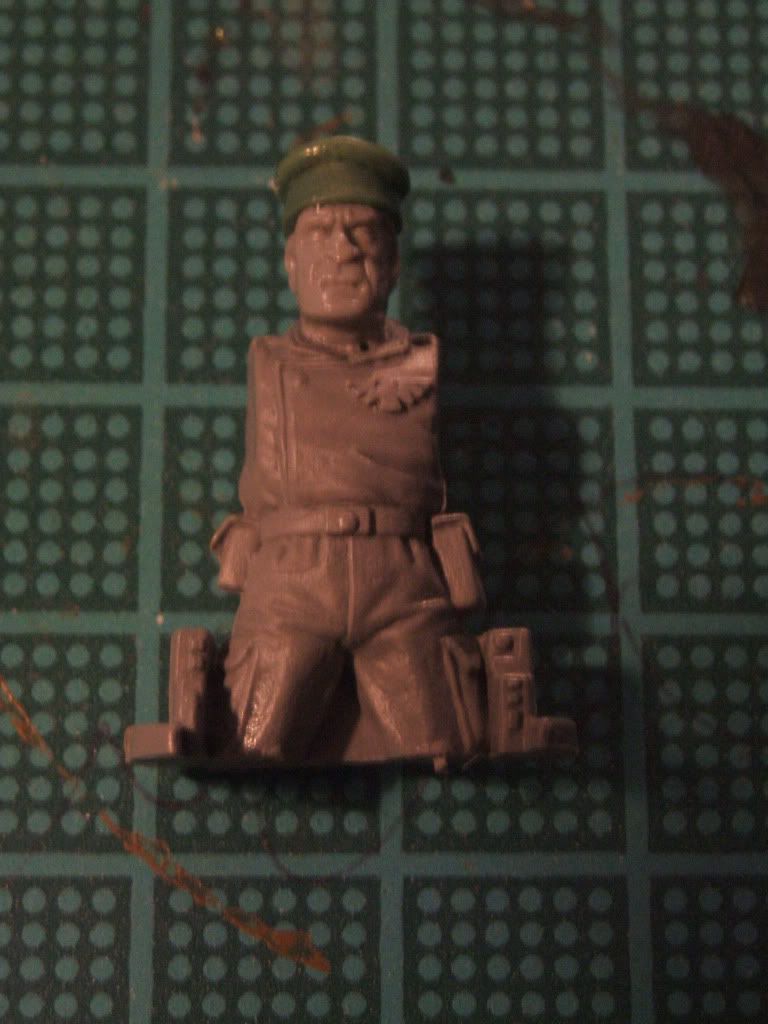
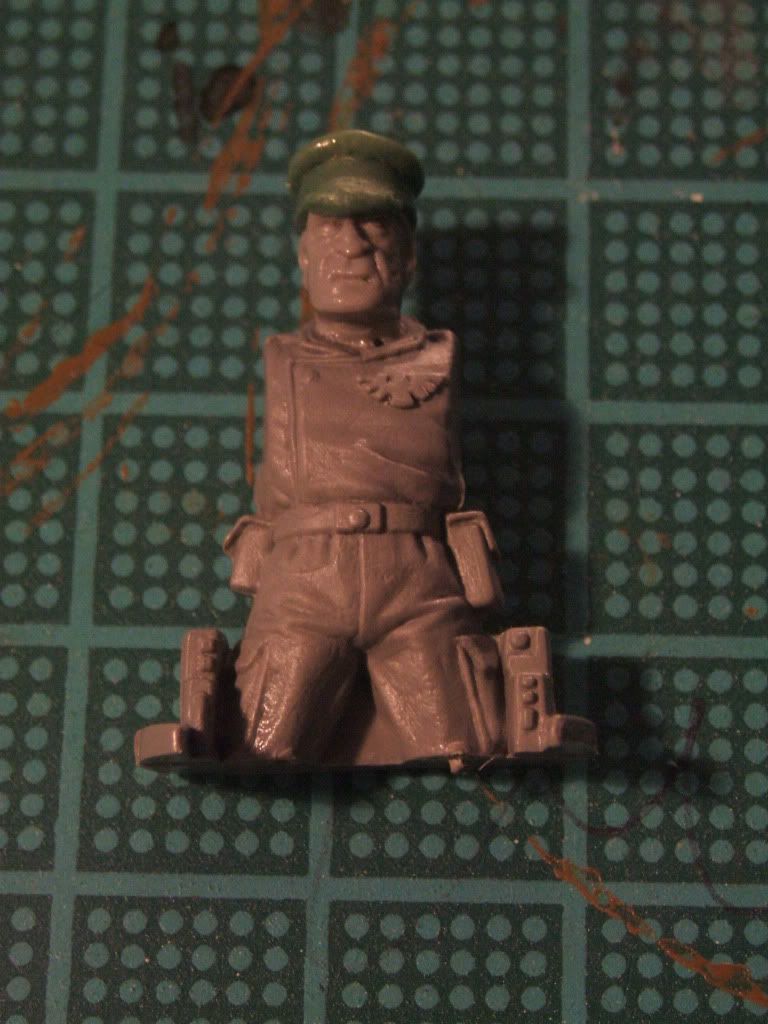
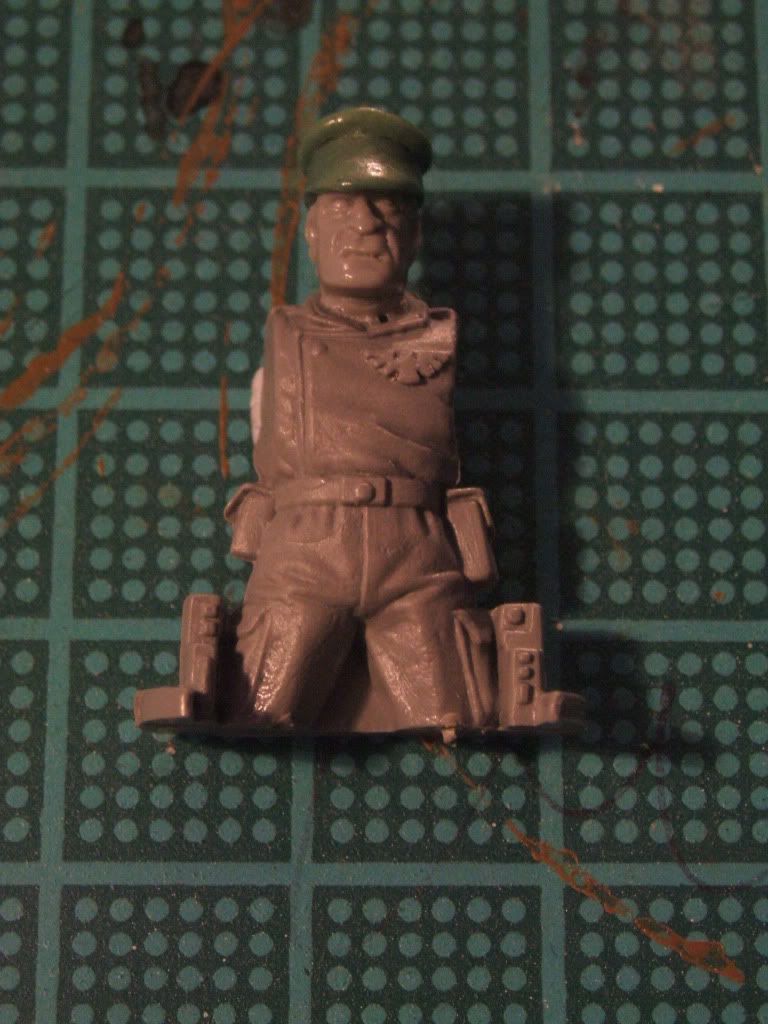
Once the rim had also cured I added the brim, this was formed from a small sausage of putty wrapped around the front and then shaped and pressed to fit, excess puty was removed scraping and the cutting downwards, with any left overs in the recesses removed with a pin. The brim was then also left to cure.
  |
Finally the Aquilla was added, a simple trianglular shape was pressed flat against the cylinder and then the detail pressed in with the tip of a scapel blade.
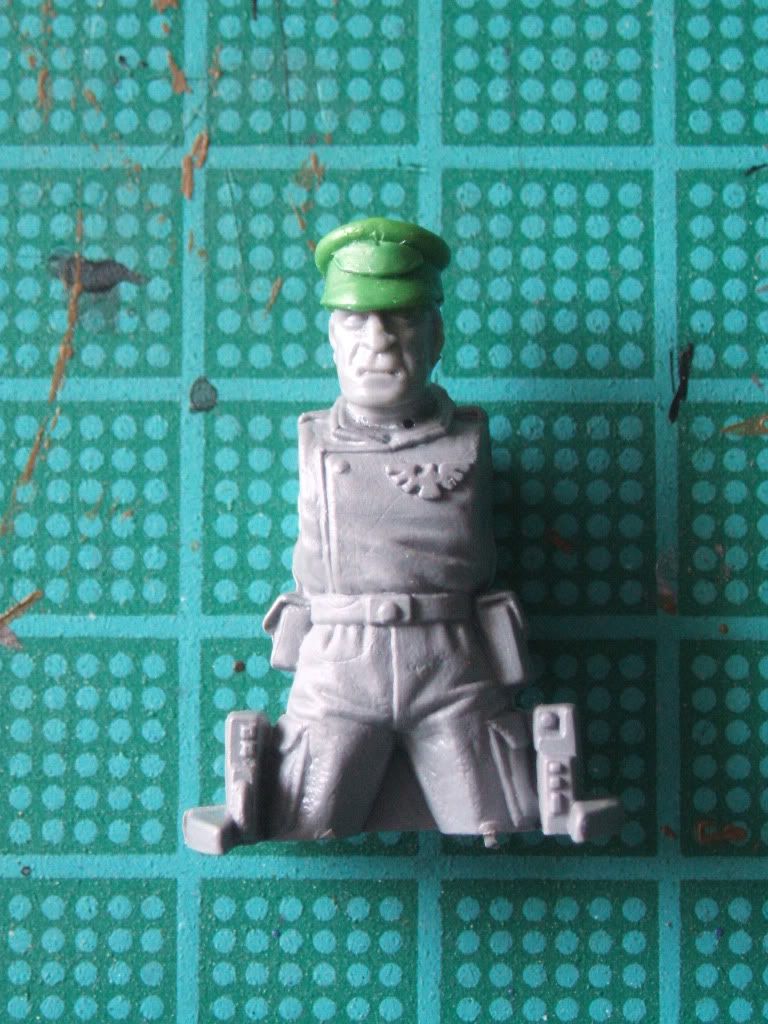 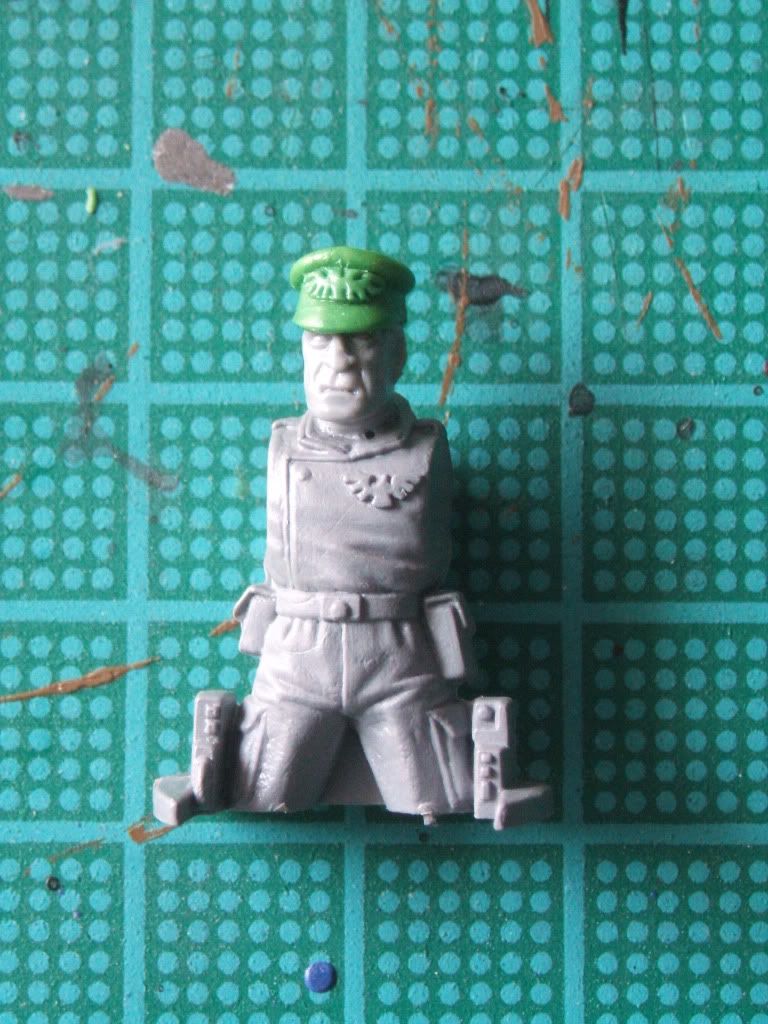 |
And so you have it, one finished Mordian style Cap.
Saturday, 23 May 2009
Tutorial - Sculpting Pith Helmets
Disclaimer - There are plenty of better sculptors out there, and I'm sure many of them would advocate different and quite possibly better ways of tackling projects then I currently do. I'd encourage anyone considering doing any sculpting to browse around and do your homework before tackling a project.
Also if anyone wants to add any suggestions to the tutorial please do comment with any tips, suggestions, criticisms etc, all would be most welcome.
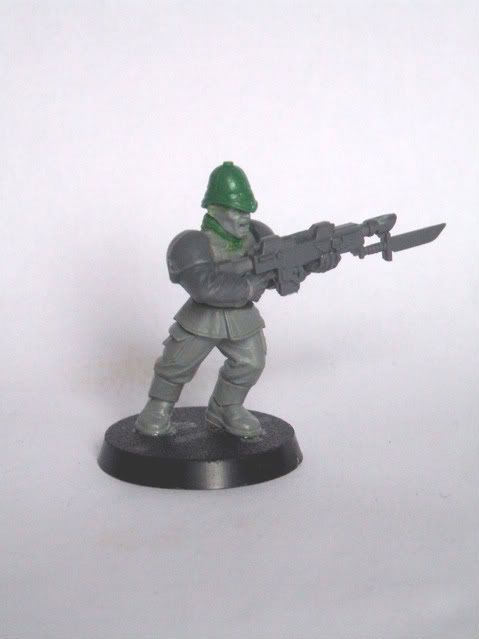
There has been a lot of interest following the new Guard Codex in how you could create your own Praetorian styled Guardsmen, part of this I've covered previously with adding Epaulettes to a model, in this tutorial I'll cover how I sculpt the most distinctive feature of Praetorian Guardsmen, the Pith Helmet.
To start with you'll need your subject, in this case I'm using the Cadian Sergeant head, slightly modified in advance removing the Mic on one side and giving him an ear instead.

You'll then need a blob of greenstuff, the closer you can get to the amount of putty you'll need the easier the work will be in this case, you don't want to be removing too much, but you don't want to be adding any during the sculpt either ideally, for a Cadian sized head such as this I've found a ball slightly smaller then 4mm in diameter to be about right. Taking this and applying it to the head you can form a rough shape.

This you can gradually work on getting the desired shape (it helps to have a model with a Pith Helmet - or if your like me a real Pith Helmet to use as a reference!), I find it easier to work front to back, moving any excess putty to the neck from where it can be removed.

It will take some practice, but eventually you'll get the basic shape finished, though I would add at this stage I don't try to finish the front brim leaving this until later. Using something like a flat headed clayshaper to get a smooth finish if you've not been using such a tool already. It's also worth noting that its very easy to end up with the putty starting to cure before you've finished this stage early on so dont be dishearted if your first few attempts don't work out, put it down to experience and try again later.

Your next stage is too put in the seams I find the easiest way to do this is by taking it in three stages. Firstly I use the length of a scalpel blade to lightly mark where the seams will go, then using the thin edge of a sculpting tool I gently press these seams in deeper correcting any mistakes in the scalpel line. Finally I use the flat headed clay shaper again to smooth the edges and push them inward to ensure the lines are straight and where they cross that there is a smooth transition.
Using this method I do the seam around the edge of the base first, then the lower horizontal band which merge with the base seam at their highest point, this acts as a guide to the upper horizontal band which I put in 1-2mm higher, the vertical bands follow last of all.
Hopefully you'll then have a piece looking something like this.
Once this has cured in the final stage I add the button to the top and work on the front brim, as this is at a slight angle I personally find it easier to add it now rather then too try an do the whole sculpt in one go and risk undoing work done on the rest of the helmet, though it certainly is possible to do it all in one go.
And so we have one finished Pith Helmet.

Also if anyone wants to add any suggestions to the tutorial please do comment with any tips, suggestions, criticisms etc, all would be most welcome.
There has been a lot of interest following the new Guard Codex in how you could create your own Praetorian styled Guardsmen, part of this I've covered previously with adding Epaulettes to a model, in this tutorial I'll cover how I sculpt the most distinctive feature of Praetorian Guardsmen, the Pith Helmet.
To start with you'll need your subject, in this case I'm using the Cadian Sergeant head, slightly modified in advance removing the Mic on one side and giving him an ear instead.
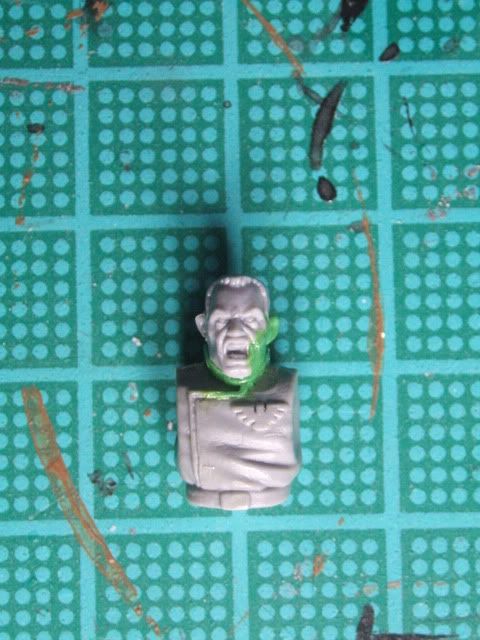
You'll then need a blob of greenstuff, the closer you can get to the amount of putty you'll need the easier the work will be in this case, you don't want to be removing too much, but you don't want to be adding any during the sculpt either ideally, for a Cadian sized head such as this I've found a ball slightly smaller then 4mm in diameter to be about right. Taking this and applying it to the head you can form a rough shape.
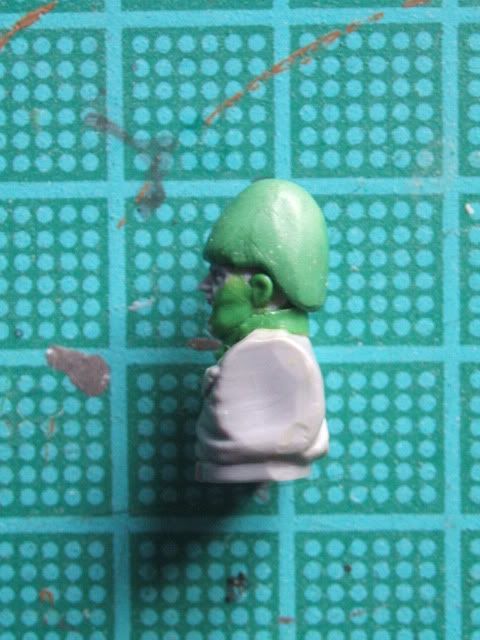
This you can gradually work on getting the desired shape (it helps to have a model with a Pith Helmet - or if your like me a real Pith Helmet to use as a reference!), I find it easier to work front to back, moving any excess putty to the neck from where it can be removed.
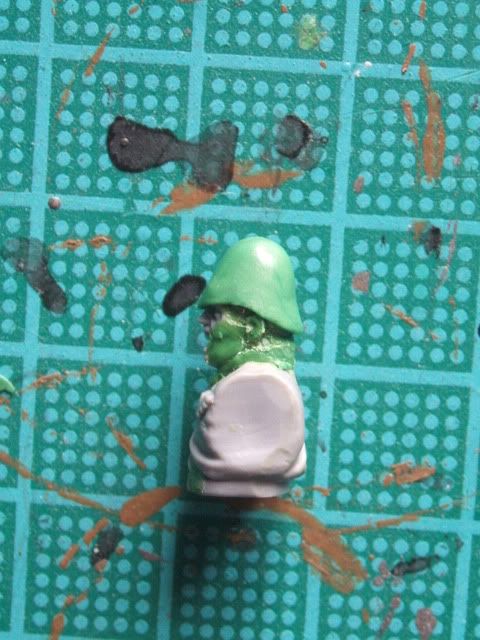
It will take some practice, but eventually you'll get the basic shape finished, though I would add at this stage I don't try to finish the front brim leaving this until later. Using something like a flat headed clayshaper to get a smooth finish if you've not been using such a tool already. It's also worth noting that its very easy to end up with the putty starting to cure before you've finished this stage early on so dont be dishearted if your first few attempts don't work out, put it down to experience and try again later.
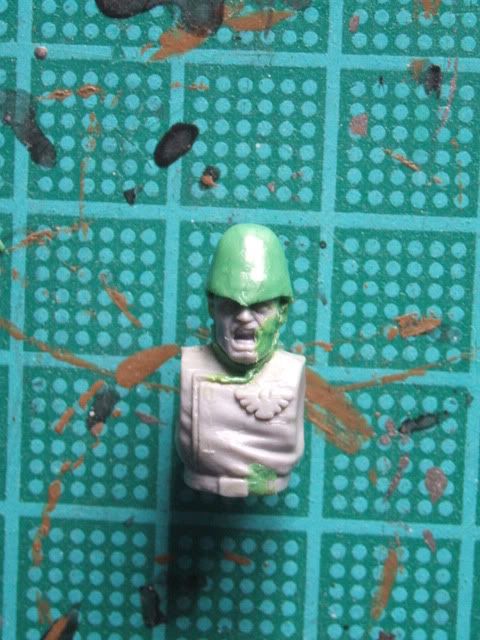
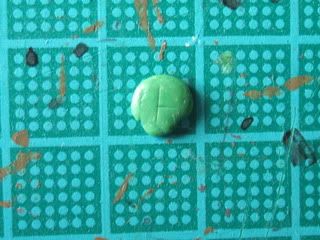
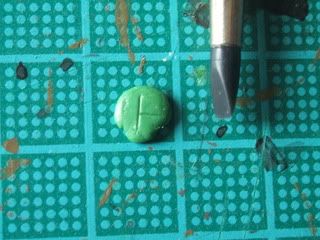
Your next stage is too put in the seams I find the easiest way to do this is by taking it in three stages. Firstly I use the length of a scalpel blade to lightly mark where the seams will go, then using the thin edge of a sculpting tool I gently press these seams in deeper correcting any mistakes in the scalpel line. Finally I use the flat headed clay shaper again to smooth the edges and push them inward to ensure the lines are straight and where they cross that there is a smooth transition.
Using this method I do the seam around the edge of the base first, then the lower horizontal band which merge with the base seam at their highest point, this acts as a guide to the upper horizontal band which I put in 1-2mm higher, the vertical bands follow last of all.
   |
Hopefully you'll then have a piece looking something like this.
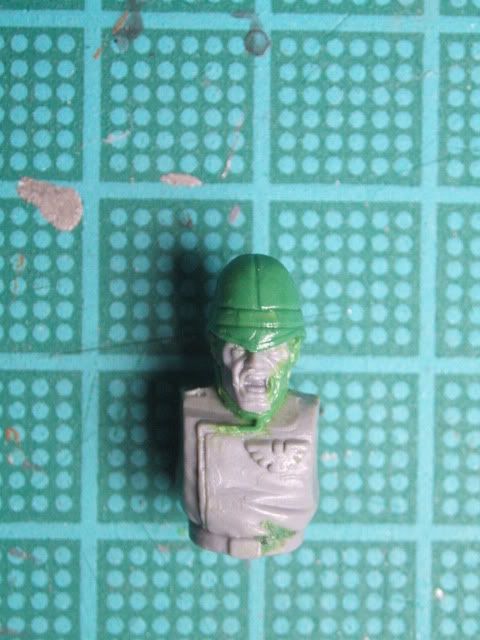 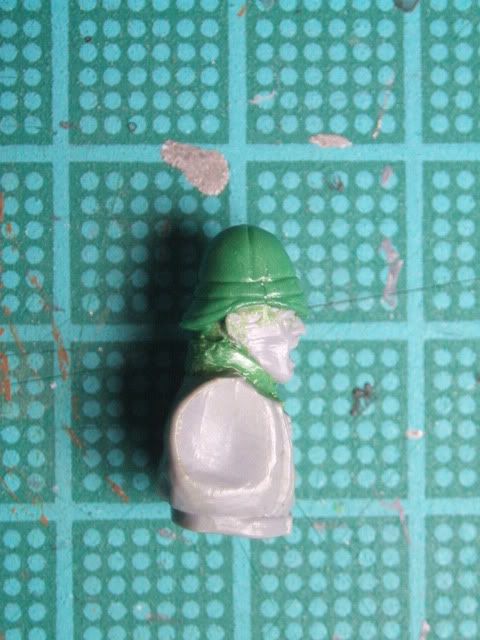 |
Once this has cured in the final stage I add the button to the top and work on the front brim, as this is at a slight angle I personally find it easier to add it now rather then too try an do the whole sculpt in one go and risk undoing work done on the rest of the helmet, though it certainly is possible to do it all in one go.
And so we have one finished Pith Helmet.
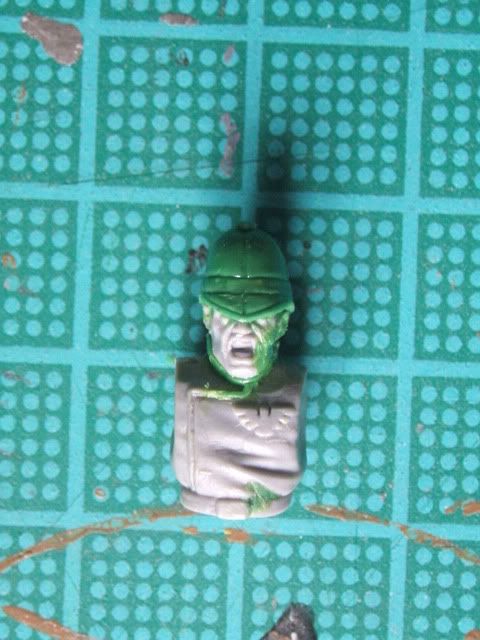 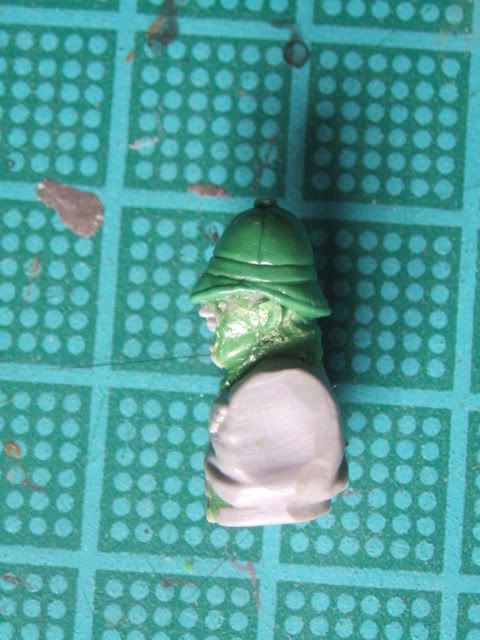 |
Saturday, 5 July 2008
Quick & Easy Minefields
Apocolypse includes the excellent Strategem 'Minefields', ideal when your facing an opponent who has to get to grips with you in assault, or an objective in your area. For a recent game against Tyranids where Imperial Forces would be defending against an endless tide of Tyranids (all the 'Troop' Tyranids would respawn in the turn immeadiately after they were destroyed) I decided it was a must have.
Without much time, but not wanting to resort to simple card markers or the like I needed an easy and quick way to model a minefield, this required something that could be used as a mine, was cheap (or free!) and plentiful. After a quick rumage in the bits box one thing jumped out at me, the small Imperial Guard Tank Wheels that anyone who's bought a few tanks will almost certainly have plenty of spares of. Too get the mine from these I simply cut the wheel down a couple of mm's in from the outside rim's edge.

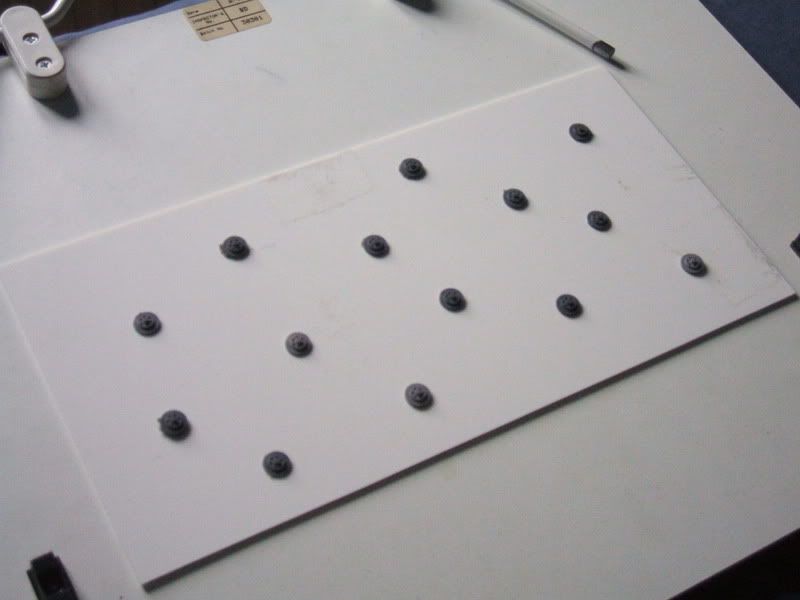
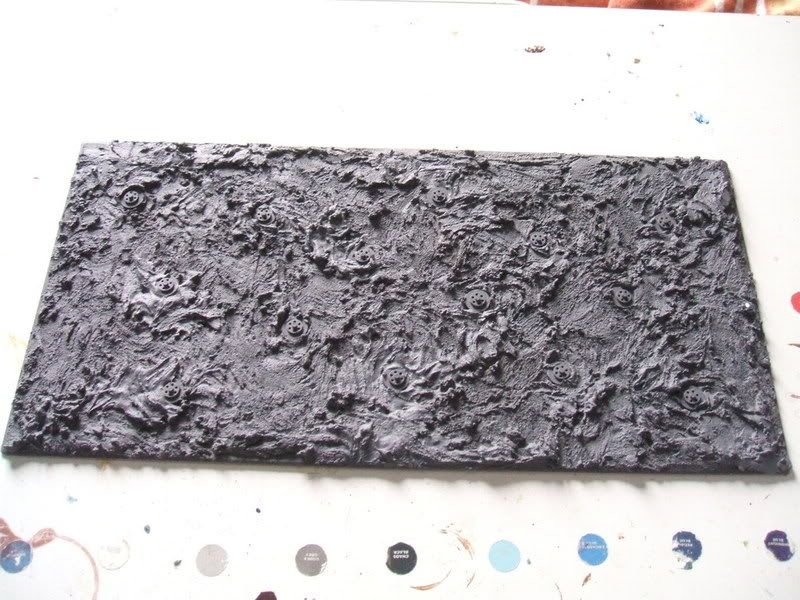
These were then spread out fairly evenly and glued down to one of three 6"x12" sections of plasticard which would act as the base, though anything sturdy would suffice, this is just what I had to hand. You could use any of the different combinations of sizes given the the minefield area in the rulebook, but I think the three 6"x12" gives the most flexibility.

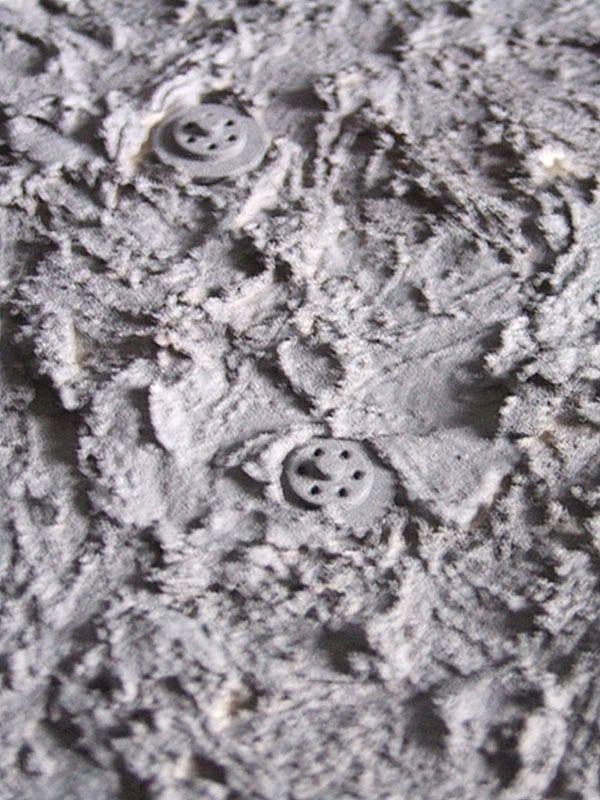
This surface was then scored using a scapel (so the material had something to grip too) and a mix of sand and ready mix plaster was added for a textured surface. You could use just sand, flock, or really go to town on the bases with added debris, craters from mines which have gone off, warning signs, barbed wire etc for a really effective look, it really depends entirely on your inclanation, time and what materials you have. I will get round to painting them eventually and will update with pictures when I have.


Without much time, but not wanting to resort to simple card markers or the like I needed an easy and quick way to model a minefield, this required something that could be used as a mine, was cheap (or free!) and plentiful. After a quick rumage in the bits box one thing jumped out at me, the small Imperial Guard Tank Wheels that anyone who's bought a few tanks will almost certainly have plenty of spares of. Too get the mine from these I simply cut the wheel down a couple of mm's in from the outside rim's edge.
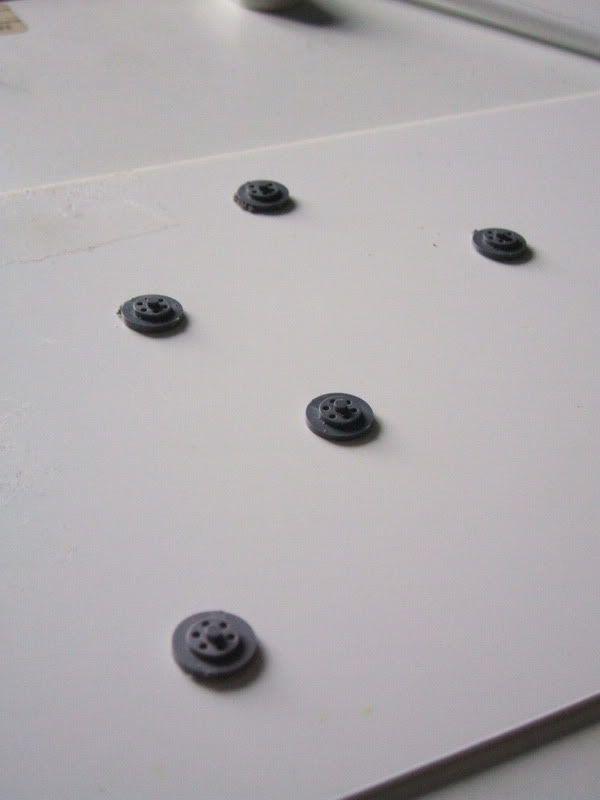
These were then spread out fairly evenly and glued down to one of three 6"x12" sections of plasticard which would act as the base, though anything sturdy would suffice, this is just what I had to hand. You could use any of the different combinations of sizes given the the minefield area in the rulebook, but I think the three 6"x12" gives the most flexibility.
This surface was then scored using a scapel (so the material had something to grip too) and a mix of sand and ready mix plaster was added for a textured surface. You could use just sand, flock, or really go to town on the bases with added debris, craters from mines which have gone off, warning signs, barbed wire etc for a really effective look, it really depends entirely on your inclanation, time and what materials you have. I will get round to painting them eventually and will update with pictures when I have.
Tuesday, 4 December 2007
Tutorial - Praetorian Plasma Gunner
Just a quick and very simple tutorial this time, there are several methods of creating convincing Praetorian Plasma Guns, at it's most complex you can remove a models lasgun and replace it with a plastic or metal Plasma Gun, at its simplist you can as I do use a plasma pistol (I use Imperial as it's the one I have available, a Chaos version works too however).
This conversion can potentially be done with a Lasgun, however I prefer to work from a Meltagun, though it makes for a larger weapon I feel it's appropriate for such a piece of kit.

I firstly snip the barrel, then making a horizontal cut along the seem of the weapon to the point where the ridge on the upper surface begins before making the vertical cut.

Next I prepare the pistol, firstly snipping the hand away cutting at an angle from the base of the grip upwards on both sides with a pair of snippers, then removing the resulting prism - alternatively a sharp scapel can be used to slice the hand away neatly including the trigger but leaving the small flask and it's mounting. The small detail on the right rear of the pistol is then removed before snipping or slicing the rear portion of the pistol off neatly where the sloping surface reaches the top.

You should now find the two components will slot together fairly neatly and can be glued in placed, if however the surfaces are not level ensure they are, center the weapon as best you can (there is a slight overhang as the Plasma Pistol is a fraction larger) making sure when glued it dries upright and not at an angle.

Finally you'll probably need a little putty to fill gaps, smoothing them over and then probably trimming a little once dry, the picture below gives an idea as to where the putty will likely be needed though I must emphasise this has not yet been trimmed and tidied. Once that is done, your ready to undercoat and paint, job done!

This conversion can potentially be done with a Lasgun, however I prefer to work from a Meltagun, though it makes for a larger weapon I feel it's appropriate for such a piece of kit.
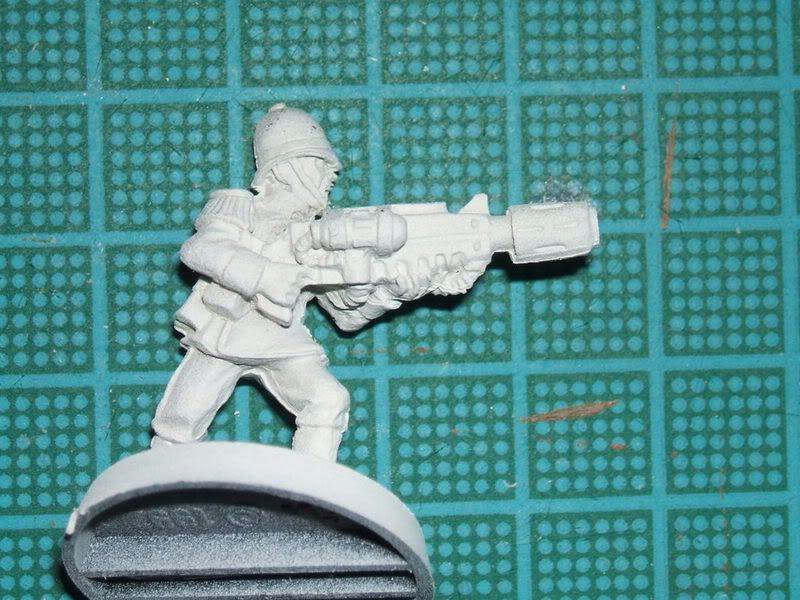
I firstly snip the barrel, then making a horizontal cut along the seem of the weapon to the point where the ridge on the upper surface begins before making the vertical cut.
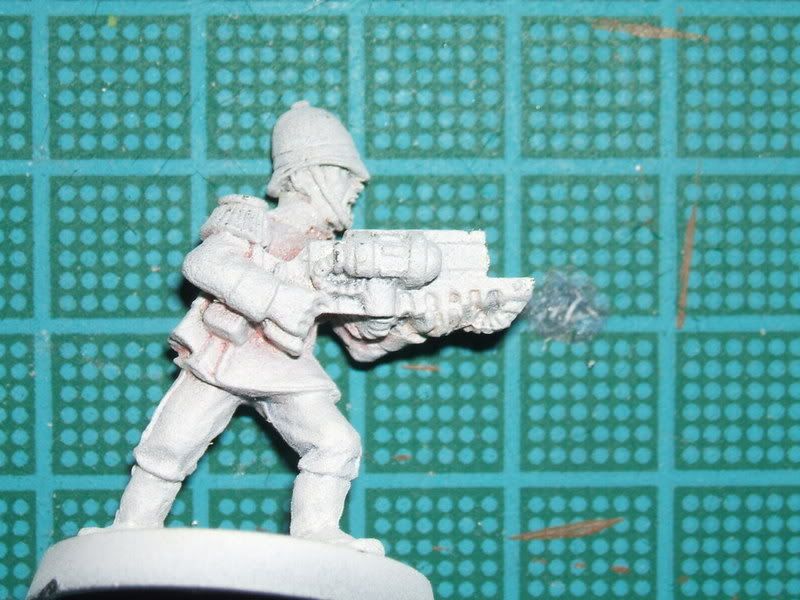
Next I prepare the pistol, firstly snipping the hand away cutting at an angle from the base of the grip upwards on both sides with a pair of snippers, then removing the resulting prism - alternatively a sharp scapel can be used to slice the hand away neatly including the trigger but leaving the small flask and it's mounting. The small detail on the right rear of the pistol is then removed before snipping or slicing the rear portion of the pistol off neatly where the sloping surface reaches the top.
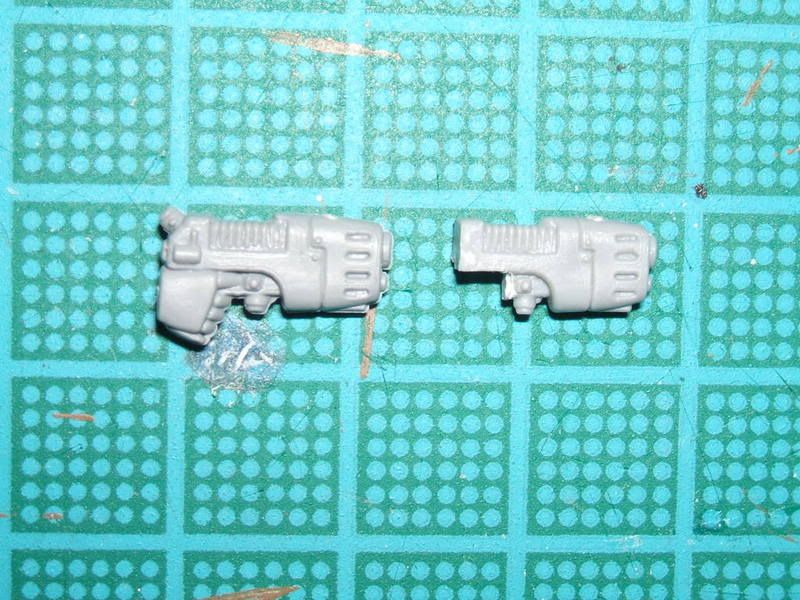
You should now find the two components will slot together fairly neatly and can be glued in placed, if however the surfaces are not level ensure they are, center the weapon as best you can (there is a slight overhang as the Plasma Pistol is a fraction larger) making sure when glued it dries upright and not at an angle.
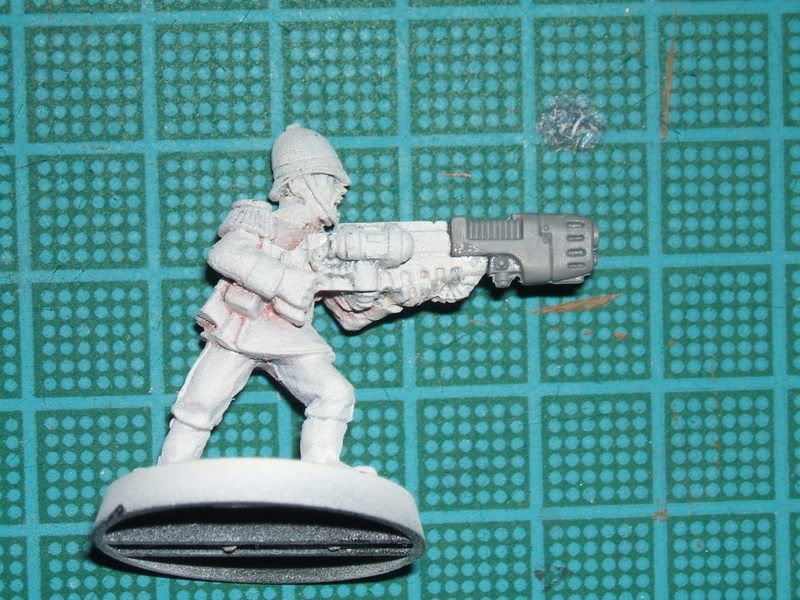
Finally you'll probably need a little putty to fill gaps, smoothing them over and then probably trimming a little once dry, the picture below gives an idea as to where the putty will likely be needed though I must emphasise this has not yet been trimmed and tidied. Once that is done, your ready to undercoat and paint, job done!

Tuesday, 27 November 2007
Tutorial - Simple Epualettes
Disclaimer - There are plenty of better sculptors out there, and I'm sure many of them would advocate different and quite possibly better ways of tackling projects then I currently do. I'd encourage anyone considering doing any sculpting to browse around and do your homework before tackling a project.
Also if anyone wants to add any suggestions to the tutorial please do comment with any tips, suggestions, criticisms etc, all would be most welcome.
1 - Stage one is to prepare the arm and shoulder your working on, the main reason for this in my book is to help when it comes to deciding how the braid will hang, in my example it's strait down, but you may have an arm raised which would perhaps cause the braid to lie at an angle partially or completely.
Doing it this way is also far easier in my opinion when it comes to putting folds in fabric beneath the epualettes if these are present as doing it after may result is the fabric ending up rather to much on top of the braiding or simply thicker in places and thinner in others.

2 - Once the surface is completely finished and cured roll up a sausage of putty, this can be formed into a horse shoe shape and placed around the shoulder.

3 - This horse shoe can then be smoothed out down the shoulder, the bottom and sides trimmed into shape, this is the basis of the braid. You can adjust it later on but it's easiest to get the lay of the shape now.

4 - You can then rough out the way the braiding falls using the tip of a scapel blade, remember at all times the effect of gravity! Try to keep the widths even where possible. However that said each strip can potentially cross, get tangled etc, this involves a little more work and should probably be saved for once you feel more confident. If you make a mistake however dont worry, this is just a rough go at it so to speak, and can be tidied in the next stage.

5 - Now you can go over your rough version widening the gap, using either a thin sculpting tool or a scapel again. This is the most important stage, remember you dont want squared edges rather slightly rounded, so dont be afraid to wiggle your tool a tiny amount. This can extend to the bottom of the braiding, doing so allows you to also put in a little more movement to the braid, having the whole lot slanting towards or away from the torso a little as desired.
If you have excess putty try an shift it upwards but dont try an remove it now, wait until it's cured to avoid ruining your work, put the piece aside for the full curing time and then leave a little extra before moving to the next stage.

6 - Having trimmed any excess putty so the top of the shoulder is flat with a scapel (at whatever angle the epualette will be), roll a little ball placing it centrally on top of the braided shoulder, then carefully flatten out the ball across the surface, you'll want at least some overhang however.


7 - Rather then trying to build a rim up, I find it easier to take the center or this disk down, this can be done with careful downward pressure to create a indentation which is of equal depth and border. It'll likely take a few attempts before you get the hang of this so be prepared to pull the disk off and start again if needs be. Allow it too cure fully again.

8 - Next take a tiny sausage shape, this can be pressed and squared to finish the epualette. And yes, thats about it I guess! Hopefully you'll now have something which looks something like this.


Also if anyone wants to add any suggestions to the tutorial please do comment with any tips, suggestions, criticisms etc, all would be most welcome.
1 - Stage one is to prepare the arm and shoulder your working on, the main reason for this in my book is to help when it comes to deciding how the braid will hang, in my example it's strait down, but you may have an arm raised which would perhaps cause the braid to lie at an angle partially or completely.
Doing it this way is also far easier in my opinion when it comes to putting folds in fabric beneath the epualettes if these are present as doing it after may result is the fabric ending up rather to much on top of the braiding or simply thicker in places and thinner in others.

2 - Once the surface is completely finished and cured roll up a sausage of putty, this can be formed into a horse shoe shape and placed around the shoulder.

3 - This horse shoe can then be smoothed out down the shoulder, the bottom and sides trimmed into shape, this is the basis of the braid. You can adjust it later on but it's easiest to get the lay of the shape now.

4 - You can then rough out the way the braiding falls using the tip of a scapel blade, remember at all times the effect of gravity! Try to keep the widths even where possible. However that said each strip can potentially cross, get tangled etc, this involves a little more work and should probably be saved for once you feel more confident. If you make a mistake however dont worry, this is just a rough go at it so to speak, and can be tidied in the next stage.

5 - Now you can go over your rough version widening the gap, using either a thin sculpting tool or a scapel again. This is the most important stage, remember you dont want squared edges rather slightly rounded, so dont be afraid to wiggle your tool a tiny amount. This can extend to the bottom of the braiding, doing so allows you to also put in a little more movement to the braid, having the whole lot slanting towards or away from the torso a little as desired.
If you have excess putty try an shift it upwards but dont try an remove it now, wait until it's cured to avoid ruining your work, put the piece aside for the full curing time and then leave a little extra before moving to the next stage.

6 - Having trimmed any excess putty so the top of the shoulder is flat with a scapel (at whatever angle the epualette will be), roll a little ball placing it centrally on top of the braided shoulder, then carefully flatten out the ball across the surface, you'll want at least some overhang however.


7 - Rather then trying to build a rim up, I find it easier to take the center or this disk down, this can be done with careful downward pressure to create a indentation which is of equal depth and border. It'll likely take a few attempts before you get the hang of this so be prepared to pull the disk off and start again if needs be. Allow it too cure fully again.

8 - Next take a tiny sausage shape, this can be pressed and squared to finish the epualette. And yes, thats about it I guess! Hopefully you'll now have something which looks something like this.


Subscribe to:
Posts (Atom)