
Also if anyone wants to add any suggestions to the tutorial please do comment with any tips, suggestions, criticisms etc, all would be most welcome.
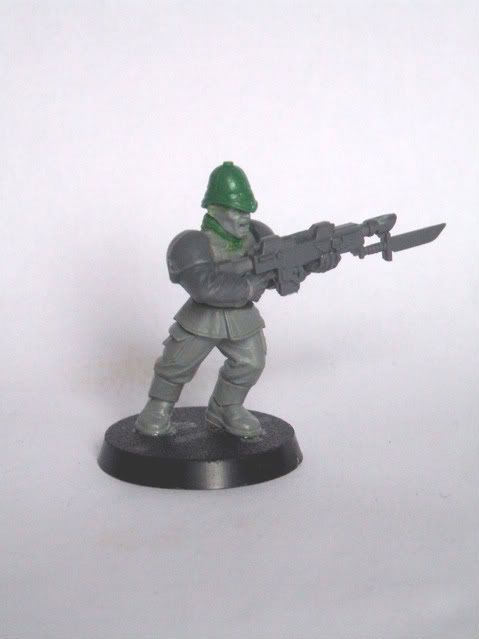
There has been a lot of interest following the new Guard Codex in how you could create your own Praetorian styled Guardsmen, part of this I've covered previously with adding Epaulettes to a model, in this tutorial I'll cover how I sculpt the most distinctive feature of Praetorian Guardsmen, the Pith Helmet.
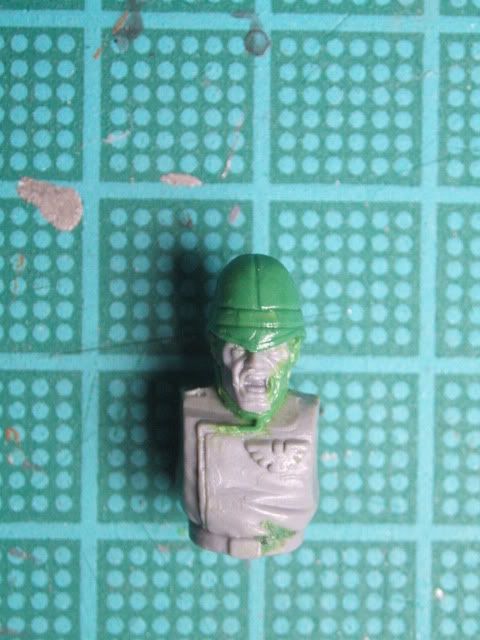
To start with you'll need your subject, in this case I'm using the Cadian Sergeant head, slightly modified in advance removing the Mic on one side and giving him an ear instead.
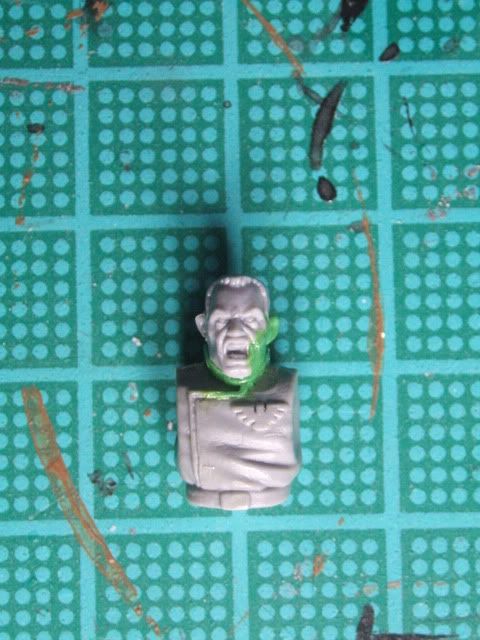
You'll then need a blob of greenstuff, the closer you can get to the amount of putty you'll need the easier the work will be in this case, you don't want to be removing too much, but you don't want to be adding any during the sculpt either ideally, for a Cadian sized head such as this I've found a ball slightly smaller then 4mm in diameter to be about right. Taking this and applying it to the head you can form a rough shape.
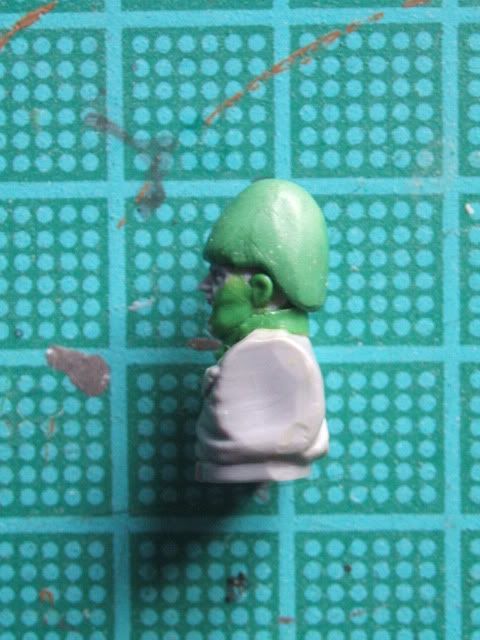
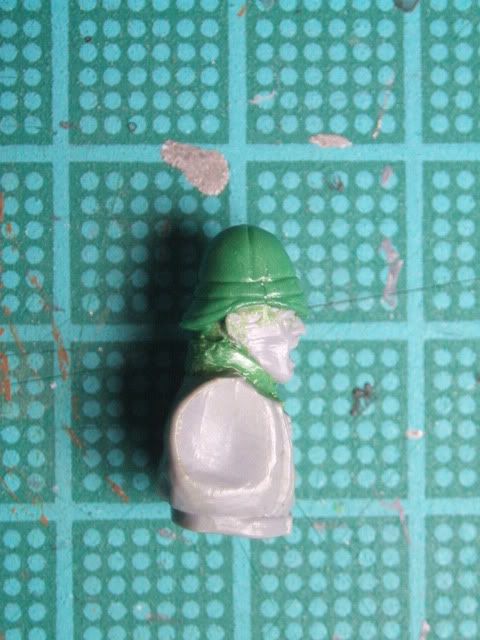
This you can gradually work on getting the desired shape (it helps to have a model with a Pith Helmet - or if your like me a real Pith Helmet to use as a reference!), I find it easier to work front to back, moving any excess putty to the neck from where it can be removed.
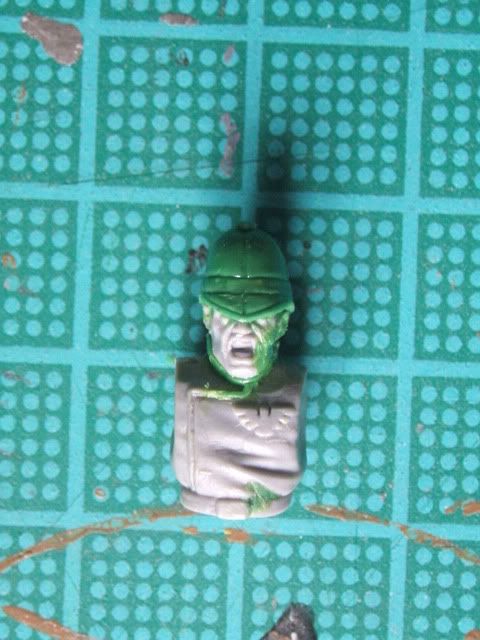
It will take some practice, but eventually you'll get the basic shape finished, though I would add at this stage I don't try to finish the front brim leaving this until later. Using something like a flat headed clayshaper to get a smooth finish if you've not been using such a tool already. It's also worth noting that its very easy to end up with the putty starting to cure before you've finished this stage early on so dont be dishearted if your first few attempts don't work out, put it down to experience and try again later.
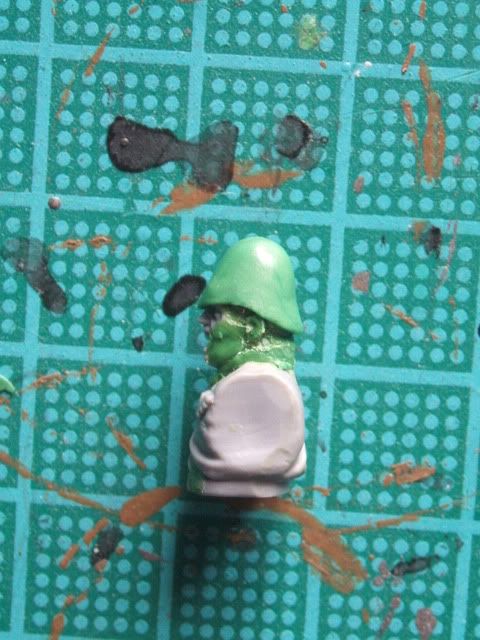
Your next stage is too put in the seams I find the easiest way to do this is by taking it in three stages. Firstly I use the length of a scalpel blade to lightly mark where the seams will go, then using the thin edge of a sculpting tool I gently press these seams in deeper correcting any mistakes in the scalpel line. Finally I use the flat headed clay shaper again to smooth the edges and push them inward to ensure the lines are straight and where they cross that there is a smooth transition.
Using this method I do the seam around the edge of the base first, then the lower horizontal band which merge with the base seam at their highest point, this acts as a guide to the upper horizontal band which I put in 1-2mm higher, the vertical bands follow last of all.
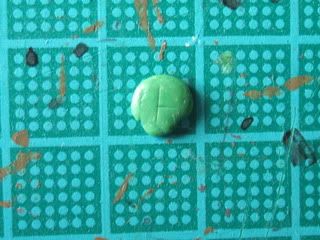   |
Hopefully you'll then have a piece looking something like this.
  |
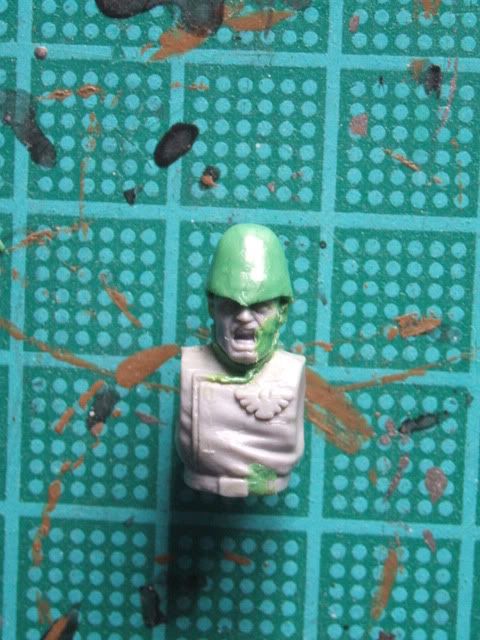
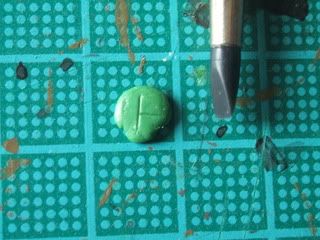
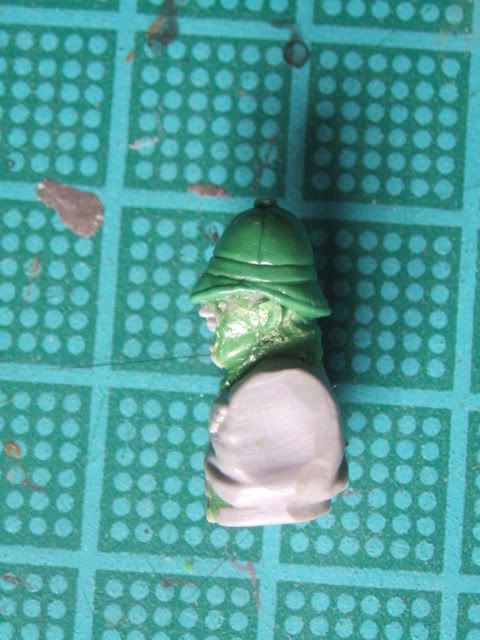
Once this has cured in the final stage I add the button to the top and work on the front brim, as this is at a slight angle I personally find it easier to add it now rather then too try an do the whole sculpt in one go and risk undoing work done on the rest of the helmet, though it certainly is possible to do it all in one go.
And so we have one finished Pith Helmet.
  |
12 comments:
Great tutorial. While I understand your disclaimer, I think are better than you think you are with sculpting. My hat's (or pith helmet) off to you sir!
an excellent tutorial. I am struggling myself with personalizing my guard and my work has ground to a complete halt because of it.
Your stuff looks very inspiring
Mike at SCW
Dude com off it... Im with the Geek, you're being way too modest here. Great tutorial, though I have no use for it whatsoever I still wanted to read it just because I like your sculpting a lot!!
Great (green) stuff! Like others have said, your skills deserve a little more self-respect. The helmet really looks good. I'm sure when it gets painted up, it would look quite seamless.
Thanks guys, I hope the tutorial comes in handy at some point :)
I guess the disclaimer is not really needed, I just find myself looking at things like this...
http://trollsforge.com/workbench/alienworm1.jpg
...which kinda speaks for itself. ;)
That said, I do stand by always looking around for other methods and tutorials, one thing I've definately found is what works for one person might not work for another, researching different methods really can pay off.
Great tutorial mate! Your greenstuff work is very good - don't be too hard on yourself!
Reading your disclaimer I was prepared for a very basic looking helmet, but looking at the final result, you nailed it dead on. Great job.
It is this kinda work that inspires me to get working on my GS again! Great tutorial there and I agree with the rest, you're a better sculptor than you think!
Again, great job!
Thank you for the instructions this was a great tutorial. You are a fantastic sculptor. When I have accumilated enough of the lads I will send you some pictures as well. Thanks again.
Mahalo from hawaii.
Thanks guys!
Mahalo I look forward to seeing some pics, drop me an email or feel free to psot them here!
Thank you for the link, Col.Gravis. I actually ordered some of the Praetorian heads from Secret Weapon Miniatures a few weeks ago. It's nice to be able to see where they came from, thanks!
Congratulations, Col.Gravis! You are one of the winners in my blog's contest. Check out the details at this post so that I can send out your prizes:
http://dicerolla.blogspot.com/2010/10/good-karma-pre-heresy-winners.html
Congrats and thank you for entering.
Post a Comment