Thursday 27 December 2007

Leviathan (Part 3)

Hope everyones had a good christmas, I've been inactive the past few days eating far too much, drinking far too much and well you know how it goes!

But how with some time off it's time to crack on with the project again, the first result of that is some time spent on the Leviathan with a couple of extra panels added, some green-stuffing and plasti-card work, also turning my thoguhts towards the gun, just something to give an idea of the size I've got in mind.


I've also been working a little on my Blood Pact, and am working on the Malcador's weapons again. More updates soon.

Saturday 22 December 2007

Orks Drift

Orks Drift has been fought...

I only managed to grab a few pics, but a quick outline of the battle!

There were two zones of battle, Orks Drift itself and a clash of armour on another table, with Imperial reinforcemens trying to break through to the Drift. The Imperial Guard were in the center of a large board, with Orks able to come on from either side of them and upto about 12" from the guard deployment zone on the flanks.


The Imperial actually outnumbered the Orks significantly (lesson learnt we need more Ork players! Hopefully the new codex will help with this!), however it was'nt nearly so straight forward the Orks all benefitted from Without Number and Bodies Over Bullets as with the Apocolypse Tyranid Endless Swarm Datafax. For those not familiar with this it basicly means if an Ork unit was destroyed it came back in the following Ork turn, while when shooting at the Orks if a shooting unit rolled 5 or more 6's to hit, that shooting was discounted as the shooters run out of ammunition! Add to that numerous 'Waaaghhhs!' (and being a GW Store these were rather loud!)

The mission luckily was simple - have Guardsmen alive in the Drift defences 6 hours from the start of the game...

For the first couple of hours the Imperials held the Orks off well, keeping them from the barricades.


But not long after the brief lunch break they made it to the barricades engaging the Guard, somewhat weakened by shooting, in combat.


At this point, with a couple of hours to go the Imperial Armour successful on the other table broke through, giving the guard some much needed reinforcement - but by now the Orks aided by local Ork personalities the Waaggghh Team who revealed themselves in the middle of the Guard lines (engaging and killing Captain Caine and his Command Squad - disaster!) were well and truly pushing the Guard back.


And if that was'nt enough, with only one hour to go (a couple of turns to each side as it turned out), the GW Exeter Staff brought on nothing less then an Ork Stompa! (Okay you may look at the picture and scoff at it, but I take my hat off to the Manager Dan who knocked this thing together for around £10/$20, going from plastic bucket to operational monster in little under an hour - obviously he's a Mekboy!) It proceaded to make its presense felt (as did an Orky Baneblade as it ripped giant holes in what was left of the Imperial Guard lines.


However as the last turn finally came despite hideous losses (almost 300 Praetorians wiped out) including that of the Regimental Standard the Imperial Guard had held on as Men of Harlech played in the background (no really lol), small squad sized units, some Roughriders and even couple of tanks still fought on and with that came victory - even if we'd not have survived another turn!

Was an excellent day, an excellent game, and a real reminder how great it is to just let loose with a big themed game from time to time! If you've got the space, and the players do stop playing those 1500pt etc standard games now an again and just have a blast, it does'nt matter if its fair, as long as you have fun!

Finally just before I sign off for now - an actual project update to follow tommorrow - a quick thankyou to everyone who took part and the staff at GW Exeter, was a great game, whats next then!?!!

Monday 17 December 2007

Orks Drift - The Poor Bloody Infantry

Ah finally, so where have I been? Stripping. Um Yeah.


I've spent the past week or so stripping all my old models and those which I bought second hand and hav'nt used before of which this is the bulk, I used Acetone free nail varnish remover which really did the job with only a 24hours soak and a quick scrub (or even wash in some cases!). Then cleaning em up, finding and getting rid of all those annoying mold lines etc and finally basing. I've also since textured the bases and am in the process of undercoating them all.

The reason is of course the previously mentioned Orks Drift game which is this Saturday (22nd December) at GW Exeter, it's an all day event starting 10:30 so if your local show your face! The basis will be fought over two tables, the first will be the Guard Infantry (with the Praetorians at the center, lead by one Captain Caine) trying to hold off the Orks all day - the Orks will have sustained assault! The second table will likely have Imperial Armour rushing to reinforce the main table, trying to break through. It should be a blast!

Tuesday 4 December 2007

Tutorial - Praetorian Plasma Gunner

Just a quick and very simple tutorial this time, there are several methods of creating convincing Praetorian Plasma Guns, at it's most complex you can remove a models lasgun and replace it with a plastic or metal Plasma Gun, at its simplist you can as I do use a plasma pistol (I use Imperial as it's the one I have available, a Chaos version works too however).

This conversion can potentially be done with a Lasgun, however I prefer to work from a Meltagun, though it makes for a larger weapon I feel it's appropriate for such a piece of kit.


I firstly snip the barrel, then making a horizontal cut along the seem of the weapon to the point where the ridge on the upper surface begins before making the vertical cut.


Next I prepare the pistol, firstly snipping the hand away cutting at an angle from the base of the grip upwards on both sides with a pair of snippers, then removing the resulting prism - alternatively a sharp scapel can be used to slice the hand away neatly including the trigger but leaving the small flask and it's mounting. The small detail on the right rear of the pistol is then removed before snipping or slicing the rear portion of the pistol off neatly where the sloping surface reaches the top.


You should now find the two components will slot together fairly neatly and can be glued in placed, if however the surfaces are not level ensure they are, center the weapon as best you can (there is a slight overhang as the Plasma Pistol is a fraction larger) making sure when glued it dries upright and not at an angle.


Finally you'll probably need a little putty to fill gaps, smoothing them over and then probably trimming a little once dry, the picture below gives an idea as to where the putty will likely be needed though I must emphasise this has not yet been trimmed and tidied. Once that is done, your ready to undercoat and paint, job done!

Sunday 2 December 2007

Orks Drift - Father Witt (Part 1)

With Captain Caine complete comes the second of the two characters I'm creating (for now) for the Orks Drift scenario to be played out at GW Exeter on the 22nd of December.

Father Witt is the mad priest who in Zulu goes around boosting morale with heartu cries of 'Your all going to die!'... hmmm. I was'nt entirely sure how to model him at first, the classic pastor that the fellow actually was at Rourkes Drift, something closer to the portrayal in Zulu? Or perhaps a Imperial nut? Well in the end I'm going Imperial Nut, with a touch of the pastor in him so for example he'll be wearing largely black, it'll make for something not so exciting as Caine, but I'm hoping for a good result.

After a couple of experiments I've settled on using one of the new Empire Flagellants as a base (handy as I wanted some for another project soon to take off), not nearly as much work as Caine. For a weapon nothing is more suitable for a mad priest then an Eviscreator, a two handed chainsword with some serious stopping power, current models have always been a tad small for how I picture such a weapon - so how about a Catachan Sentinels close combat attachment? Oh yes. That'll do!


Saturday 1 December 2007

Thursday 29 November 2007

Orks Drift - Captain Caine (Part 6)

Painting begins! I may not have been 100% happy with the model, but its amazing what a lick of paint can do, okay, so its not display standard by a long shot, but I'm increasingly pleased with how its looking. Sorry about the darkness of the pictures, natural light ones will have to wait until the weekend now.


Wednesday 28 November 2007

Orks Drift - Captain Caine (Part 5) - Conversion Complete

Well thats the conversion finished, it's not perfect but it'll do given time constraints, my only real regret is giving in on a dioramic base, BUT I'm quite templted to revisit this model later on (once its painted) and do a much nicer base.


Tuesday 27 November 2007

Tutorial - Simple Epualettes

Disclaimer - There are plenty of better sculptors out there, and I'm sure many of them would advocate different and quite possibly better ways of tackling projects then I currently do. I'd encourage anyone considering doing any sculpting to browse around and do your homework before tackling a project.

Also if anyone wants to add any suggestions to the tutorial please do comment with any tips, suggestions, criticisms etc, all would be most welcome.


1 - Stage one is to prepare the arm and shoulder your working on, the main reason for this in my book is to help when it comes to deciding how the braid will hang, in my example it's strait down, but you may have an arm raised which would perhaps cause the braid to lie at an angle partially or completely.

Doing it this way is also far easier in my opinion when it comes to putting folds in fabric beneath the epualettes if these are present as doing it after may result is the fabric ending up rather to much on top of the braiding or simply thicker in places and thinner in others.


2 - Once the surface is completely finished and cured roll up a sausage of putty, this can be formed into a horse shoe shape and placed around the shoulder.


3 - This horse shoe can then be smoothed out down the shoulder, the bottom and sides trimmed into shape, this is the basis of the braid. You can adjust it later on but it's easiest to get the lay of the shape now.


4 - You can then rough out the way the braiding falls using the tip of a scapel blade, remember at all times the effect of gravity! Try to keep the widths even where possible. However that said each strip can potentially cross, get tangled etc, this involves a little more work and should probably be saved for once you feel more confident. If you make a mistake however dont worry, this is just a rough go at it so to speak, and can be tidied in the next stage.


5 - Now you can go over your rough version widening the gap, using either a thin sculpting tool or a scapel again. This is the most important stage, remember you dont want squared edges rather slightly rounded, so dont be afraid to wiggle your tool a tiny amount. This can extend to the bottom of the braiding, doing so allows you to also put in a little more movement to the braid, having the whole lot slanting towards or away from the torso a little as desired.

If you have excess putty try an shift it upwards but dont try an remove it now, wait until it's cured to avoid ruining your work, put the piece aside for the full curing time and then leave a little extra before moving to the next stage.


6 - Having trimmed any excess putty so the top of the shoulder is flat with a scapel (at whatever angle the epualette will be), roll a little ball placing it centrally on top of the braided shoulder, then carefully flatten out the ball across the surface, you'll want at least some overhang however.


7 - Rather then trying to build a rim up, I find it easier to take the center or this disk down, this can be done with careful downward pressure to create a indentation which is of equal depth and border. It'll likely take a few attempts before you get the hang of this so be prepared to pull the disk off and start again if needs be. Allow it too cure fully again.


8 - Next take a tiny sausage shape, this can be pressed and squared to finish the epualette. And yes, thats about it I guess! Hopefully you'll now have something which looks something like this.


Sunday 25 November 2007

Orks Drift - Captain Caine (Part 4)

Well have now added the arms, though a little more work is still needed, the epualettes are also finished. For his hand weapon I've settled on a Plasma Pistol in the end, I played around with the idea of a Plasma Weapon based on a Webley pistol as suggested by a few people on Warseer, but in the end time constraints and the realisation that to get detail in the weapon would need to be quite large put me off. The idea is something I'd still like to play around with though, maybe another model!

The only thing I'm not quite happy with is the hand, I'd hoped to cut corners by using one from the Cadian plastics, in retrospect I think it may be just a tad large as is, I'm going to try an shave down the knuckles a bit, if that does'nt work I'll go to Plan B and sculpt a hand instead.

Finally I've also started working on a base, working from a resin piece from the Citadel Basing kit and an Ork Boy, we'll see how it turns out!


...and yes I have just noticed how thick the hair strands are in this pic from that angle, I'll go back and sort that out!


Thursday 22 November 2007

Orks Drift - Captain Caine (Part 3)

Added his hair last night, another first for me with sculpting, it was actually a good deal trickier then I expected. I worked the whole lot wet rather then doing it in layers as normal, the advantage of this was it was easier to get the whole lot looking as one, rather then multiple wigs(!), though of course that meant as mistakes were made I had to go over bits again. From the front I'm realtively happy with it, though I'm sure it could be improved upon with more practice. The back (not show yet) I'm not so thrilled with, the hair does'nt seem to lie quite right to me, especially when looking top down, I'm probably exagerating the problem, being very self critical I guess, I'll post pics in the future of that portion, tonight I want to get the epualettes finished to square off the toros more, and then to start working on the arm stumps again.

Tuesday 20 November 2007

Blog Changes

Okay, okay, yes nothing modelling wise to show today, though I've done a little more to Caine. I've really spent the past couple of hours just fiddling around with the blog with the intention of doing something more with it, so new menus, a changed layout and a bit of background text to give some information on Praetoria to the uninitiated.

One thing you might notice is a tutorials heading, so yes I'm going to try an do a few, nothing major, there are far more capable people then me out there in just about every field! But hey, I've had enough requests for some so who am I to argue? ;)

Monday 19 November 2007

Orks Drift - Captain Caine (Part 2)

Just a little update, the head I sculpted is now fixed on the torso, I've extended the skull ready for doing work on the jaw bone, ears and hair and also done the collar though this needs a little more work. Off to pull a platoon out of the stripping bath now, more soon!


Sunday 18 November 2007

Orks Drift - Captain Caine (Part 1)

Excitement runs high in the barracks of the 4th at the moment, my local GW (Exeter) is going to be fighting out 'Ork's Drift' on the 22nd of December, which of course means lots of Orks(!) and who better to take on the Orks then the Praetorian Imperial Guard! But of course theres more, I've been volunteered to knock out a couple of characters for the game for what Zulu game would be complete without Captain Caine and Parson 'Your all going to die!' Witt?

So I've begun work on Captain Caine first, taking this picture as my inspiration.


The model is being based on a Standard Bearer model, he long ago donated his head to another model, a quick snip and adding of armature for the arms and I was ready to go.


I began work only on one side the body initialy (this was because I had'nt at that point decided on what the other arm would be doing). This involved building up the arm in which a bolt pistol taken from the Baneblade Commander would be held, and also working on the front of the tunic. The tunic would have its top button undone (yeah I know disgusting aint it, a Praetorian in the field without his uniform tidy!), the cloth hanging down.


The head was the next problem, I wanted bare head something like Michael Caines in the picture, there are'nt many which are suited, and on finding the only one which I had in my bits box was a little large (the WFB Empire Outrider with bare head) I could'nt really decide what to do.

So I decided to take the plunge and try sculpting my own head, something I've never attempted before. I spent an evening researching and practicing, finding an excellent tutorial on the One Ring website. On my fifth attempt I produced this, which at least for now I've settled on using, once its cured fully (I'm leaving it 24hours just to be sure), I'll add it to a head and mount it on the model to see how it looks.

Wednesday 7 November 2007

Leviathan (Part 2)

The madness continues, be it a little slower now!

I've completed further work on the rear section, mostly rough tidying with greenstuff, the end result there is still a long way to go, but this will mostly wait now until I've decided how to finish the corners. One thing you can see in this picture (be it at a distance) is that I've started altering some of the statues, basicly I decided to have them all looking the same would be... daft, so I'll work on these as I go round the sides trying to keep them all slightly different.


I've also added the curve to the front of the hull, this is mounted directly on a framework you can see in earlier pictures. I cut the templates by taking a piece of paper and slowly cutting it back until I had the right fit, I then used two thinner pieces of plasti-card rather then one thicker piece which has given surprising strength, the picture below shows it directly after glueing (hence the sticky tape holding it firmly in place), like much of the rest of the hull this will then require outer 'armour plating' detail.


Next up came some early work on the sides, with additional CoD sections much the same as on the rear. I've also added the walls and floor of the fighting deck, the keep still needs adding, as do the tower wall facing it with its door. Im leaving that for now however while I do some more work on the sides, at the moment thats the plating on the lower-rear and doing the rear corners, I'll then move onto the lower front before tackling the sponson towers.


Saturday 27 October 2007

Leviathan (Part 1) - If your going to blame anyone, blame Jervis.

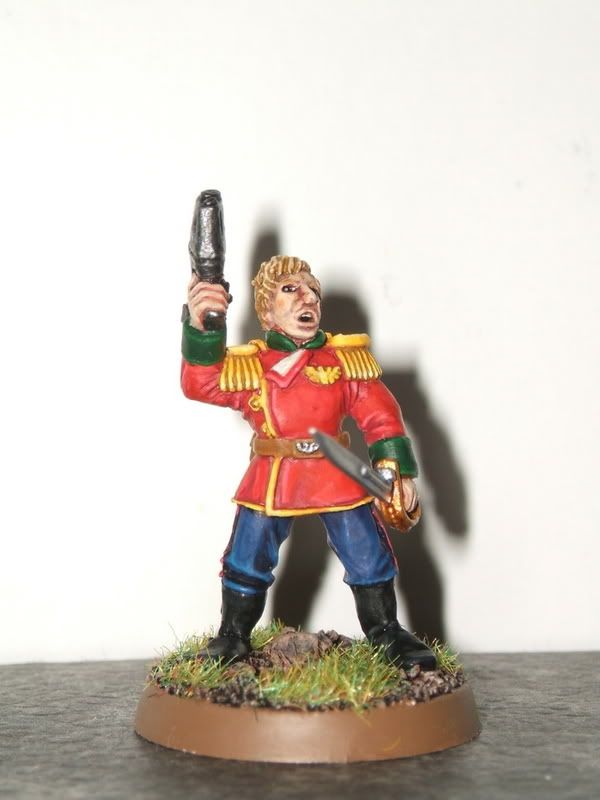
At the GT Jervis Johnson gave an interesting and enlighting seminar as if often the case at these events, this time it largely discussed Apocolypse, and included him making an entirely valid point that as tourny players for a great many of us there that, the tournament and events like it, was the hobby. Ive been of guilty of that as anyone, I often have wacky ideas, but few of them see fruitation due to the virus of "tourny legal" being too much of a concern. So with it that - and the release of a certain large plastic kit I decided for certain it was time to turn one of my wacky ideas into a reality.

Leviathan.


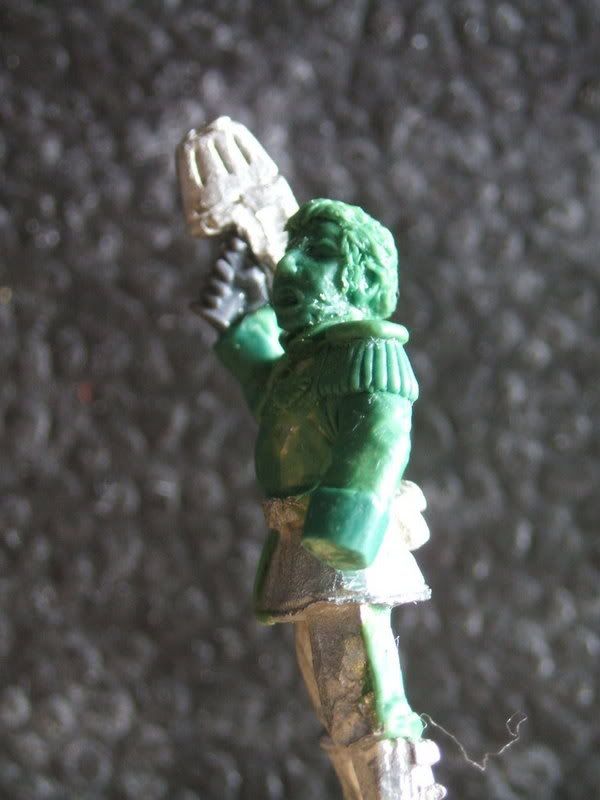
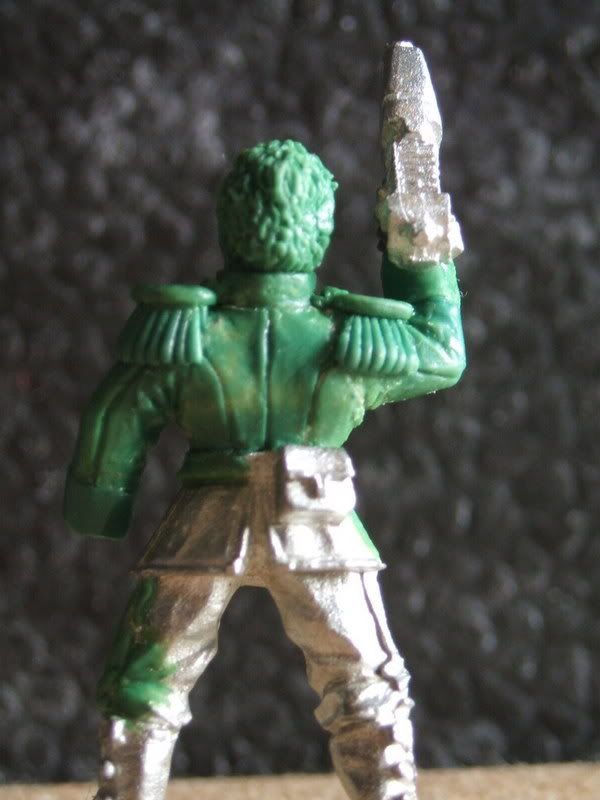
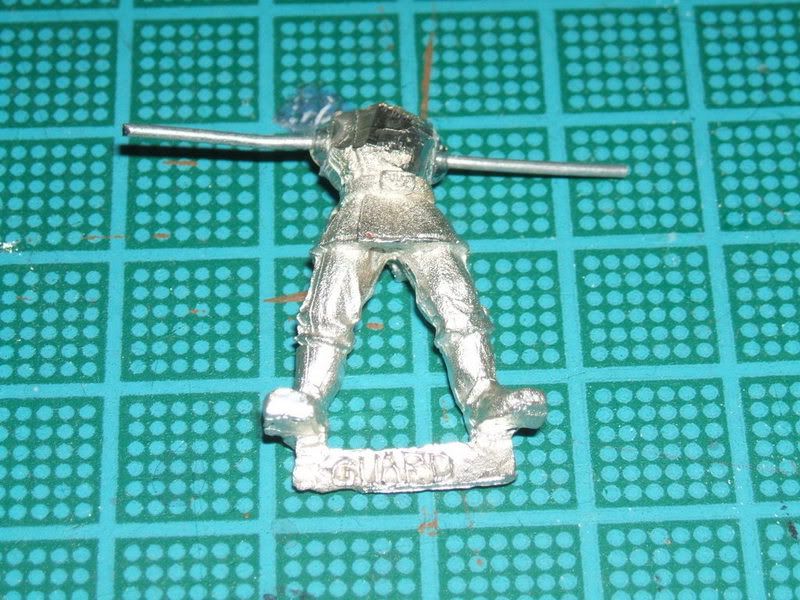
A few other people have created such beasts, notibly grandmasterscpectre and irfpio are examples I've followed, my only complaint with them has been that often they're a tad on the large side, however that said theres never been alot of work with, and what there is alot of variance in the impressions given.

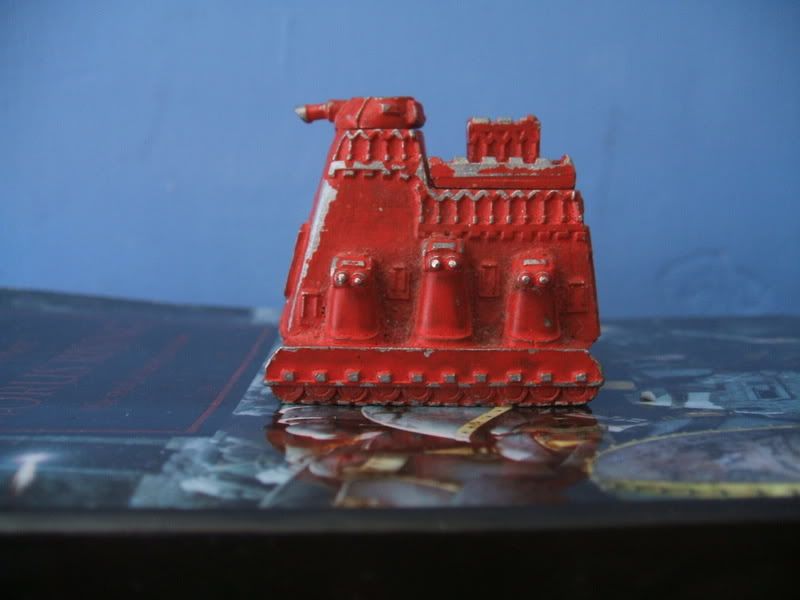
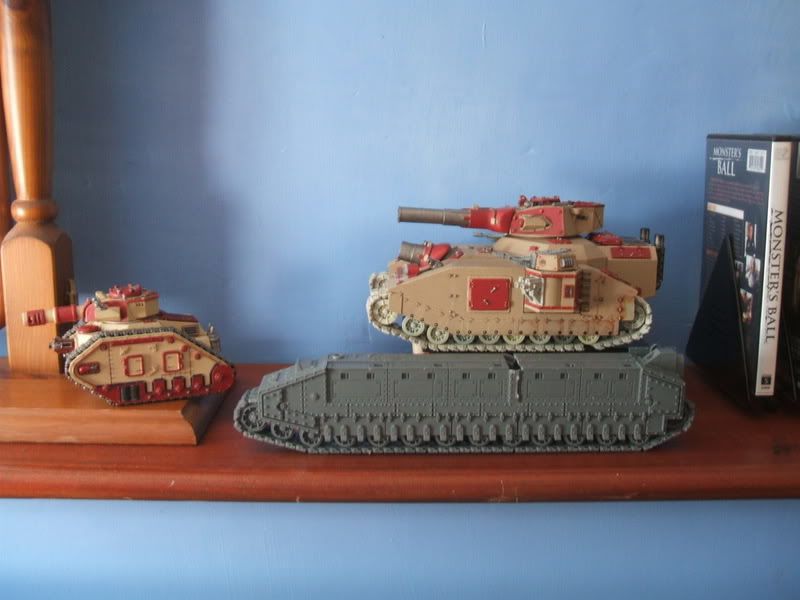
The model above is the old epic model (minus its primary gun), its slightly larger in terms of length and width then a super heavy tank such as the Baneblade and in the last incarnation of it's rule carried 6 Infantry Stands (which equates to 30 models), previous rules versions had them carrying tanks however, and mentions of them in the background nearly always dipect them as real monsters, towering over the formations they command, some even with landing pads for Valkyeries and the like. A more recent background text covers the Battle of Tyrok Fields on Cadia during the 13th Black Crusade, the most telling piece for me here was that Reaver Titans were said to tip the traitor Leviathans over, that was the final nail for me and I decided upon something smaller (with the added bonus that it was actually portable!)

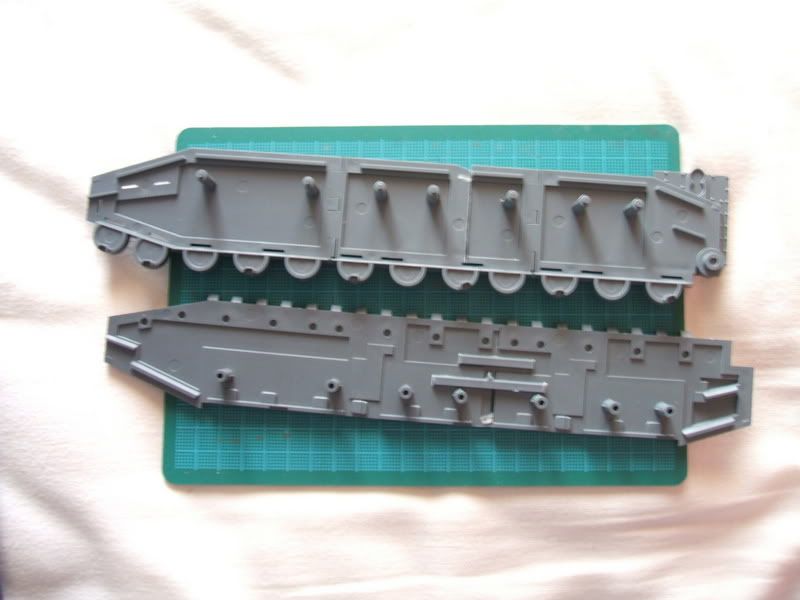
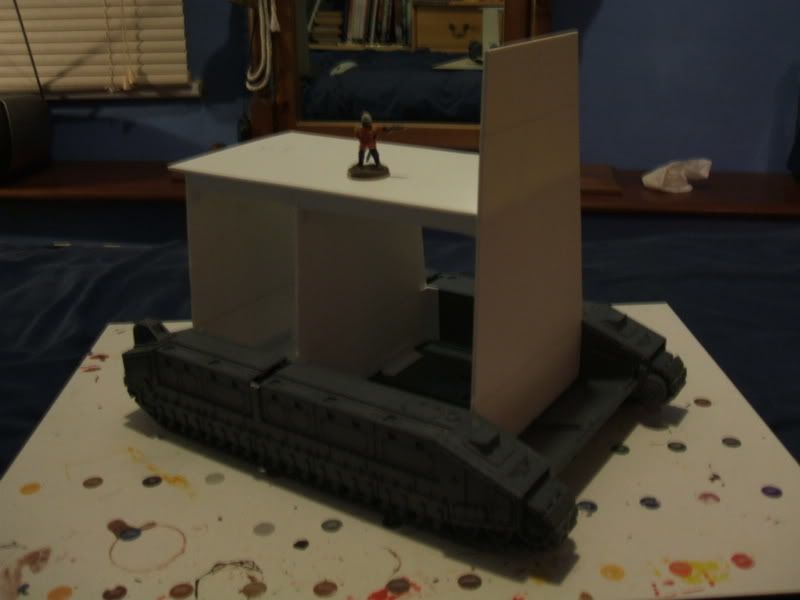
My model is based on two Baneblades, the first step was to join the track assemblies into something larger, this was surprisingly difficult as the various armour plates just didnt line up in a suitable spot (or any!). In the end I settled on lining up with the bottom plates above the wheels, the front half was cut after the third section, the rear before the second with the inside halves cut in line with this.


The result was considerably larger then a Baneblade, which felt pretty much spot on to me.


The two track assemblies were joined with a doubled up belly from the Baneblade kits, the overhang of the tracks filled with plasti-card, I can't emphasize enough how important bracing is at this point to give it strength and just keep the thing together, and how good sprue is for the job!


I was'nt sure at first how best to build the hull, I considered building a framework (which while more complex would be idea if intending interior detail), using a series of box's and finally using a series of panels, linked together with cross bars. It was this final option I went for in the end.


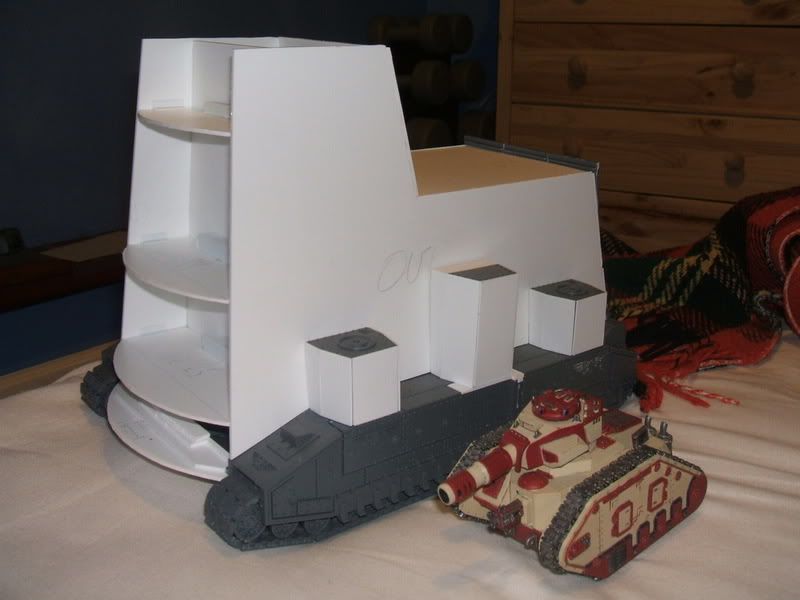
The skeleton was reinforced with crossbars on each side and plasti-strut for extra strength for the rigours of the gaming table.


Now the sides were added, fixed to the skeleton. The next task was to get the turret towers on the sides up, the fore and aft turrets on each side were build around the top section of the Baneblade sponsons which was easy enough. The middle towers were more difficult, my initial idea was to cut out the mount from the Baneblade hull to mount its turret, but this proved itself a little too difficult, instead I built the tower using the bottom plate of the sponsons, I'll then add a turret cupola to act as a turret ring, fixing the third turret in place with magnets.


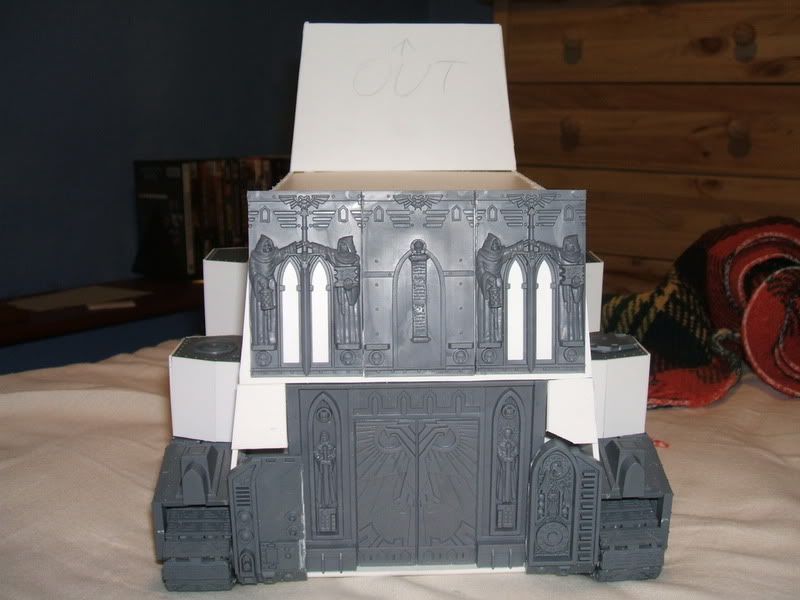
With that in (and lacking thin plasti-card at this point to do the front curve (more on this later), I've begun detailing, much of this will be done with the Cities of Death kits, starting with the rear of the vehicle using the Sanctum Imperialis, the door is embedded slightly with plate sections on the top and baneblade rear sections towards the bottom, much of whats left white will be armour plating. Theres a long long way to go, it's really only just becomming clear how much time it's going to take to get the detailing done to even just this small section, but I'm hoping the end result will be worth it.